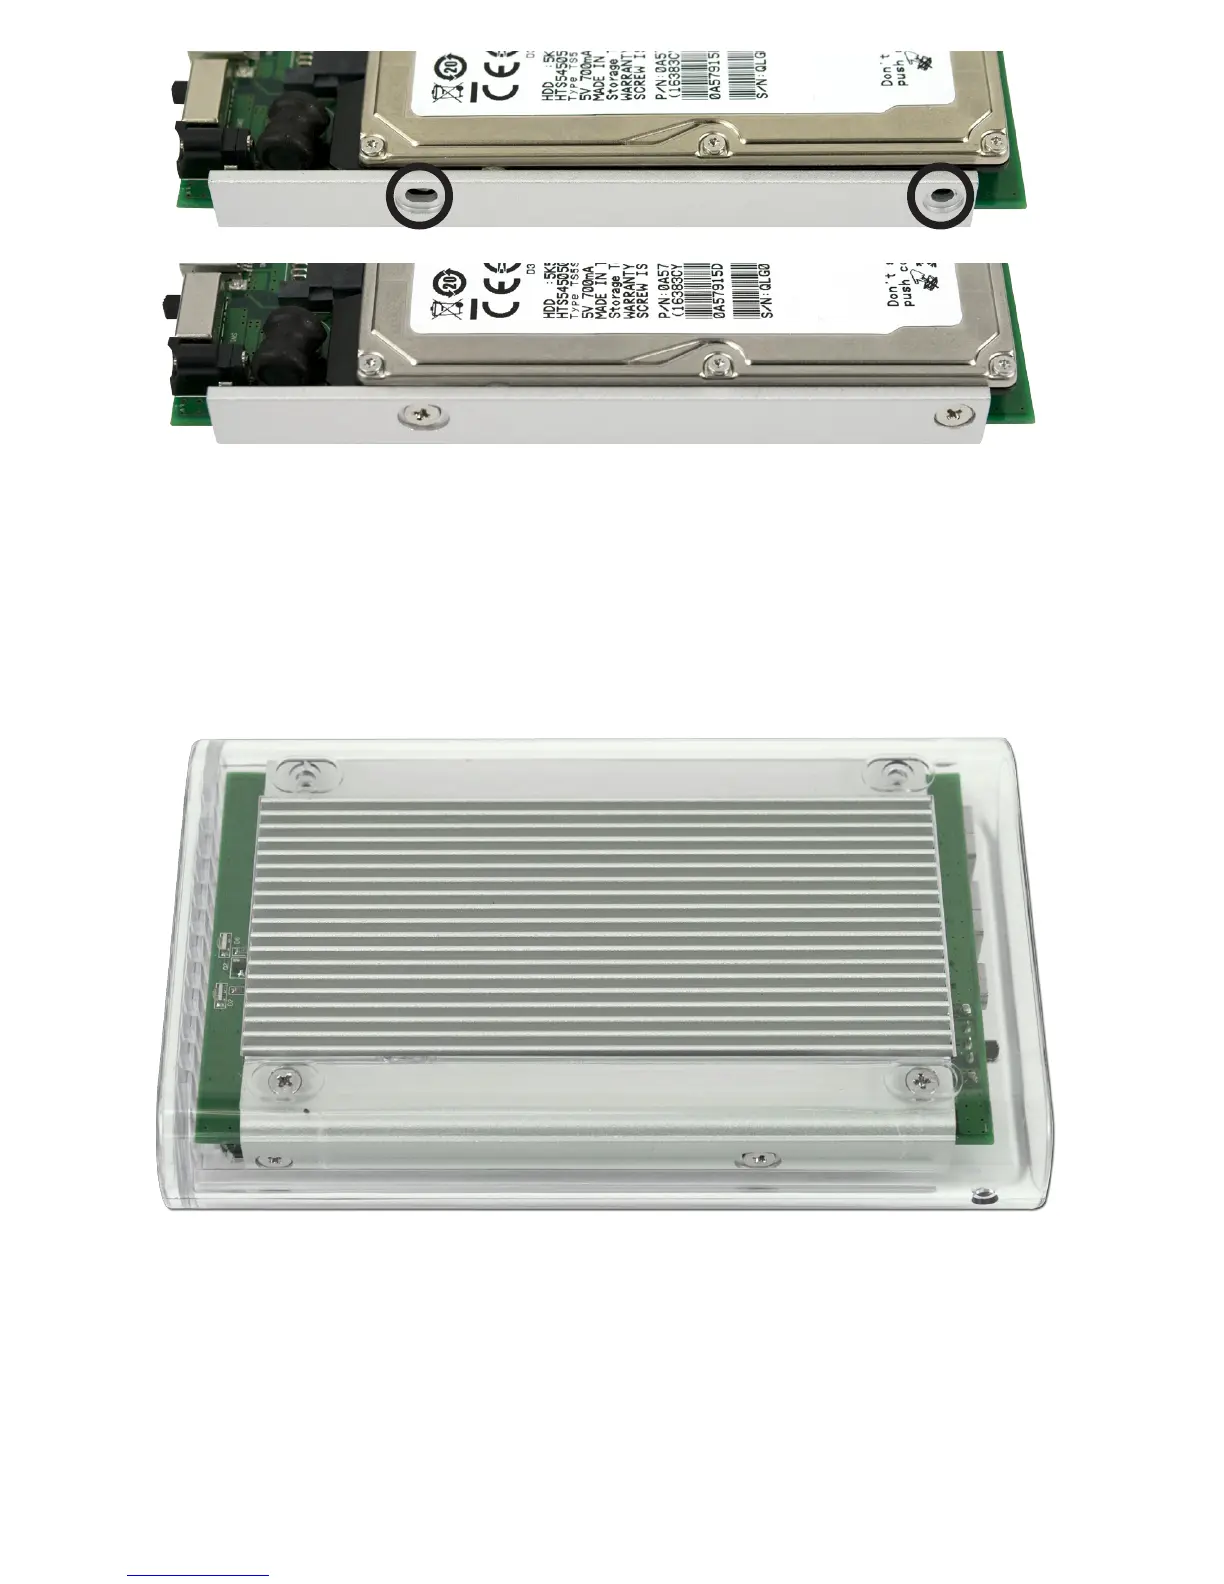
Slide the bridge card with the hard drive into the aluminum heatsink -
there is a notch that the bridge card will slide into.
Secure the hard drive using 4 screws from the included plastic bag,
through the heatsink, into the hard drive. Don’t overtighten, start all 4
screws before fully tightening.
Gently slide the completed heatsink, drive, and bridge assembly into
the acrylic enclosure. Take the 2 Phillips screws you removed initially,
and 2 more from the included plastic bag and once again, don’t fully
tighten the screws, just start them, as you will need to rock the assem-
bly back and forth a bit to get all 4 screws started, then you can tighten
them. Note that there is a rubber mounting strip on the bottom of the
heatsink, that makes it a bit dicult to get the screws all the way in. You
may nd holding the enclosure in your hand, screws down, works best.

 Loading...