19
ENGLISH
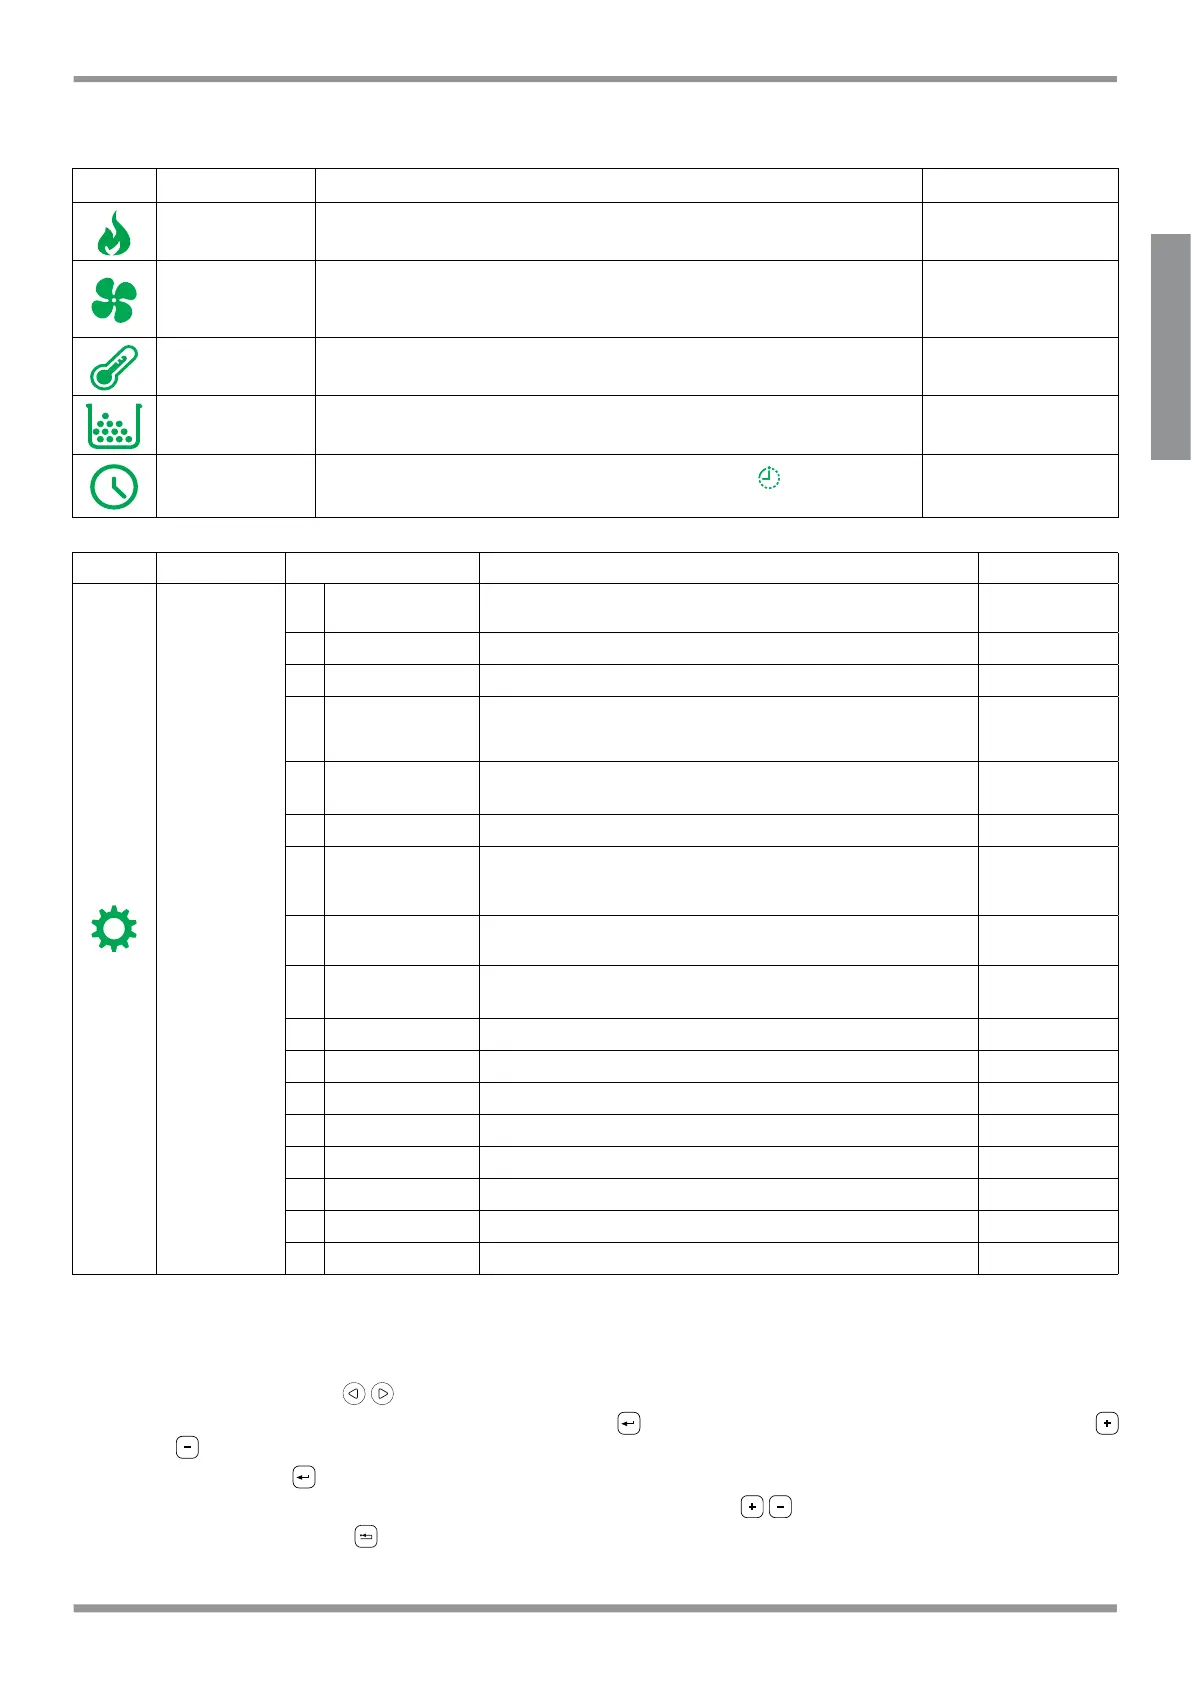
ICON FUNCTION DESCRIPTION VALUES
Power
Stove output setting 1..5
Fan It allows you to set the fan speed.
c
: OFF,1..5; A; Hi
r
: ON/OFF
l: ON/OFF
Temperature
Displays the room temperature reading and is used to set the desired
temperature.
6°C .. 51°C
Fuel
Not used
Timer
Enables or disables the timer. When enabled, the icon will be
displayed steady (not ashing)
ON - OFF
ICON FUNCTION SUBMENU DESCRIPTION VALUES
Setup
[1]
Weekly timer
Assigns the programs (max 3) to the dierent days of the
week
[d1] ... [d7]
[2]
Programs Program setting menu [P1] ... [P6]
[3]
Time / date Time and date setting
[4]
Hours remaining
Displays the number of hours remaining until recommended
maintenance. When “Hi” is displayed, the remaining time
exceeds 999 hours.
[5]
System
information
Displays the current software version
[6]
Function not enabled
[7]
Eco function
Enables or disables Eco Mode, in which the stove
automatically switches o and on based on room temperature
(only in conguration 1).
OFF; Eco
[8]
Restart delta
Dierence in degrees from room temperature below which
the stove switches on again (only in conguration 1).
0,5 ... 5,0°C
[9]
Frost protection
temperature
Minimum temperature below which the stove switches on
(only in conguration 1).
OFF; 3 ... 20 °C
[10]
Lock keypad Disables the buttons on the keypad OFF; Lo; Hi
[11]
Display brightness Sets display brightness OFF; 1 ... 5
[12]
Display mode Sets how the data is displayed OFF; 1 ... 4
[13]
Buzzer volume Sets the buzzer volume OFF; 1 ... 5
[14]
Combustion Three dierent types of combustion can be set 1 ... 3
[15]
Function not enabled
[30]
Installer menu Sets/displays the stove conguration PWD: “54”
[40]
Service menu Menu reserved for the service centre
Submenus [3 0] and [4 0] in the Setup menu are password-protected and reserved for service centre personnel.
USING THE CONTROL PANEL
• The arrow buttons are used to scroll between the dierent menus that are highlighted.
• When selecting a given function, simply press the button and then modify the values, again using the
buttons.
• Pressing the
button conrms the setting.
• In general all values that are ashing can be modied using the
buttons.
• The “cancel” button
is used to cancel any changes; pressing and holding the button displays any active
alarm or error codes.
 Loading...