Install the Firewall on a Wall
1 Mark the locations on the wall that line up with the wall mount holes on the bottom of the provided wall mount.
2 Attach the firewall to the wall mount using three #6-32 screws and a #2 Phillips-head screwdriver. See Figure 2.
3 Attach the wall mount to the wall using four screws that are appropriate for your wall (sheet metal and drywall inserts are included with the
wall mount kit). Ensure that the side fins run vertically, as shown in Figure 3.
PA-450R
docs.paloaltonetworks.com
1
2
Before You Begin
Use this document to install and begin setting up your Palo Alto Networks PA-450R device. Refer to the product’s hardware
reference at https://docs.paloaltonetworks.com/hardware for safety information, specifications, and more detailed procedures
for installing the firewall.
◼ Verify that the installation site has adequate air circulation and DC power.
◼ Have the following equipment ready:
◼ Unpack the equipment and verify that you received the following items:
Page 1 of 2
Quick Start Guide
Qty Description
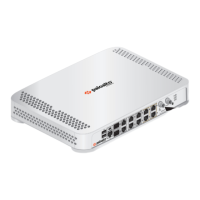
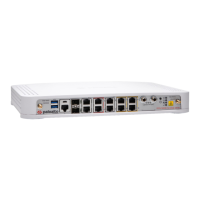
1 PA-450R firewall.
2 Euroblock connector and terminal block.
1 #10 Ground lug.
1 Console cable.
1 Shielded RJ-45 CAT6 Ethernet cable for management (MGT) port access.
1 Sheet, Limited Warranty.
1 China RoHS declaration.
Install the Firewall
There are three ways to install the PA-450R firewall:
◼ On a flat surface
◼ On a wall
◼ In a 19” equipment rack
Install the Firewall on a Flat Surface
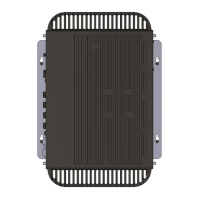
The PA-450R firewall ships with rubber “feet” attached to the bottom of the device. The device can be set horizontally upon a
flat surface. See Figure 1.
Figure 1
Ensure there are no building services (water, gas, or wiring) behind the wall where you intend to install the firewall.
Figure 2
Figure 3
Do not open or power the device if a hazardous environment is present.
The wall mount kit (PAN-1RU-RGD-WALLMNT) is not included with the firewall and must be purchased separately.
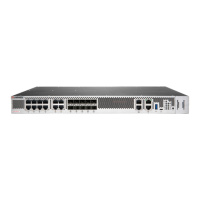
Install the Firewall in a 19” Equipment Rack
Refer to the PA-400R Series Next-Gen Firewall Hardware Reference at https://docs.paloaltonetworks.com/hardware.
The rack kit (PAN-1RU-RGD-RACK4) is not included with the firewall and must be purchased separately.
After installing the firewall and connecting all relevant cables, make sure to leave covers and plugs on any unused ports.
The device must be installed in an IP54 rated enclosure if installing in a Class 1 Divison 2/Zone 2 Hazardous location.
◼ #2 Phillips-head screwdriver for #6-32 screws.
◼ 1/8” flat head screwdriver for terminal block screws.
◼ Crimp tool for #10 ground lug and 8 AWG wire.
◼ Wire strippers for 8 AWG and 16 AWG wire.