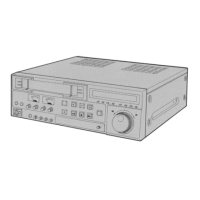
3-18
Measuring
Measuring point (
*
)
No. Item instruments & Mode
Adjustment parts (
-
)
Adjustment procedure
Input signals
Adjustment level (
+
)
(2) PAL circuit adjustments
Set the [NTSC /PAL] switch of rear panel to “PAL”.
30 PAL PB Y
level adjust-
ment
WFM (PAL) or
oscilloscope
100% WHITE
(built-in signal)
EE
ADJUST
MENU, 260.
PB Y LEV
(PAL)
(1)Set the INPUT SELECT SW to LINE or Y/C.
(2)Select ADJUST MENU No. 260, "PB Y LEV
(PAL)".
(3)Adjust so that the level from the pedes-
tal to 100% WHITE is as specified.
(4)Press the [SET] button to store the adjustment
data.
*
Y OUT (Y/C jack) (75 !
terminated)
-
[PLAY] and [STOP]
buttons
+
700 mVp-p
31 PAL PB SYNC
level adjust-
ment
WFM (PAL) or
oscilloscope
100% WHITE
(built-in signal)
EE
ADJUST
MENU, 262.
PB SYNC LEV
(PAL)
(1)Set the INPUT SELECT SW to LINE or Y/C.
(2) Select ADJUST MENU No. 262, "PB SYNC LEV
(PAL)".
(3)Adjust so that the sync level is as specified.
(4)Press the [SET] button to store the adjustment
data.
*
Y OUT (Y/C jack) (75 !
terminated)
-
[PLAY] and [STOP]
buttons
+
300 mVp-p
32 PAL PB C
level adjust-
ment
WFM (PAL) or
oscilloscope
RED raster (built-
in signal)
EE
ADJUST
MENU, 263.
PB C LEV
(PAL)
(1)Set the INPUT SELECT SW to LINE or Y/C.
(2)Select ADJUST MENU No. 263, "PB C LEV
(PAL)".
(3)Adjust so that the color levels are as specified.
(4)Press the [SET] button to store the adjustment
data.
*
C OUT (Y/C jack) (75 !
terminated)
*
[PLAY] and [STOP]
buttons
+
885 mVp-p
700mVp-p
300mVp-p
885mVp-p
Note:
When this item is selected after an NTSC
adjustment item, the built-in 100% WHITE
signal may sometimes be unable to be out-
put. In this case, select No. 262, "PB SYNC
LEV (PAL)" and then select No. 260, "PB Y
LEV (PAL)" again.
 Loading...