48
During shooting, you can record up to two
channels of sound. You can also switch the input
sound to be recorded on each of the channels to
the built-in microphones, external microphones or
audio equipment connected to camera.
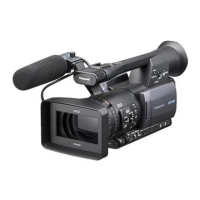
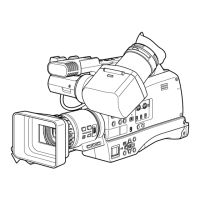
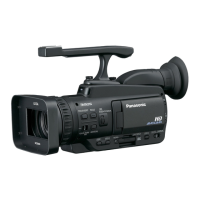
BARS
LCD
ZEBRA OIS
EVF DTL WFM
SHUTTER
AUDIO
CH2 SELECT switch
CH1 SELECT switch
INPUT 1/2
(MIC POWER +48V)
switches
INPUT 2 switch
INPUT 1 switch
INPUT 1 terminal
INPUT 2 terminal
Switching Audio Input
Using the built-in microphone
1
Switch the CH1 SELECT switch to INT (L).
Audio from the built-in microphone Lch is
recorded to audio channel 1.
2
Switch the CH2 SELECT switch to INT (R).
Audio from the built-in microphone Rch is
recorded to audio channel 2.
Using an external microphone and
audio equipment
1
Connect an external microphone or audio
equipment to the INPUT 1/2 (XLR 3-pin)
terminals. (Page 71)
2
Use the INPUT 1/2 switches to switch the
audio input.
LINE: (audio equipment is connected)
Input level is 0 dBu.
MIC: (an external microphone is connected)
Input level is -50 dBu.
Be aware that sensitivity will be higher if
you choose -60 dBu so you will record more
noise.
3
When using the phantom microphone
(which requires + 48V power supply),
set the INPUT 1/2 (MIC POWER +48V)
switches to ON.
ON: (When using the phantom microphone)
+48V power supply to INPUT 1/2 terminals.
OFF: (When a phantom microphone is not
connected)
No power supply for INPUT 1/2 terminals.
The battery will discharge faster if you use a
phantom microphone.
Set to OFF if you connect equipment not
compatible with +48V. You can damage such
equipment if you leave the setting at ON.
When using the AG-MC200G (optional), set
the MIC GAIN item to -50 dBu.
•
•
•
•
•
 Loading...