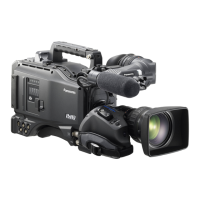
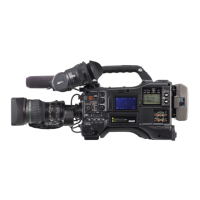
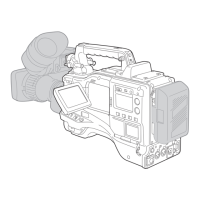
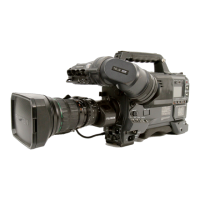
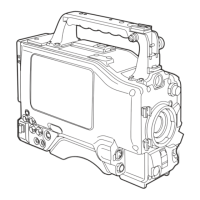
Do you have a question about the Panasonic AJ AJ-HDX900 and is the answer not in the manual?
Details the menu operation section, including MENU button, JOG dial, setup card insertion slot, and busy lamp for navigating the unit’s menus.
Details basic procedures for shooting and recording, covering power supply, battery attachment, switch settings, and cassette handling.
Provides a step-by-step procedure for shooting, from adjusting white/black balance to stopping recording, including CAUTION notes.
Explains the PRE-RECORDING function to capture audio/video seconds before actual recording, covering setup and operation.
Describes the INTERVAL REC function for recording at intervals, including setup, shooting procedures, and exiting the mode.
Explains frame-by-frame shooting using ONE SHOT mode, covering checkpoints and how to exit the mode.
Details setting the time code (drop frame or non-drop frame) using the DISPLAY and TCG switches and buttons.
Explains how to navigate menus, increment/decrement values, and set items to ON/OFF using the JOG dial.
Discusses white balance adjustment when there is no time, when automatic adjustment fails, and provides error messages and their meanings.
Details adjusting black balance automatically, covering its necessity and the procedure using the AUTO W/B BAL switch.
Describes setting the electronic shutter modes (fixed, half, synchro scan) and the available shutter speeds for different video systems and camera modes.
Explains setting shutter mode and speed, including using the SHUTTER switch and SYNCHRO SCAN (+/-) buttons.
Guides on setting the internal clock's date, time, and time zone difference from world standard time using the unit's controls and referencing a time difference table.
Guides on allocating functions to USER MAIN, USER1, and USER2 buttons for quick access to frequently used features like S.GAIN, PRE REC, and DRS.
Details manually setting color temperature for PRST, A, and B positions of the WHITE BAL switch using menu operations.
Details handling the setup card (SD memory card) for storing menu settings, including insertion, removal, and precautions for use.
Explains saving data settings to a selected file on the setup card, including selecting file number, inputting title, and handling potential error messages.
Guides on saving data settings to a selected file on the card, including selecting file number, inputting title, and confirming save operations.
Continues the process of loading data from the SD memory card, including selecting the file and confirming the read operation.
Continues the process of saving lens files to built-in memory, confirming the write operation, and exiting menu.
Guides on reading lens files from the unit's built-in memory, including selecting file number and confirming the read operation.
Details writing and reading lens files to/from SD memory cards, covering file selection, title assignment, and referencing subsequent steps.
Guides on loading lens files from the SD memory card, including selecting card file number and noting that internal memory will be rewritten.
Guides on setting the synchro scan mode by switching the SHUTTER switch and operating the SYNCHRO SCAN buttons.
Details setting USER SW GAIN, allowing additional gain modes like S.GAIN, DS.GAIN, and LINE MIX GAIN for increased sensitivity.
Guides on loading data from the SD memory card, including selecting the file number and confirming data loading operations.
Details how to provide lens files, covering adjustment of white shading, flare, and gain offset using menu operations.
Guides on attaching Anton/Bauer battery packs, inserting them, and setting the battery type via the menu.
Details using NP-1 type battery packs, including removing the holder, attaching the case, and setting the battery type.
Guides on using the external DC power supply, including connecting it, turning on switches, and confirming pin arrangements.
Details attaching the lens and adjusting the flange back to ensure proper focus in telephoto and wide-angle modes.
Continues white shading adjustment, including when using an extender and observing R, G, B waveforms.
Details connecting the remote control unit (AJ-RC10G) for remote operation, including switch functions and VTR operations in remote mode.
Describes using V-mount type battery packs, including attaching the adapter plate and setting the battery type.
Explains connecting an external switch to the DC OUT connector for REC start/stop control and using an LED for a tally lamp.
Outlines essential inspections prior to shooting to verify system functionality, including battery, power, and cassette checks.
Details preparations for inspections, including inserting a charged battery and checking the power switch and displays.
Continues camera unit inspection, checking extender function, and ensuring lens cable is connected.
Details the emergency eject procedure using a screwdriver to remove the cassette when the EJECT button fails, including important notes on its use.
Continues VTR unit inspection, covering external microphone use, time code, and user bits.
Details RB GAIN CONTROL settings for R and B gain adjustments, including AWB PRE, AWB A, and AWB B settings.
Details MATRIX settings for color correction tables and linear matrix adjustments for R-G, R-B, G-R, G-B, B-R, B-G.
Details LOW SETTING parameters including master gain, horizontal/vertical detail level, noise elimination, frequency selection, LEVEL DEPEND, master gamma, and black gamma.
Details MID SETTING parameters like master gain, horizontal/vertical detail level, noise elimination, frequency selection, LEVEL DEPEND, master gamma, black gamma, and matrix/color correction.
Details ADDITIONAL DTL settings for knee/level, detail gain, clipping, source, vertical detail frequency, and horizontal detail line mix.
Explains SKIN TONE DTL settings for skin color tables, zebra pattern display in viewfinder/video out, and skin tone detail parameters like center, width, phase, and brightness.
Details KNEE/LEVEL settings for master pedestal, manual knee mode, knee point, slope, auto knee point/level, and auto knee response rate.
Continues SHUTTER SELECT details for POSITION4 to POSITION6 settings based on frame rates.
Explains SW MODE settings for RET SW (R.REVIEW, CAM RET), S.BLK LVL, AUTO KNEE SW, SHD/ABB SW CTL, COLOR BARS, S.GAIN, and DS.GAIN.
Details REC FUNCTION settings, including INTERVAL REC MODE, INTERVAL REC HOLD, PRE REC MODE, and RETAKE MODE.
Explains RGB BLACK CONTROL settings for master pedestal, R, G, B pedestal levels, and pedestal offset.
Explains COLOR CORRECTION settings for saturation adjustments of R, R-Mg, Mg, Mg-B, B, B-Cy, Cy, Cy-G, G, G-Yl, Yl, Yl-R colors.
Details HIGH SETTING parameters like master gain, horizontal/vertical detail level, noise elimination, frequency selection, LEVEL DEPEND, master gamma, black gamma, and matrix/color correction.
Explains GAMMA settings, including master gamma, R/B gamma, and gamma modes (HD, SD, FILM LIKE 1/2/3).
Details USER SW functions allocated to USER MAIN, USER1, and USER2 buttons, covering various functions like S.GAIN, PRE REC, and DRS.
Explains SHUTTER SPEED settings for SYNCHRO SCAN and preset positions (POSITION1 to POSITION6) for different frame rates.
| Sensor Type | 3CCD |
|---|---|
| Recording Format | DVCPRO HD, DVCPRO50, DVCPRO, DV |
| Resolution | 1280 x 720, 1920 x 1080 |
| Viewfinder | Color LCD |
| Type | Professional Camcorder |
| Sensor Size | 2/3 inch |
| Effective Pixels | 2.2 Megapixels |
| Lens Mount | B4 Mount |
| Audio Channels | 4 channels |
| Audio Recording | 16-bit/48 kHz |
| Frame Rates | 24p, 30p, 60i |


