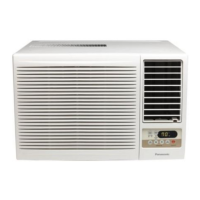
CABINET INSTALLATION
INSTALACI(_N DEL CAJA
fOCut the "Sealing Ribbon" to the proper length, and attach it
along the bottom edge of the bottom window sash. _ _ --_-
torte la elnta de sellar del largo apropiado y col6quela a Io '_
largo de la parte inferior de la ventana de guillotina. W,ndow sashsea ing ribbon
Cm_a de sellado de la hola
m6vil
fOTo prevent condensation water from dripping inside, the cabinet
should be installed level or very slightly tilted to the outside.
Para pr_venir que el qua de condensaci&n gotee de_, el
caj_ _be ser instalada al nivel o con una muy ligera inclinaci6n
desde adentro hacia fuera.
f_) Secure the cabinet using screws.
Fije la caja usando los tornillos.
Type A screws
Torninos tipoA\_/ rl /°_ j
Type B screws '_
Tornillos tipo B ii
j% '
Window sill _ ', [
Alf_izar de la / i
ventana Type A screws
Tornillos dpo A
• Expand the expandable panel fully into the grooves of the
window frame, secure the expandable panel, left, right and
top mounting frames co the bottom of the window sash
using 4 screws typeA and 2 screws type B
• Secure the cabinet using wood screws typeA
• Cut the window sash foam seal to the proper size and
seal the opening between the top of the inside window
sash and the outside window sash
Note : If a gap exists between the unit and window sash,
you may use "Sealer" supplied with the installation
kit for a better seal.
Insige of sash I I Outside of sash
Interior de la hoja rn6vil j _ Exterior de la hoja movil
'_ ---- Window sash
Top angle : Sealingribbon Hop de la ventana
Angulo superior _ Cinta de sellar
Expandable panel
Panel extensible
• Expande el panelextenible complecamente dentro del marco de [a
ventana,aseg0relo a la parte inferior de ta hoja de la ventanapor la
izquierda,a la derechay por laparte superior, usandoA tornillos Upo
A y 2 tornillos del tipo B.
• Fije la caja usandotornillos paramadera tipoA.
• Corte lacinta parasellarde la hojade la ventanadel tamafio eorrecto
y selle la abertura entre la parte superior del interior y del exterior
de la hoja dela ventana.
Nota : Si existiera un espacioentre la unidad y la hoja de la ventana,
peede usarelsellador queest_dentro delpaquete de inscalaci6n,
para obtener un rneior seltado.
CHASSIS INSTALLATION INTOTHE CABINET
INSTALACI(_N DEL CHASIS DENTRO DE LA CAJA
Slide the chassis into the cabinet
Deslica el chasis dentro del caja
 Loading...