Do you have a question about the Panasonic DVD-LV70 and is the answer not in the manual?
Instructions for inserting the battery into the remote control.
Guidance on replacing the battery when the remote control fails.
Steps for connecting and using the AC power adapter for the unit.
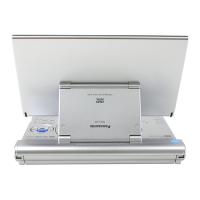
Instructions for securely fitting the battery pack onto the unit.
Steps for recharging the battery pack using the AC adapter.
Ensures the unit is ready for playback by connecting power sources.
Navigating and selecting options within the player's menus.
How to pause playback and resume from the stopped point.
Utilizes the unit's memory to restart playback from a previous position.
Displays the beginning of chapters for quick selection during playback.
Temporarily stops playback and allows resuming later.
Navigating between different chapters or tracks on the disc.
Playing the disc content at reduced speeds for detailed viewing.
Quickly scanning through the disc content forward or backward.
Advancing the picture one frame at a time for detailed analysis.
Special steps for VCDs with interactive playback features.
Re-enabling menu interaction after canceling it.
Creating a custom playlist of tracks from a disc.
Playing tracks from a disc in an unpredictable order.
Selecting different audio tracks available on a DVD.
Selecting desired subtitle language tracks for DVD playback.
Changing camera angles during playback if multiple angles are available.
Adjusting vocal tracks for karaoke discs during playback.
Navigating audio modes using the unit's directional controls.
Adjusting the aspect ratio and zoom level of the displayed image.
Modifying the overall lightness or darkness of the screen display.
Fine-tuning the saturation or hue of the picture colors.
Details on how different picture modes affect display on various screen types.
Simulating surround sound effects using only the unit's speakers or headphones.
Setup for achieving surround effects with headphones connected to the unit.
Connecting external speakers to experience surround sound.
How to access and navigate on-screen menus for disc and unit information.
On-screen icons providing details about the current DVD, Video CD, or CD.
On-screen icons displaying player status and available functions.
Interface for controlling playback speed, rewind, and fast forward.
Detailed explanation of icons related to disc content like audio and subtitles.
Options for selecting audio tracks and subtitle languages for DVDs.
Information on signal characteristics like sampling frequency and bit depth.
Icons for advanced playback features like repeat play and markers.
Setting start and end points to repeat a specific segment of playback.
Options for repeating tracks, titles, or the entire disc.
Selecting playback modes like Normal, Program, or Random for CDs/VCDs.
Adjusting audio to emphasize dialogue from the center channel.
Creating and recalling specific points within a disc for quick access.
Configuring Virtual Surround Sound modes and levels.
Visual interface for controlling playback speeds like slow motion and search.
Steps to access and navigate the initial settings menu for customization.
Setting preferred languages for audio, subtitles, and menus on DVDs.
Setting parental controls to limit playback of discs with certain content.
Changing the language displayed in the player's on-screen menus.
Customizing the display and color of on-screen notifications.
Selecting between field or frame stills for paused video.
Enabling or disabling audio playback during fast forward/rewind.
Configuring display for widescreen content on standard TVs.
Adjusting audio dynamic range for low-volume listening.
Choosing the picture type (I, P, B) for still images.
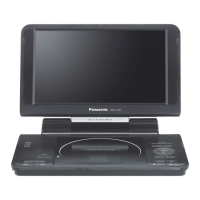
Steps for connecting the player to a TV for a larger viewing experience.
Initial steps required before setting the TV aspect ratio.
Default settings for TV aspect ratio and display options.
Connecting the unit to a 5.1 channel amplifier for surround sound.
Steps for making analogue connections to a stereo amplifier or mini-system.
Additional connections required for Dolby Pro Logic surround sound.
Guidelines for recording audio from the unit to external devices.
Recording digital audio signals directly to an MD player.
Ensuring the unit and connected equipment are ready for speaker configuration.
Configuring speaker settings for systems with three or more speakers.
Setting up the player for stereo sound or Dolby Pro Logic systems.
Selecting speaker size (Large/Small) and subwoofer presence.
Adjusting speaker delay to compensate for different listening distances.
Adjusting speaker volume levels for optimal sound balance.
Ensuring the unit and connected equipment are ready for digital audio configuration.
Setting PCM output for DVDs recorded in high-resolution formats.
Configuring Dolby Digital audio output settings (Bitstream/PCM).
Configuring DTS Digital Surround audio output settings.
Details on PCM output settings for DVDs and connection types.
Explains Bitstream vs PCM output for Dolby Digital audio.
Explains output settings for DTS Digital Surround audio.
Troubleshooting steps when the unit cannot play a disc.
Solutions for missing or mispositioned on-screen messages.
Adjusting the position of on-screen menu icons.
General error code indicating a problem requiring troubleshooting.
Explains error codes starting with 'H' and troubleshooting steps.
Procedures for cleaning the unit and its lens.
Contact information for ordering replacement parts and accessories.
List of authorized service centers for product repair and support.
How to obtain product service, information, or assistance.
Terms and conditions of the product's limited warranty.
Instructions for packing and shipping the product for service.
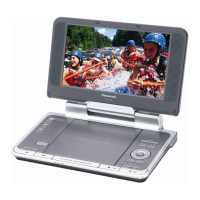
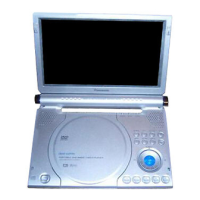
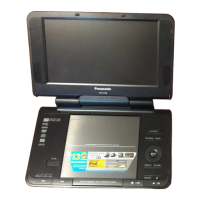
| Screen Size | 7 inches |
|---|---|
| Resolution | 480 x 234 pixels |
| Playable Media | DVD, CD |
| Built-in Speakers | Yes |
| Headphone Jack | Yes |
| Power Source | AC Adapter, Rechargeable Battery |
| Remote Control | Yes |
| Audio Output | Stereo |
| Supported Formats | DVD, DVD-R, DVD-RW, CD, CD-R, CD-RW, MP3 |
| Output | Composite Video |
| Aspect Ratio | 4:3, 16:9 |
| Region Code | 1 |