8
RQT6526
Getting
started
Basic
operations
[DVD-V] [CD] [VCD]
1 Press [POWER Í] to turn on the unit.
For progressive output
Press [PROGRESSIVE OUT] so the indicator lights.
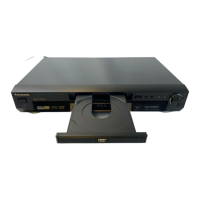
2 Press [<] to open the disc tray.
3 Place the disc on the disc tray.
Label-up (With double-sided discs, load
so the label for the side you want to play
is facing up.)
4 Press [1] (PLAY).
The disc tray closes and play begins.
[CD] (MP3/WMA)
Group and track names are displayed on the television. Press
[SUBTITLE] to turn the display on or off.
To stop play
Press [∫] (➡ page 11, Resume function).
To pause play
Press [;] during play.
Press [1] (PLAY) to restart play.
[Note]
≥If “/” appears on the television
The operation is prohibited by the unit or disc.
≥Discs continue to rotate while menus are displayed even after playing an
item. Press [∫] when you finish to preserve the unit’s motor and your
television screen.
≥Volume may be lower when playing DVDs than when playing other discs
or during television broadcasts. Reduce the volume before playing other
sources so that a sudden increase in output does not occur.
≥Progressive output is not possible if the “Progressive Out” setting is left
as “Disable” in the QUICK SETUP menus.
≥Although the progressive out indicator lights if you press
[PROGRESSIVE OUT] after changing the “Progressive Out” setting to
“Enable”, output will still only be interlace if you have connected the unit
to your television through the VIDEO OUT or S VIDEO OUT terminals.
Remote control only
The QUICK SETUP screen appears when you press [SETUP] the first
time after purchase and assists you to make necessary settings. You can
access this screen again later if you need to ( ➡ page 16, Others—QUICK
SETUP).
Preparation
Turn on the television and select the appropriate video input on the
television to suit the connections for the player.
1 Press [POWER Í] to turn on the unit.
2 Press [SETUP] to show
the QUICK SETUP screen.
3 Press [3, 4] to select the menu language and
press [ENTER].
4 Press [3, 4] to select “Yes” to continue and
press [ENTER].
5 Press [3, 4] to select the item and press
[ENTER].
≥Audio Language (For setting details ➡ page 16)
≥Subtitle Language (For setting details ➡ page 16)
≥TV Aspect (For setting details ➡ “TV Aspect”, below)
≥Progressive Out (For setting details ➡ page 16)
6 Press [ENTER] and then [SETUP] to end the
settings.
To return to the previous screen
Press [RETURN].
∫ TV Aspect
Select “4:3” (regular) or “16:9” (widescreen) to suit your television.
If you have a regular 4:3 television, you can also select how video on some
discs is shown (➡ page 16, Video—TV Aspect).
≥4:3 Pan&Scan (Factory preset)
Widescreen software is expanded to fill the
screen of a 4:3 aspect television (unless
prohibited by the producer of the disc).
≥4:3 Letterbox
Widescreen software is shown in the letterbox
style on a 4:3 aspect television.
∫ Viewing 4:3 aspect pictures on a 16:9 widescreen
television using progressive output
16:9 aspect pictures are shown correctly, but 4:3 aspect pictures are
stretched horizontally to fill the screen.
≥If your television can change the aspect when input is progressive
Use the television to change the aspect to the correct one.
≥If your television cannot change the aspect when input is
progressive
Press [PROGRESSIVE OUT] so the indicator goes out. Output will now
be interlace and 4:3 aspect picture is shown in the middle of the screen.
Quick setup Basic play
 Loading...
