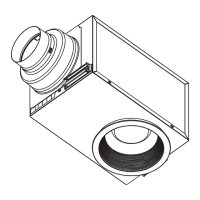
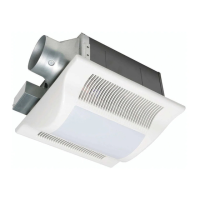
Fig.13
Ceiling (already existed)
Unit: inches (mm)
Conduit
A
tit
4
:4
\a
\
pi
i
r
r
4
Tapping
crews ST4.2x20)
v
Circular
exhaust
duct
Joist
0
7:6
_.0
Machine screw (M4X6)
2 Self-drilling screws (fix the
flange and Flex-Z Fasten bracket
through the ceiling)
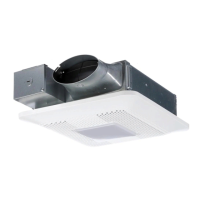
Fig.15
INSTALLATION (RETROFIT)
AWARNING
0
Disconnect power source before working
on unit.
1.
Remove the existing fan and cut ceiling opening.
Install the Flex-Z FastTM bracket to joists by using
the 4 pre-installed tapping screws (ST4.2x20).
Leave existing ductwork and wiring in place.
(Fig.1 3)
2.
Follow the step 1, 4, 5, 7 on page 6. (Before
connect the circular exhaust duct to the adaptor,
pull down the circular duct from the ceiling.)
3.
Install the adaptor to Flex-Z FastTM bracket by using
2 self-drilling screws. (Fig.14)
4.
Secure the fan body to Flex-Z Fast' bracket by
using 2 self-drilling screws, plug connector to
receptacle and secure the fan body to adaptor
by using machine screw (M4X6). (Fig.15)
ACAUTION
0
Secure the duct adaptor to the fan housing
with the machine screw (M4X6) by
re-inserting and carefully screwing the adaptor
to the housing. Please insure the screw is
appropriately placed so it does not strip
the teeth nor come in contact with the
Flex-Z Fast
TM
bracket.
5. Follow the step 10 to 15 on page 7 .
8
 Loading...