Setting the Handset and Base Unit
35
*
1
After you set the PBX type,
unplug the AC adaptor, wait until the run indicator of the base unit
turns off, and plug in the AC adaptor again.
*
2
To check the type of PBX you are using, see page 31.
*
3
When a check mark is displayed beside a tone type, the incoming call log for that tone type
will be logged.
• These settings are only applied to your telephone, not the PBX itself.
Main Item Description Setting Default
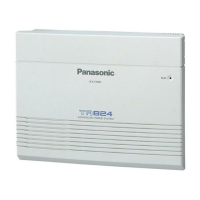
Selects the type of PBX that
the base unit is connected to.*
1
Ty p e 1 *
2
Ty p e 2
Type 1
When using a PBX other than
a KX-TAW848/KX-TDA series
PBX, you do not need to
change this setting.
Mode 1
Mode 2
Mode 1
“
PBX Type-Type 1
(KX-TA624/824)” only
Selects which line of information
is displayed as Caller ID. When
the Caller ID matches an item
stored in the Phonebook, the
handset rings according to the
setting of the item. As shown
below, a caller’s number, caller’s
name and CO line number are
displayed on each line.
Displayed items vary depending
on your PBX and its settings.
1st Line
2nd Line
3rd Line
1st Line
“
PBX Type-Type 2
(KX-TA308)” only
Sets the current date and time
for the base unit.
Date
Time
01-01-05 (D-M-Y)
12:00 AM (H:M)
“
PBX Type-Type 2
(KX-TA308)” only
Sets each type of Incoming
Call Log to either on or off.*
3
You must set at least one of the
incoming call types to on to
store a received call in the
Incoming Call Log.
Single Tone
On
Off
Double Tone
On
Off
Triple Tone
On
Off
Single Tone: Off
Double Tone: Off
Tr i p l e Tone : O f f
PBX Type
Fwd/DND Icon
Caller ID Line
01234567890
T.Edison
Call on CO 1
1st Line
2nd Line
3rd Line
<Example>
Date&Time
Incoming Log

 Loading...


