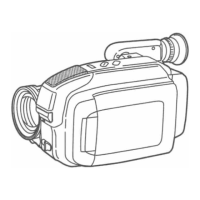
Tally Lamp
Digital E.I.S. Operation Notes
1
Press MENU for MENU mode.
Press
UP or DOWN to select
TALLY LAMP .
2
Press DISPLAY to select:
ON lamp lights during recording.
OFF lamp stays off.
3
Press MENU to exit.
Before you begin...
• Connect Camcorder to power source.
• Set POWER to CAMERA.
• Insert cassette with record tab.
The tally lamp can be set to come on or
stay off during recording.
New camcorder's default setting is ON.
1
,
2
,
3
DISPLAY
MENU
UP
DOWN
Tally Lamp
Tally Lamp
SELECT : PUSH SELECT : PUSH // KEY KEY
SET : PUSH DISPLAY KEYSET : PUSH DISPLAY KEY
END : PUSH MENU KEYEND : PUSH MENU KEY
PROGRAMMED RECPROGRAMMED REC
TITLE TITLE ; AUTO/MANUAL; AUTO/MANUAL
TALLY LAMPTALLY LAMP ; ON ; ON
STAND-BY RELEASE ; OFF STAND-BY RELEASE ; OFF
CLOCK SETCLOCK SET
- - - MENU - - - PAGE 1/2 - - - MENU - - - PAGE 1/2
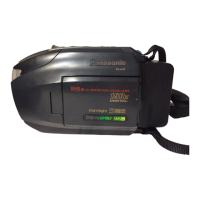
(PV-L650 shown)
Digital Zoom
Power Zoom magnification is digitally increased.
1
Press DIGITAL ZOOM.
D.ZOOM mode (150Xmaximum).
Higher digital magnification levels
may cause picture distortion.
2
Hold down “T” on POWER ZOOM.
Digital Zoom starts when normal
zoom reaches maximum (18X).
• Zoom level appears in EVF or LCD
monitor.
• POWER ZOOM switch controls
digital zoom level.
• Normal zoom resumes when level
falls to 18X.
3
Press DIGITAL ZOOM to turn off
Digital Zoom so no indication
appears.
1, 3
T
W
2
Before you begin...
• Connect Camcorder to power source.
• Set POWER to CAMERA.
D.ZOOM
50X
EISEIS
NORMAL
Digital EIS ON
1
Press EIS to display “EIS” in the EVF
or LCD monitor.
• Image becomes slightly enlarged
and shutter speed auto-adjusts from
1/80 to 1/350 according to
brightness.
• Use High Speed Shutter
if needed. Shutter speed setting
remains after EIS is canceled.
2
Press EIS again to cancel when not
in use.
E.I.S. may not function during...
• extreme Camcorder movement.
• recording of subject with distinct
horizontal or vertical stripes.
• low light situations (EIS indicator
flashes).
• intense fluorescent lighting situations.
• recording of very fast motion.
Digital Electronic Image
Stabilization (E.I.S.)
Helps stabilize picture when recording in
unstable situations.
1
,
2
Before you begin...
• Connect Camcorder to power source.
• Set POWER to CAMERA.
Cleaning EVF (Electronic Viewfinder)
Attaching Optional Filters and Lenses
(VM-D100/PV-L550/PV-L600/PV-L650/VM-L450)
To Remove
Lens Hood Area Operation Caution
With a Wide or Telephoto conversion lens (optional) attached, the four corners of the
screen may darken when zoom is set to maximum wide angle.
When attaching the lens hood, a Wide or Telephoto conversion lens (optional), etc. after
a filter (optional) has been attached, the four corners of the screen may darken when
zoom is set to maximum wide angle.
With two filters (optional) attached, the four corners of the screen may darken when zoom
is set to maximum wide angle.
When you remove the Lens Hood, pinch the Lens Hood
and turn it counterclockwise as illustrated at right.
Then attach an optional filter or lens.
• Be careful not to touch the lens itself.
• Replace the Lens Hood after removing the accessory.
A
B
2
Remove any lint or dust particles
with a soft clean cloth being careful
not to scratch the glass surfaces.
3
Replace the EVF Eyepiece and the
screw.
A
C
B
1
A
Remove the screw with a Phillips
screwdriver.
Turn counterclockwise.
B
Turn the EVF Eyepiece.
C
Pull the EVF Eyepiece.
9
PV-D300 / VM-D100 / PV-L550 / PV-L600 / PV-L650 / VM-L450

 Loading...