16
Fig. 2-1
Fig. 2-2
Fig. 2-3
2. SELECTING THE INSTALLATION SITE
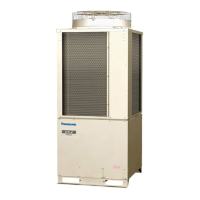
2-1. Outdoor Unit
AVOID:
●
heat sources, exhaust fans, etc.
●
damp, humid or uneven locations
●
indoors (no-ventilation location)
DO:
●
choose a place as cool as possible.
●
choose a place that is well ventilated.
●
allow enough room around the unit for air intake/
exhaust and possible maintenance.
●
use lug bolts or equal to bolt down unit, reducing vibration
and noise.
Installation Space
Install the outdoor unit where there is enough space for ven-
tilation. Otherwise the unit may not operate properly. Fig. 2-2
shows the minimum space requirement around the outdoor
units when 3 sides are open and only 1 side is shuttered,
with open space above the unit. The mounting base should
be concrete or a similar material that allows for adequate
drainage. Make provisions for anchor bolts, platform height,
and other site-specific installation requirements.
●
Leave space open above the
unit.
●
Construct louvers or other
openings in the wall, if nec-
essary, to ensure adequate
ventilation.
●
Do not do any wiring or tubing within 1 ft. of the front
panel, because this space is needed as a servicing
space for the compressor.
●
Ensure a base height of 4" or more to ensure that
drainage water does not accumulate and freeze
around the bottom of the unit.
●
If installing a drain pan, install the drain pan prior to
installing the outdoor unit.
* Make sure there is at least 6" between the outdoor
unit and the ground.
Also, the direction of the tubing and electrical wiring
should be from the front of the outdoor unit.
Out-
door
unit
Heat
source
Hot air
Exhaust fan
More than
2 in.
More than
1.7 ft.
* More than 4 in.
* More than 4 in.
* More than 4 in.
Example of installation of 2 units
(When wall height is below 6 ft.)
* However, be sure to ensure a space of 1 ft. or more at
either the right side or the rear of the unit.
35
(Ceiling panel dimensions)
113 (Ceiling panel dimensions)
35
(Ceiling panel dimensions)
4435
(Ceiling panel dimensions)
31-1/8
(Installation hole pitch)
31-1/8
(Installation hole pitch)
7-7/8
31-1/8
(Installation hole pitch)
109-1/16 (Installation hole pitch)
7-7/8
35(Ceiling panel dimensions)
36-1/4 (Installation hole pitch)
37-1/2 (Maximum dimensions)
Top view
 Loading...