21
2. Then go to setting mode 2.
Setting mode 2
Fig. 8-2
Setting procedure
● To enter the setting mode, press and hold the CHECK
button, SET button, and CANCEL button simultaneously for
4 seconds or longer.
● PresstheTEMPERATUREUPandDOWNbuttonsto
change the parameter.
● Duringthismode,“SETDATA”isdisplayed,blinking.The
display shows the set outdoor unit address “System XX-YY”
(System XX = system address; YY = address at outdoor unit
sub-bus), parameter number, and the value (8 digits).
The value is displayed in 8 digits. The display changes
between the first 4 digits and the last 4 digits. When the first
4 digits are displayed, the top point of the colon is lit.
● PresstheTIMERUPandDOWNbuttonstochangethe
value. To confirm the changed value, press the SET button.
Atthistime,“SETDATA”displaystopsblinkingandremains
lit.
● To exit setting mode, press the CHECK button. The remote
controller display returns to the normal display mode.
Required settings
● Once you entered the setting mode 2, use the TEMP. UP
andDOWNbuttonstogotoparameter4B.
With the TIMER buttons, change the value to “000”.
(Decreasemaximumcondensingtemperature)
● Additionally, go in similar manner to parameters 35 and
36andchangeeachvalueto“+004”.(Decreasemaximum
condensing temperature)
● Then go to parameter E1 and change it to “-018”. (Air curtain
in cooling mode goes in Thermostat Off status 2 minutes
after the blow out temperature is exceeded, in order to avoid
too much condensate occurrence)
■
ECO G series units
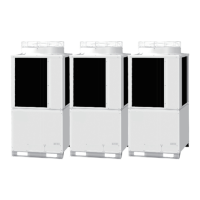
GF2 3-PIPE U-16GF2E5, U-20GF2E5, U-25GF2E5
GE2 2-PIPE
U-16GE2E5, U-20GE2E5, U-25GE2E5,
U-30GE2E5
GEP2
2-PIPE,
High Power
U-16GEP2E5, U-20GEP2E5,
U-25GEP2E5
CHECK
button
TEMP.
UP/DOWN
buttons
SET button CANCEL button TIMER UP/
DOWNbuttons
1. After finishing the addressing procedure (refer to the
outdoor unit test run service manual supplied with the
outdoor unit), note down the address of the air curtain unit
such as 1-1 or 2-18 etc. and go to the outdoor unit electrical
board.
Outdoor unit electrical board
Fig. 8-3
Setting procedure
● PresstheUP(S005)orDOWN(S006)keytoscrollthrough
the menu items.
Duringandaftermenuitemchanges,themenunumber
display appears for about 1 second (0.7 seconds), followed
by the letter display.
● To select a menu item, press the SET (S007) key during the
menu number display period.
● When the HOME (S004) key is pressed, the display will
always show “no00.” (contents will not change during
setting).
● When no operations occur for 10 minutes in areas other than
item “no00.”, then item “no00.” will be displayed (contents
will not change during setting).
Required settings
● WiththeUPandDOWNbuttonsgotomenu6:“SEt in”
● PresstheSETkey,andthenbyusingtheUPandDOWN
buttons choose the previously noted address of the air
curtain.
Example: For address 1-1 you must choose “1.“ in the
display, for address 2-18 you must choose “18.”.
● In the second position of the display you will see the
parameternumber.ByusingtheUPandDOWNbuttons,go
to each of the following parameters, press the SET button,
thenchangewiththeUPandDOWNbuttonthevalueand
press SET button again, then go to the next parameter:
“1.” set to 1 (RAP valve present)
“6.” set to 1 (air speed in Thermo Off does not change)
“L.” set to 16 (blow-out temperature in cooling should not go
below +16 °C)
“n.” set to 38 (optimum blow-out temperature in heating is
+38 °C)
● ThenpresstheHOMEbuttonandwiththeUPandDOWN
buttons go to menu 5: “SEtout”
● PresstheSETkeyandbyUPandDOWNbuttonsgo
to parameter “A0”, press SET again and change this
value to 2, press SET again and finalize the setting by
pressing the HOME button. (Air curtain in cooling mode
goes in thermostat off status 2 minutes after the blow
out temperature is exceeded in order to avoid too much
condensate occurrence)

 Loading...


