Choice 3(A) : Install the driver by wireless network connection (Only available for computers that have wireless network function.)
Choice 3(B) : Install the driver by wireless network connection (Only available for computers that have wireless network function.)
How to Download and Install Pantum Printer Driver for Windows ? How to Download and Install Pantum Printer Driver for Mac OS ?
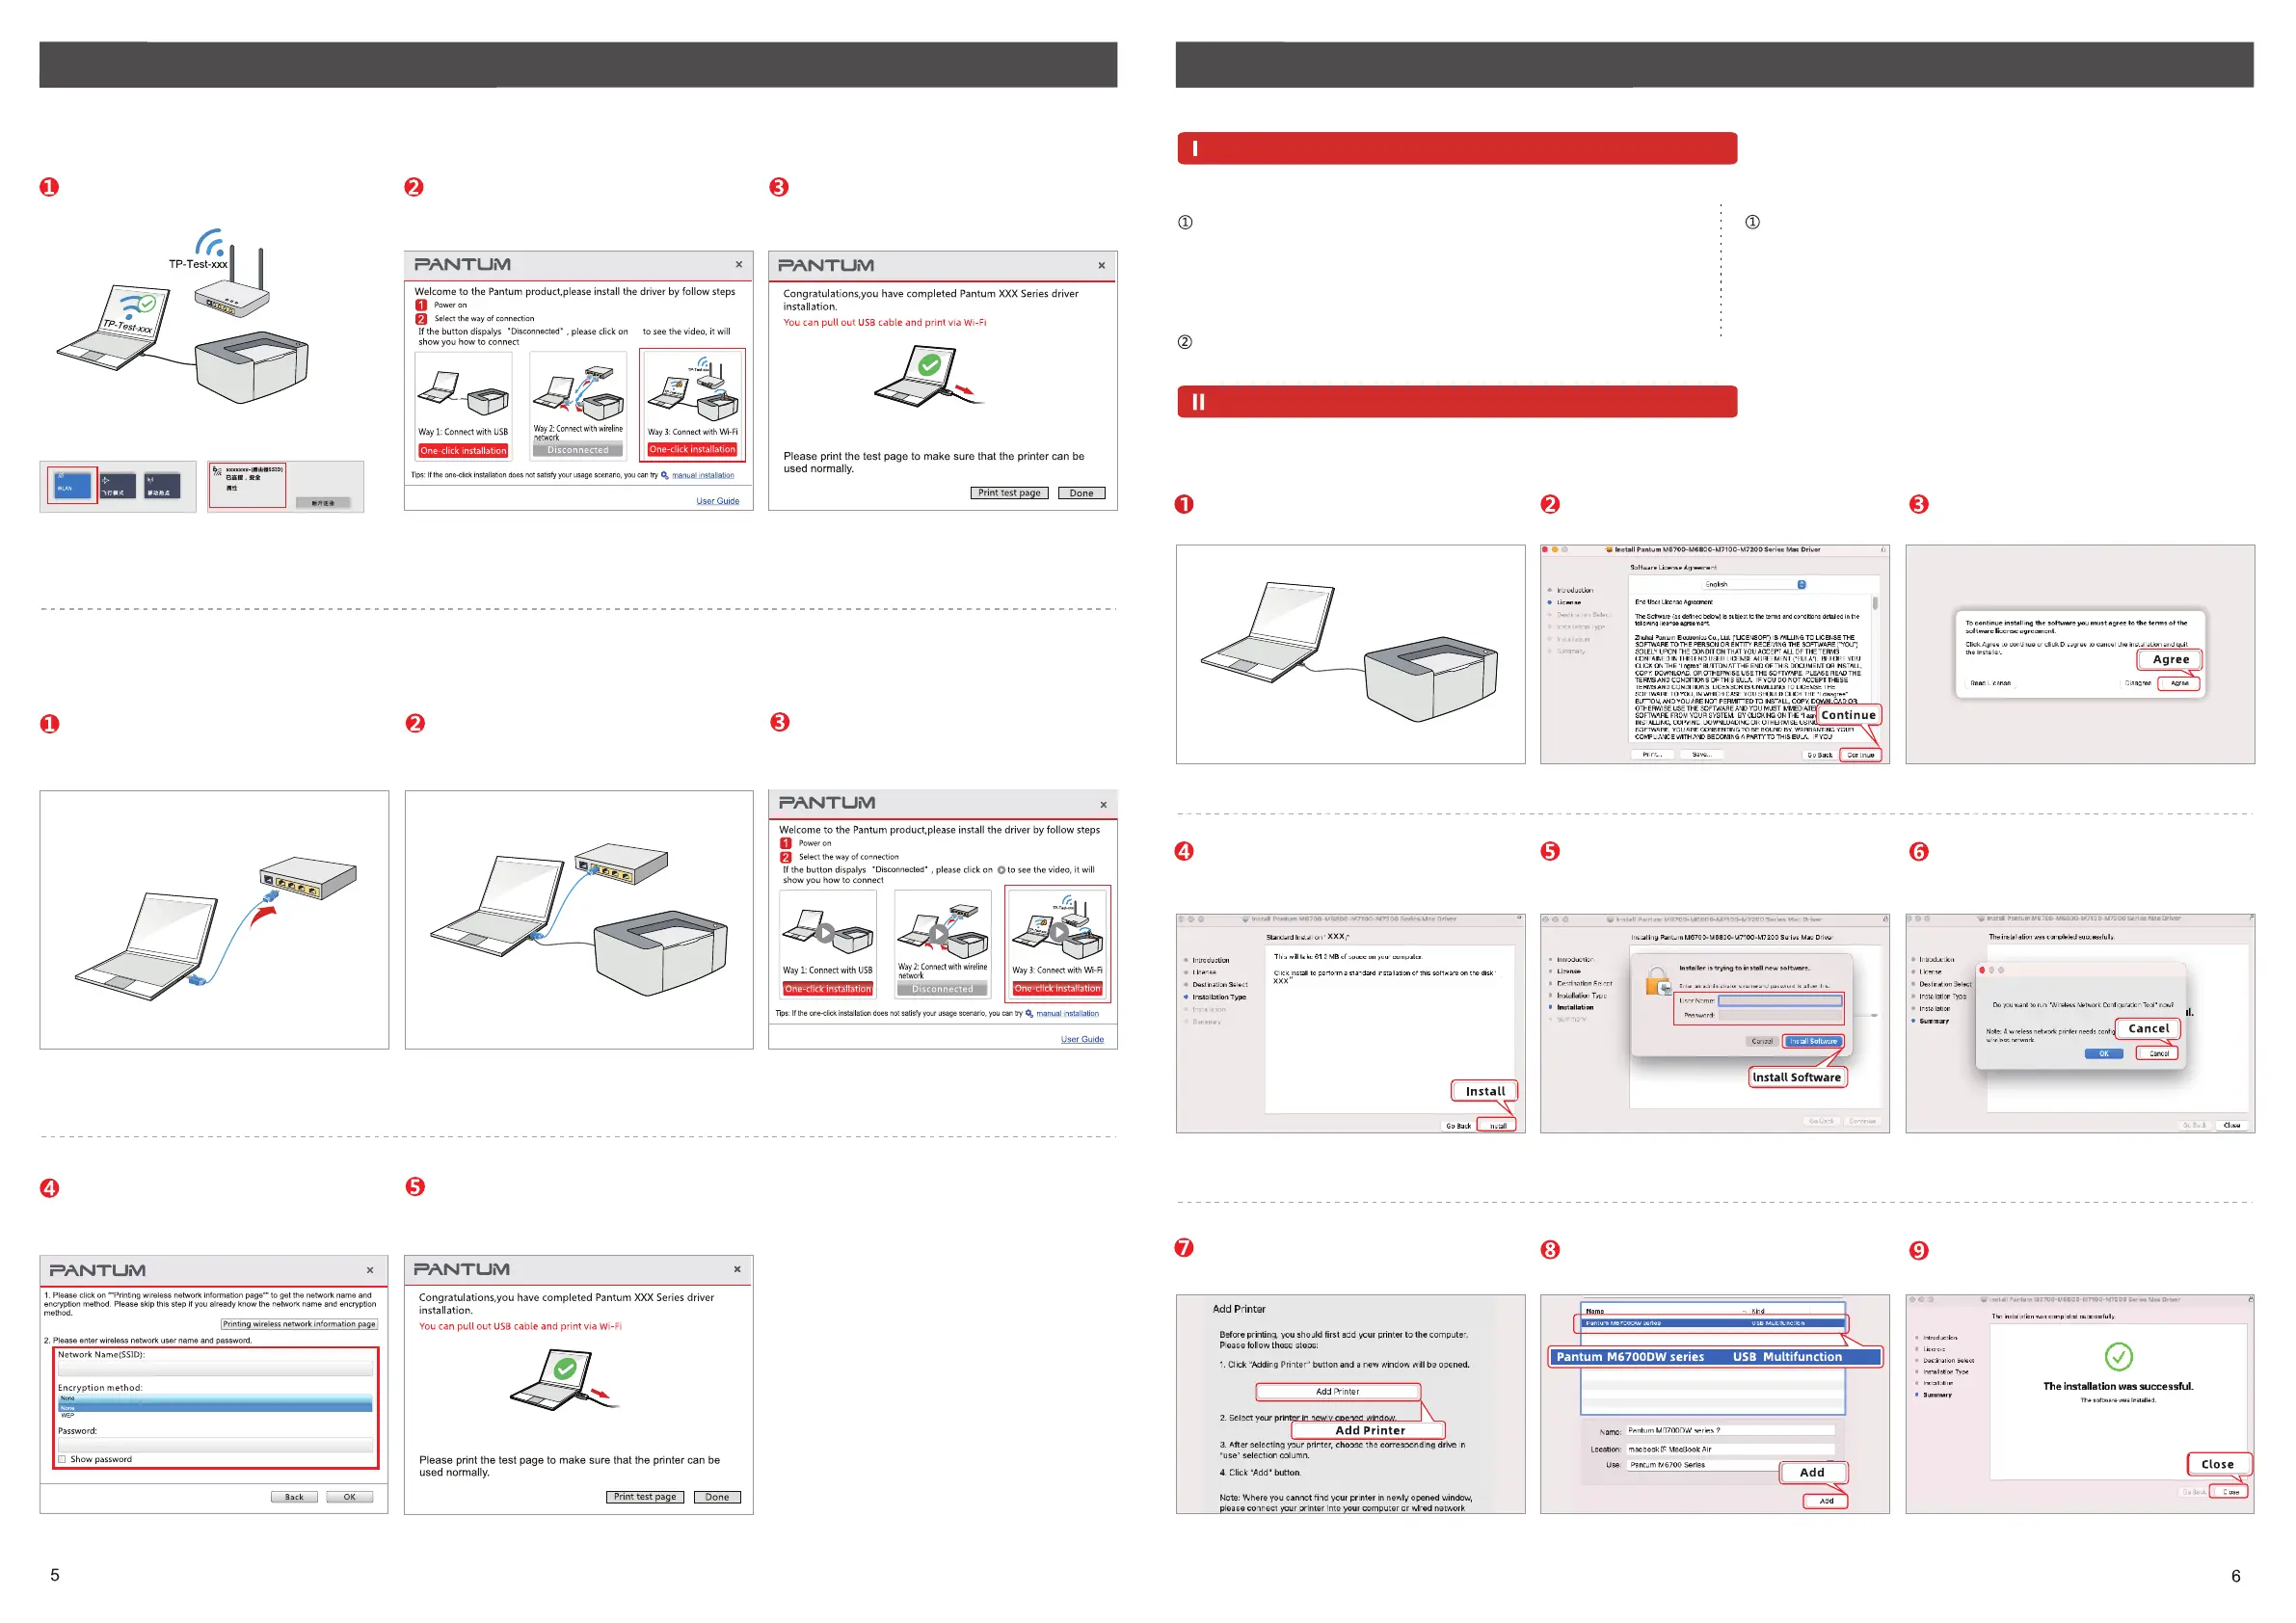
Ⅱ How to install the driver ?
I How to attain and operate driver software ?
Plug into the USB cable to make a
connection between printer and comput-
er.
Choice 3 only can work when your computer has connected
wireless network and in a normal connection state.
If you select “OK” , that would turn to choice 3:
Setup driver by wireless network connection to complete
driver installation.
Select way3: Connect with Wi-Fi and then
click “One-Click Installation”.
When successfully installed, unplug USB
cable and then you can achieve wireless
printing on PC.
Plug in the network cable to make a
connection between your printer and
computer.
Plug into the USB cable to make a
connection between printer and computer.
Input wireless network’s name and
password.
When successfully installed, unplug USB
cable and then you can achieve wireless
printing on PC.
Select way3: Connect with Wi-Fi and then
click “One-Click Installation”.
Plug into the USB cable to make a connec-
tion between printer and computer.
Read the installation agreement and click
“Continue”.
Enter installation interface and click
“Agree”.
Read the installation instruction and click
“Install”.
Input your computer username and
password, click “Install Software”.
Click “Cancel” when it asks you if you
want to run “Wireless network configura-
tion tool”.
Click “Add Printer”. Select the connection type called “USB
Multifunction” and click “Add”.
When successfully connected, click
“Close” to complete driver installation.
Choice 1: Download the driver from our official website
Choice 1: Install the driver by USB cable connection
Choice2: CD Installation
Search the website: www.pantum.com, find out “Drivers &
Downloads” and then select “Drivers”----Input printer’s
name---- Select the driver file corresponding to the printer’s
name---Select computer system----Download----Save the
driver file to the designated location.
Select the driver file you have downloaded and double-click it
to start the driver installation.
Insert the attached CD into the CD-ROM drive of your computer
and double-click “Pantum XXXXXX Mac Driver.pkg”
installation package to start driver installation.
*(The choice only works for the printers which are labeled as “N” “W”, like M7100DN, M7100DW).
*(The choice only works for the printers which are labeled as “W”, like M7100DW
Notes:
Notes:
 Loading...