PARALINX MANAGER SOFTWARE
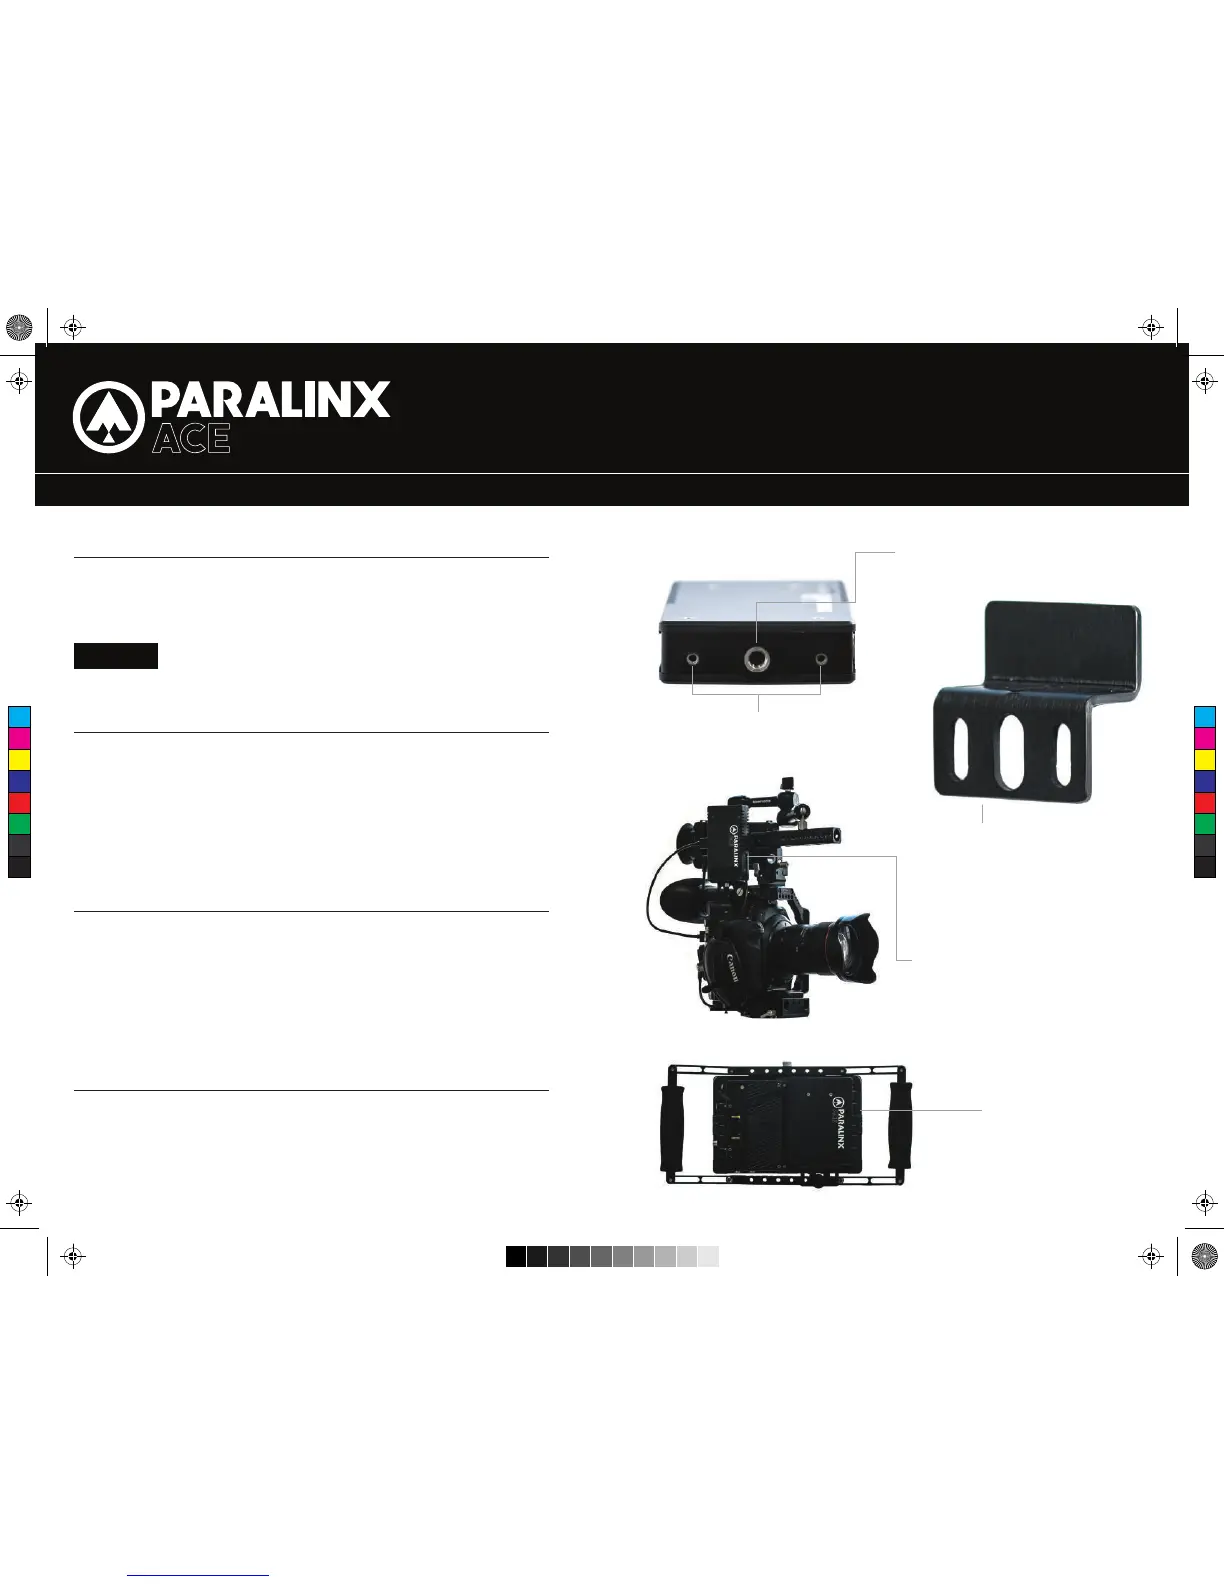
MOUNTING
2/56” MOUNTING THREADS
– Keep the transmitter and receiver at close range for 60 seconds after powering on
the devices, allowing them to scan for and select the best wireless channel .
– For best results when using multiple Paralinx Ace in the same area, place the
transmitters and receivers a few feet apart from each other.
– Operation of other wireless equipment may interfere with the Paralinx Ace. For best
results, separate other wireless transmitters and receivers as much as possible.
– Mount the Paralinx Ace transmitter vertically, keeping the antennas clear of any
obstructions.
– Orient the transmitter and receiver so they are parallel to each other.
– For best results, orient the receiver so the front or back has clear line-of-sight to
the transmitter.
CAUTION!
Using a reverse polarity or improperly-constructed power cable can
damage the product and is not covered under warranty!
Paralinx Manager allows you to configure and upgrade your Paralinx Ace. It is
available at www.paralinx.net/downloads. The following configuration is available:
– REGION SELECTION:
Configure Paralinx Ace to comply with your region’s regulations governing use
of the 5GHz spectrum A.
CUSTOM / 3RD PARTY CABLES
DEVICE OPERATION
BEST PRACTICES MOUNTING OPTIONS
MOUNTING THREADS ON TX/RX
ACE HDMI TRANSMITTER
MOUNTED TO CAMERA CAGE
QUICK START GUIDE
1/4”- A20 MOUNTING THREAD
ACE MOUNTING BRACKET- ATTACHES
TO BASE OF TX/RX WITH 2/56” SCREWS
AND ALLOWS MOUNTING IN VARIOUS
APPLICATIONS.
ACE RECEIVER MOUNTED
TO BACK OF SMALLHD 7”
MONITOR
2. Test the power cable polarity with ONLY the power cable connected to Paralinx Ace.
3. Do not connect video cables.
1. Check the power cable for shorts and proper grounding.
C
M
Y
CM
MY
CY
CMY
K
Ace QSG HDMIv3.pdf 2 9/18/15 1:29 PM
 Loading...