4-2 Operating the Converter
590 Series DC Digital Converter
Setting-up the Converter
Note: Refer to Chapter 5: “The Man-Machine Interface (MMI)” to familiarise yourself with the
MMI’s LED indications, and how to use the keys and menu structure.
The following instructions are written in logical order. Complete each stage successfully
before progressing to the next.
Calibration
NO POWER IS CONNECTED AT THIS STAGE
You must first calibrate the Converter for use with the motor:
The settings for Armature Current, Field Current, Armature Voltage and the Tacho Calibration
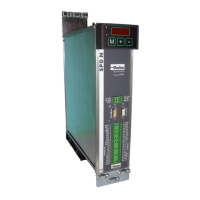
Option Board (if fitted) are selected on the control board. Lift the hinged terminal cover to
reveal the switchable calibration panel and the switchable tacho calibration option board (if
fitted).
TACHO CALIBRATION
OPTION BOARD
SWITCHABLE CALIBRATION PANEL
TEST
POINTS
IMPORTANT: You must not exceed the maximum drive and motor ratings. Refer to the Product Code or
maximum rating label, and the motor rating plate.
Switchable Calibration Panel
IA CAL
SW1 SW2 SW3 SW4
IF CAL
.
SW5 SW6
VA CAL
ON
1
2
3
4
SW7
Armature Current (IA CAL)
Note the maximum armature current from the motor rating plate and set this value using SW1,
SW2 and SW3. The switches set Amps in hundreds, tens and units. The illustration above shows
an IA CAL setting of 77A.
Field Current (IF CAL)
Note the nominal field current from the motor rating plate and set this value using SW4, SW5
and SW6. The switches set Amps in tens, units and tenths. The illustration shows an IF CAL
setting of 5.7A. The maximum current is 19.9A, setting a higher value than this results in 0A.
Note: If using an external stack controller, set the switches for one quarter less current than you
require, i.e. if you want 12A of field current, set the switches to 9A. (This allows for a
different turns ratio used in the current transformers of external stack modules).

 Loading...