34
Adjusting the spacer
The spacer (flower protection) (21) keeps
plants and stems that are not to be cut
away from the cutting unit.
Procedure (Fig.C.5)
1. Fold the spacer (21) down.
2. Fold the spacer (21) up (resting posi-
tion) when it is not needed.
Extending the cutting line
The device is equipped with a fully auto-
matic line tracker . The line extends auto-
matically every time the device is switched
on. For proper functioning of the automat-
ic line extension mechanism, the spool
(18) must have stopped completely be-
fore you restart the device. If the lines are
initially longer than the cutting circle, they
are automatically shortened to the right
length by the line cutter (32).
1. Check the nylon lines regularly for
damage and make sure the cutting line
still has the length specified by the line
cutter.
2. If no line ends are visible:
Replace the spool (see Replacing the
spool, p.37).
3. Adjust the line length manu-
ally:
Remove the battery (6) from the
device!
Pull gently on the line end until the line
ends protrude slightly beyond the line
cutter (32).
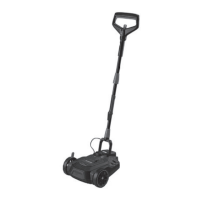
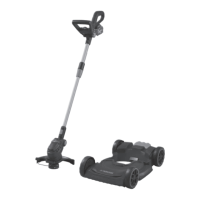
Working with the trimmer
cart
The lawn trimmer can be used like a city
lawn mower with 2-stage axial cutting
height adjustment by engaging it in the
trimmer cart (25).
Mounting the lawn trimmer on the
trimmer cart (Fig.E)
1. Place the motor head (16) in the guide
(27) on the trimmer cart.
2. Push the lawn trimmer backwards at
an angle. The protective cover (17) en-
gages at the trimmer cart lock (26).
Dismounting the lawn trimmer
from the trimmer cart
1. To remove the lawn trimmer from the
trimmer cart (25), press the trimmer
cart lock (26).
2. Lift the lawn trimmer at an angle and
remove it.
Cutting height adjustment on the
trimmer cart
Requirements
• Battery removed
• Lawn trimmer disassembled
Procedure (Fig.D)
1. Turn the trimmer cart (25) over so that
both axles are accessible.
2. Pull back the axles and bring them to
the same notch on both sides (cutting
height notch a = 35 mm, b = 55 mm).
To achieve an even cutting height, both
axles must be in the same notch.
3. Mount the lawn trimmer on the trimmer
cart.
Checking the battery charge
level
LEDsMeaning
red, orange, greenBattery charged
red, orangeBattery partially
charged
redBattery needs to be
charged
1. Press the button (8) next to the charge
level indicator button (9) on the battery
(6).
 Loading...