6
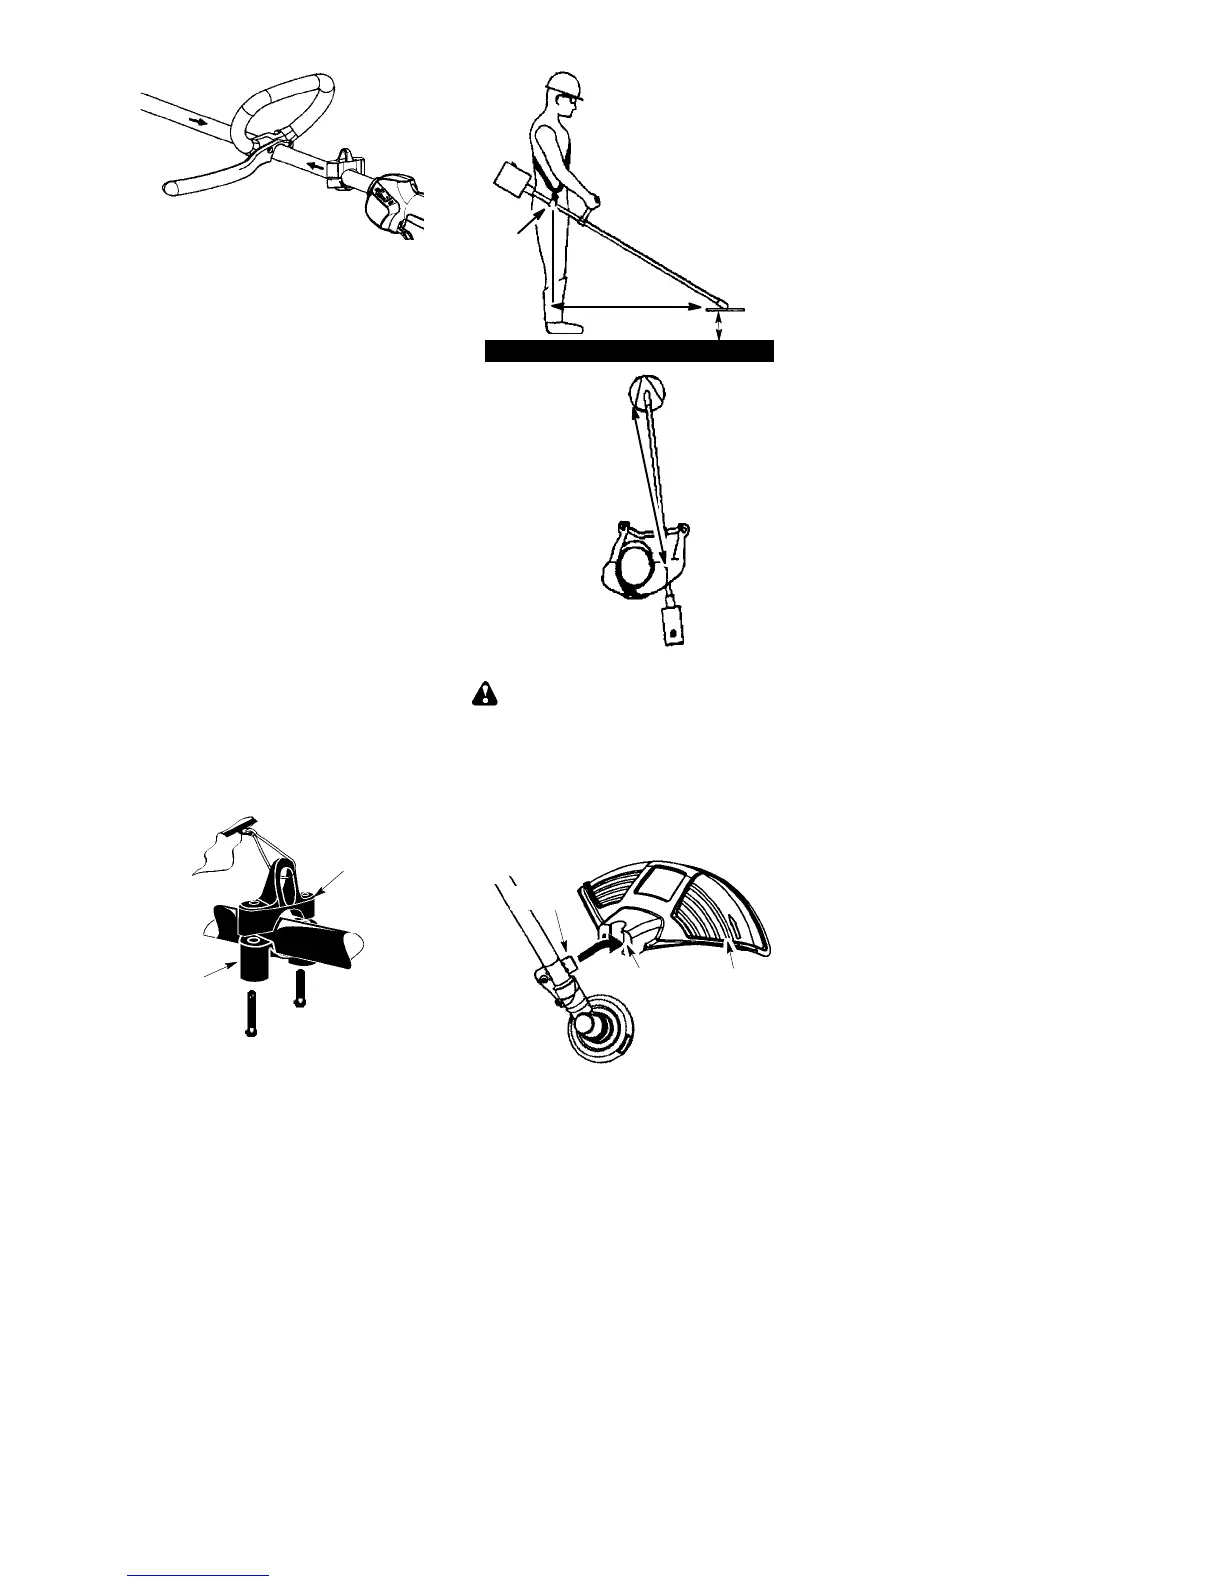
3. Make a final adjustment of the handle to a
comfortable working position. T ightenthe
nut firmly with wrench (provided).
ASSEMBLY OF SHOULDER STRAP
Proper shoulder strap and handlebar adjust-
ments must be made with the engine com-
pletely stopped before using unit.
1 . Insert your right arm andhead through the
shoulder strap and allow it to rest on your
left shoulder . Make sure the hook is to the
right side of your waist.
NOTE: A one-half twist is built in the shoul-
der strap to allow the strap to rest flat on the
shoulder.
2. Adjust the strap, allowing the hook to be
about 15 cm below the waist.
3. Fasten the strap hook to the clamp located
between the trigger handle and the handle-
bar clamp base and lift the tool to the operat-
ing position.
4. Try on shoulder strap and adjust for fit and
balance before starting the engine or be-
ginning a cutting operation.
NOTE: It may be necessary to relocate the
shoulder strap clamp on the shaft for proper
balancing of unit.
TO RELOCATE SHOULDER STRAP
CLAMP:
1. Loosen and remove both clamp screws.
2. Place the upper shoulder strap clamp
over the shaft.
3. Position the lower shoulder strap clamp
under the shaft and align the upper and
lower clamp screw holes.
Upper Shoulder
Strap Clamp
Screws
Lower Shoulder
Strap Clamp
4. Insert two screws into the screw holes.
5. Secure shoulder strap clamp by tighten-
ing screws with a hex wrench.
76 cm
HARNESS
ADJUSTMENT
FOR BALANCE
10 -- 30 cm
above
ground
15 cm
below
waist
76 cm
ATTACHING THE SHIELD
WARNING: The shield must be prop-
erly installed. The shield provides partial
protection to the operator and others from the
risk of thrown objects, and is equipped with a
line limiter blade which cuts excess line to the
proper length. The line limiter blade (on un-
derside of shield) is sharp and can cut you.
1. Insert bracket into slot on shield.
2. Pivot shield to align holes in shield and
bracket.
Slot
Shield
Bracket
3. Secure shield to bracket with bolt.