23
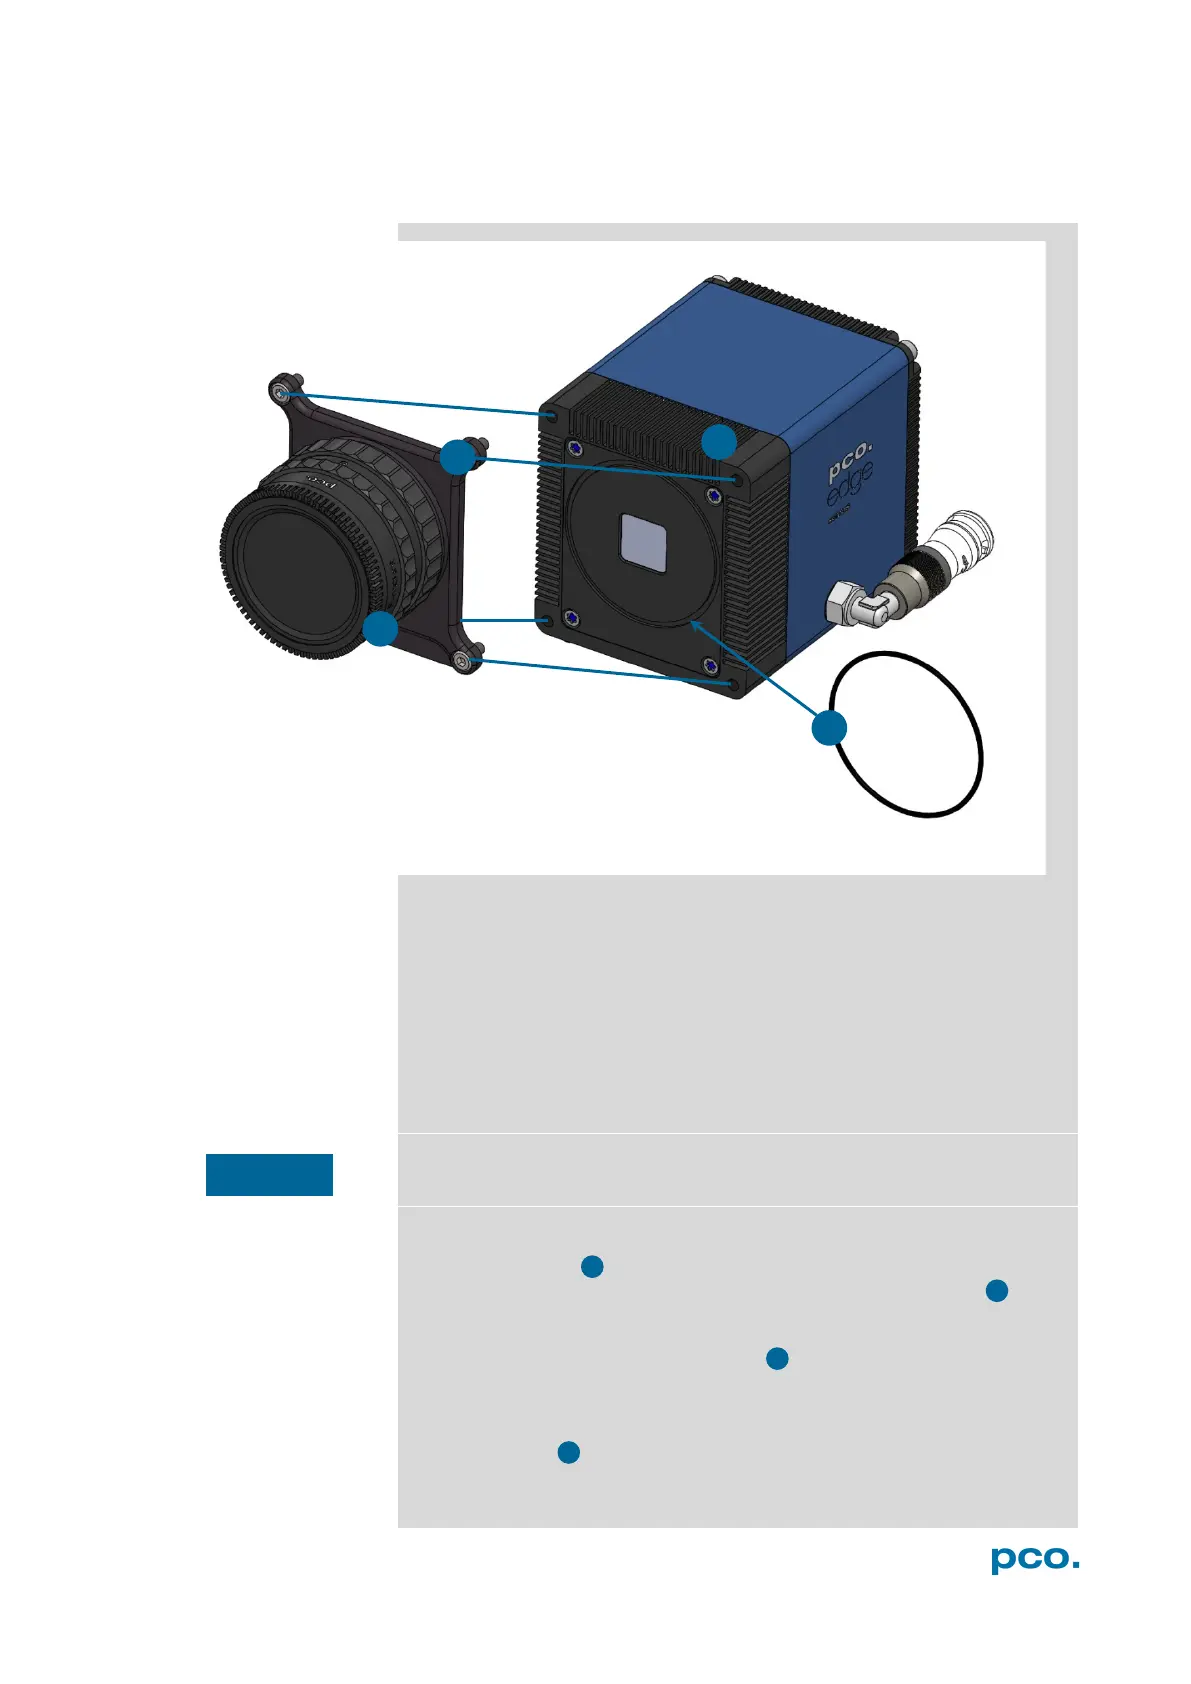
A2.3 DIRECT CAMERA MOUNTING
The hardware design allows to mount the camera very close to an
optical setup (e.g. a microscope) without F- or C-mount adapter but
with the help of a rubber ring.
This allows to reduce the distance from the focal plane of the sensor
to the adaption plate to only 6.18 mm.
Contact us, if you need the rubber ring. The ring is not included in the
standard package of the camera:
O-ring D 55 x 1.5 material number: 10305100011
The rubber ring is essential for this direct adaption, as it is necessary
to block parasitic light.
Mounting Steps
First, the adapter containing the lens mount must be removed.
Completely unscrew the four cylinder head screws M4 x 8 and
remove the adapter.
As second step, place the rubber ring in the intended recess of the
camera.
Finally screw the camera to your optical setup by using the four M4
screw sockets .
Always make sure that the O-ring does not slip out of the recess!

 Loading...