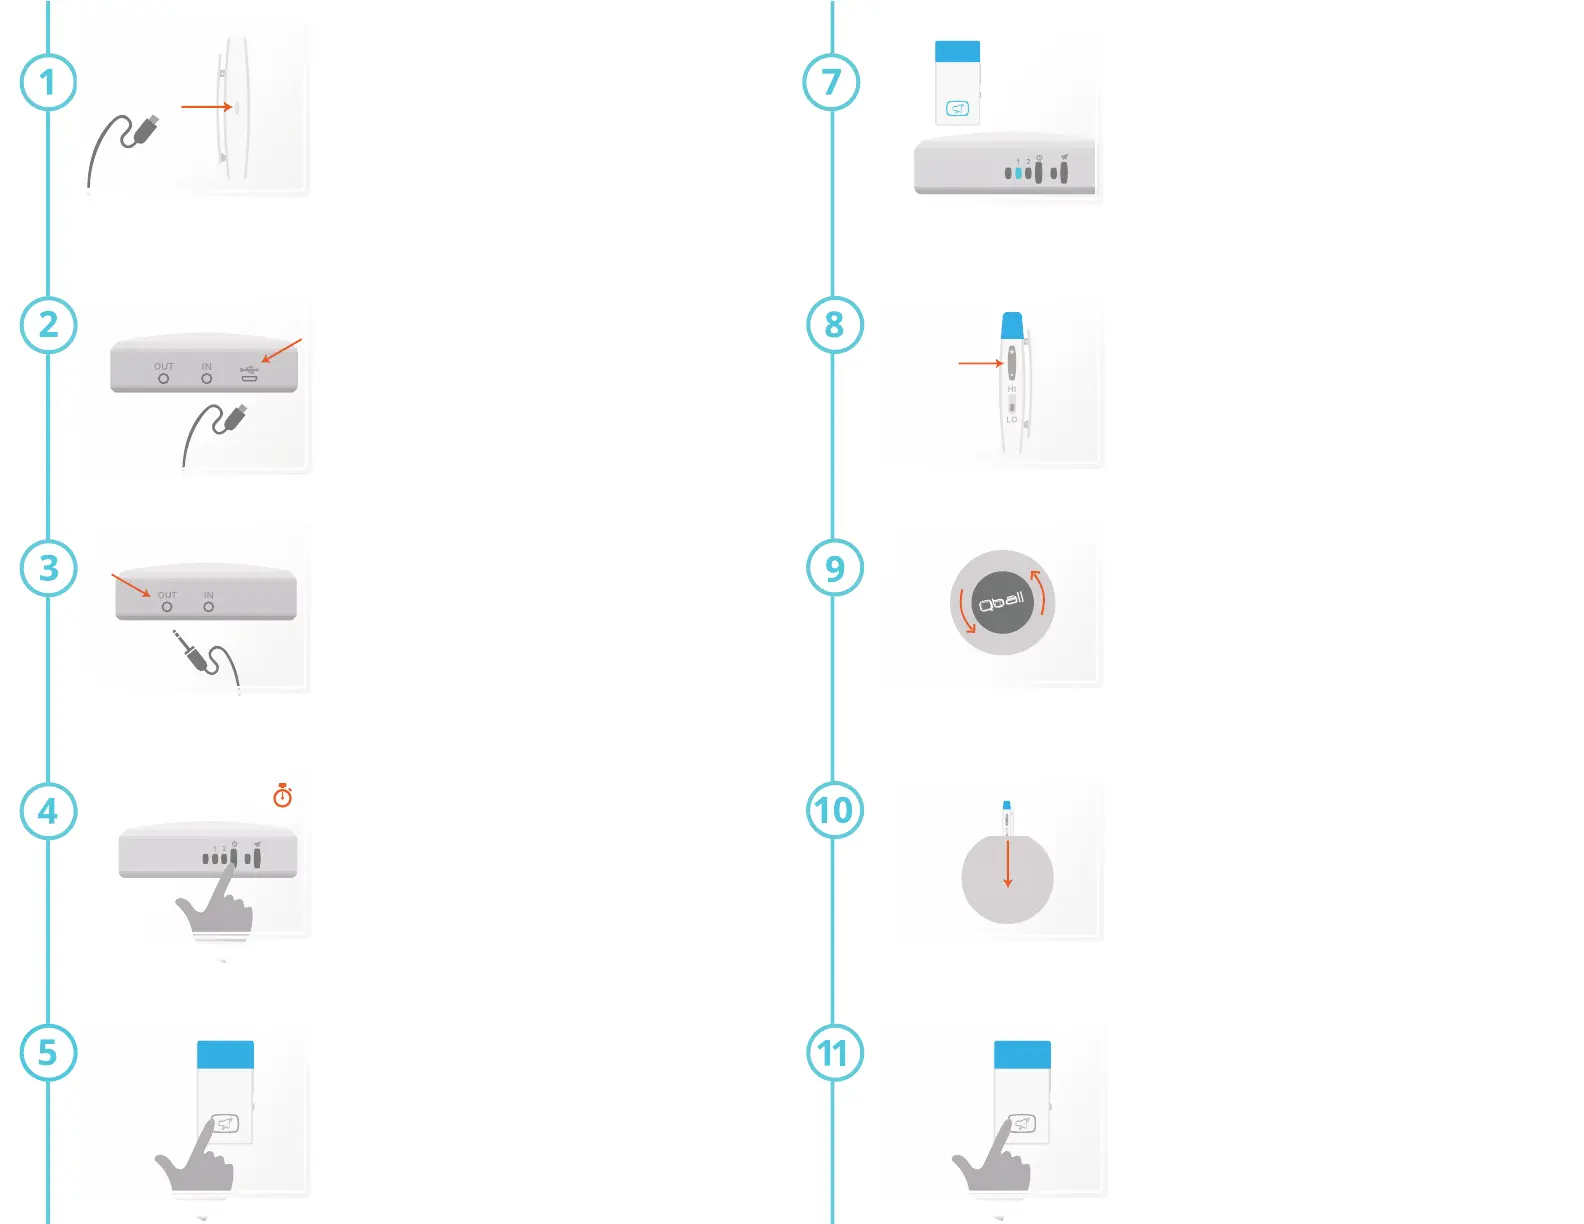
Power the PEEQ Receiver
1. Plug the provided MicroUSB cable from the
wall charger to the power port on the back of
the PEEQ Receiver.
Connect Your Speakers
1. Plug one side of the provided 3.5mm aux cable
into the “OUT” port on the back of the PEEQ Receiver.
2. Plug the other side of the provided 3.5mm aux cable
into your speaker or amplifier.
**Make sure the aux cable is pushed all the way into
the PEEQ Receiver. Not plugging the cable all the way
in can result in a “hum” sound during use.**
Charge the Microphone Battery
1. Plug the provided MicroUSB cable from the
wall charger to the charging port on the side of
the Mic.
2. A red indicator light will appear below the
charging port, indicating the Mic is charging.
3. The red indicator light will turn green once the
Mic is fully charged.
Turn the PEEQ Receiver On
1.Press and hold the power button on the front of the
PEEQ Receiver until the blue light turns on below the
“1” and “2” (this can take around five (5) seconds).
2. The blue lights will begin flashing, indicating that the
PEEQ Receiver is searching for a paired Mic.
5 Seconds
Note: To connect to desktop computer speakers, or for video-conferencing, see alternate setup
instructions on page 4.
Turn the Microphone On
1.Press and hold the power/mute button on the front
of the Mic until the light turns on. (this can take around
three (3) seconds).
Confirm Microphone Pairing
The Mic and PEEQ Receiver were paired from the
factory and will automatically connect.
1. Confirm the flashing blue light on the Mic, and the
flashing blue light under “1” on the PEEQ Receiver
have changed to steady blue.
2. If you have a secondary Mic, repeat steps 5-7. For
step 7.2, confirm the flashing blue light under “2” on
the PEEQ Receiver has changed to steady blue.
Note: The flashing blue light under “2” will continue to flash - this is normal. The Receiver is
looking for a secondary Mic to sync with. If you only have one Mic it will continue to flash.
Adjust the Microphone Volume
1. Adjust the volume using the volume button on
the side of the Mic.
2. Adjust the volume on your speakers or
amplifier, if necessary, to your desired volume.
Open the Qball
1.Turn the black Microphone cover 1/8th of a
turn counter-clockwise and pull out.
Insert Microphone
1. Move the clip inside the ball out of the way and
insert the Mic with the blue rubber grip facing up.
2. Make sure the clip fits over the Mic securely.
3. Replace the cover and turn clockwise until it
it clicks into place.
Note: If you put the Mic in upside-down (blue rubber grip facing down), the quality of sound
will be negatively impacted.
Mute & Turn Off Microphone
1. To mute the Mic, press the power/mute button
on the front of the Mic. Press it again to unmute.
2. To turn off the Mic, press and hold the power/
mute button for three (3) seconds and release.
 Loading...