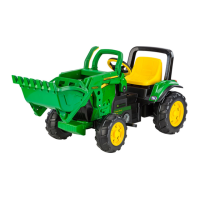
13 •Place the handlebar on the loader arms,
slanting it downward slightly in order to
correctly position the two pins on the
handlebar (see detail in the next figure).
14 •The two pins on the handle must be kept
on the outside of the hooks that protrude
from the loader arms. The figure shows
one of the two pins in both the wrong
position (NO) and the right position
(OK).
15 •Insert the tabs on the front part of the
handlebar into the openings in the loader
arms.
16 •Fasten the handlebar using the screws and
nuts, inserting the nuts into the hexagonal
housings inside the loader arms, and the
screws through the circular holes from the
outside. (The figure shows the bottom of
the loader arms).
17 •Finish fastening the handlebar by holding
the nuts in place while tightening the
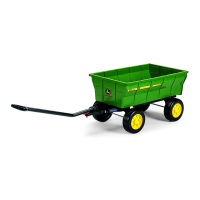
screws.
18 •Insert the rod for the shovel command
lever into the hole in the shovel.
19 •Place a large stud in the special tool (see
detail A).
20 •Fasten the rod by pushing the stud all the
way in. (If this is difficult to do, use a
hammer).
21 •Press the two loader-arm rests into place
on the sides of the grill, as shown in the
figure. The two pieces are shaped to fit the
grill, so make sure to position them
carefully, inserting the pin marked “L” on
the left and the pin marked “R” on the
right.
22 •Remove the pin that fastens the loader to
the tractor. NOTE: Pin is taped to front
scoop.
23 •Place the loader on the tractor, lining up
point A on both sides with the previously
attached rests. Press on the back of the
loader arms on both sides to fasten them
at point B.
24 •Push the pin that fastens the loader to the
tractor through its hole and out the
opposite side of the tractor.
25 •Place a small stud in the special tool (see
detail A).
26 •Fasten the pin by pushing the stud all the
way in. (If this is difficult to do, use a
hammer).
ENGLISH
FRANÇAIS ESPAÑOL
13 •Placer la poignée sur la benne en l’inclinant
légèrement vers le bas pour y insérer
correctement les deux tiges (voir détail de
la figure suivante).
14 •Les deux tiges de la poignée doivent rester
à l’extérieur du crochet qui dépasse de la
benne. La figure représente une tige en
position incorrecte (NO) et en position
correcte (OK).
15 •Insérer les languettes situées à l’avant de la
poignée dans les trous de la benne.
16 •Fixer la poignée avec la vis et l’écrou en
insérant l'écrou dans le logement
hexagonal situé à l’intérieur de la benne et
la vis dans le trou rond, de l’extérieur (sur
la figure, la benne est vue de dessous).
17 •Finir de fixer la poignée en bloquant
l’écrou d’un doigt tout en serrant la vis.
18 •Insérer la tringle du levier de commande
de la pelle dans le trou de cette dernière.
19 •Insérer un grand clou dans l’outil prévu à
cet effet (voir détail A).
20 •Fixer la tringle en enfonçant le clou à fond
(en cas de résistance, utiliser un marteau).
21 •De chaque côté du cache, insérer par
pression les deux douilles de support de la
benne, comme indiqué sur la figure.
Attention ! Les pièces sont profilées pour
suivre la ligne du cache ; insérer la douille
L à gauche et la douille R à droite.
22 •Extraire la tige de fixation de la benne.
NOTE : La broche est enregistrée sur
bande pour affronter le godet.
23 •Placer la benne sur le tracteur en faisant
coïncider le point A (de chaque côté) avec
les douilles précédemment appliquées.
Appuyer sur l’arrière de la benne pour
l’accrocher au point B (de chaque côté).
24 •Insérer la tige de fixation de la benne
jusqu'à ce qu’elle sorte de l’autre côté du
tracteur.
25 •Insérer un petit clou dans l’outil prévu à
cet effet (voir détail A).
26 •Fixer la tige en enfonçant le clou à fond
(en cas de résistance, utiliser un marteau).
13 •Poner el mango en el cucharón
manteniéndolo ligeramente inclinado hacia
abajo para colocar correctamente los dos
pivotes en su interior (véase el detalle en
la figura siguiente).
14 •Los dos pivotes del mango tienen que
quedar fuera del gancho que sobresale del
cucharón. La figura ilustra uno de los dos
pivotes en la posición incorrecta (NO) y
en la posición correcta (OK).
15 •Meter las lenguetas de la parte delantera
del mango en los agujeros del cucharón.
16 •Fijar el mango con el tornillo y la tuerca
metiendo la tuerca en el alojamiento
hexagonal dentro del cucharón y el
tornillo por el exterior en el agujero
circular (la figura muestra el cucharón por
debajo)
17 •Completar la sujeción teniendo sujeta con
un dedo la tuerca mientras se atornilla el
tornillo.
18 •Meter en el agujero de la pala la varilla de
la palanca de mando de la pala.
19 •Meter un bullón grande en la herramienta
correspondiente (véase el detalle A).
20 •Fijar la varilla empujando a fondo el bullón
(si la operación resulta dificultosa utilizar
un martillo).
21 •Meter a presión los dos casquillos de
sujeción del cucharón a los lados de la
calandra como indica la figura. Cuidado, las
piezas están perfiladas para seguir la línea
de la calandra; meter el pivote L a la
izquierda y el perno R a la derecha.
22 •Extraer el pivote de sujeción del cucharón.
NOTA: El contacto se graba para afrontar
la cucharada.
23 •Colocar el cucharón en el tractor
haciendo que coincida el punto A (por
ambos lados) con los casquillos aplicados
antes. Presionar sobre la parte de atrás del
cucharón para engancharlo en el punto B
(por ambos lados).
24 •Meter el pivote de sujeción del cucharón
hasta que salga por la parte opuesta del
tractor.
25 •Meter un bullón pequeño en la
herramienta correspondiente (véase el
detalle A).
26 •Fijar el pivote empujando a fondo el bullón
(si la operación resulta dificultosa utilizar
un martillo).
 Loading...