- 17 -
EN_English
Thank you for choosing a Peg-Pérego product.
WARNING
_ IMPORTANT: read these instructions carefully and
keep them for future use. The child’s safety could
be at risk if these instructions are not followed.
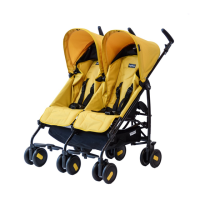
_ This item was designed for the transport of 1 child
in the seat and 1 one child standing on the rear
footboard.
_ Do not use this item for a number of occupants
greater than that intended by the manufacturer.
_ This item is approved for children from birth up to
a weight of 15 kg in the seat. The rear footboard is
approved for the transport of a second child up to a
weight of 20 kg.
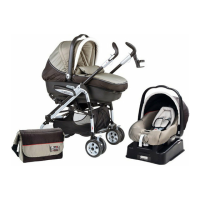
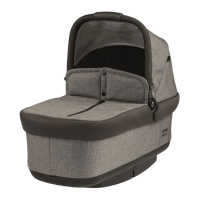
_ This item has been designed for use with the Peg
Perego Ganciomatic products: "Primo Viaggio Tri-Fix"
car seat (0+ group) or Navetta (0 group).
_ Be careful not to hurt the child when adjusting the
mechanisms (handlebar, backrest).
_ Always apply the brake when stopped and when
positioning the child in the seat or when removing the
child from the seat.
_ Assembly and preparation of the product, plus
cleaning and maintenance operations, must be carried
out exclusively by adults.
_ Do not use this item if there are parts missing or signs
of breakage.
_ Do not insert fingers into the mechanisms.
_ Any load hanging on the handlebar or the handles
can make the stroller/carriage unstable; follow the
manufacturer’s instructions for max load capacity.
_ Do not place loads over 5 kilos in the basket. Do not
place in the bottle holder weights heavier than stated
or hot drinks. Do not place in the hood pockets (if
applicable) weights over 0.2 Kg.
_ The front bar is not designed to support the child’s
weight. It is not designed to keep the child in the seat
and does not substitute for the waist belt.
_ Do not use the item near to stairs or steps, heat
sources, naked flames or dangerous objects within
reach of the child.
_ The use of accessories not approved by the
manufacturer could be dangerous.
_ Do not use the rain canopy (if present) indoors and
regularly check to ensure the child is not too warm;
do not park the stroller close to heat sources and keep
well away from lighted cigarettes. Ensure the rain
canopy is not interfering with any moving parts of the
carriage or stroller; always remove the rain canopy
before folding your carriage or stroller.
_ When using the stroller with two children, never leave
them unattended and do not allow the second child
to climb onto the rear ledge with the stroller empty.
_ Do not use the release levers to move or lift the stroller
when the child is in it.
_ WARNING: Do not add a mattress pad.
_ BEFORE USE CHECK THAT THE PEG-
PÉREGO GANCIOMATIC PRODUCTS
ARE CORRECTLY FIXED TO THE ITEM.
_ IT MAY BE DANGEROUS TO LEAVE
YOUR CHILD UNATTENDED.
_ ALWAYS USE THE 5-POINT HARNESS
AND ATTACH THE WAIST STRAP TO THE
LEG DIVIDER STRAP.
_ THIS PRODUCTS IS NOT SUITABLE FOR
JOGGING OR SKATING.
_ BEFORE USE CHECK THAT ALL THE
ATTACHMENT MECHANISMS ARE
CORRECTLY ENGAGED.
_ TO AVOID INJURY ENSURE THAT
YOUR CHILD IS KEPT AWAY WHEN
UNFOLDING AND FOLDING THIS
PRODUCT.
_ DO NOT LET YOUR CHILD PLAY WITH
THIS PRODUCT.
INSTRUCTIONS FOR USE
1•
OPENING: before opening the chassis remove the two
safety caps from the hooks, otherwise it will be impossible
to open it correctly (Fig.a). To open the chassis, pull the
two levers on the handlebars upwards (Fig.b);
2• at the same time, lift the chassis and it will open
automatically (Fig.c). To make sure that the stroller is
correctly open, check the two side hooks (Fig.d).
If the straps are not fasten correctly, press onto the
seat (fig_e) until it clicks into place.
3• ASSEMBLING: to mount the front wheels, lower lever A
and slip wheel B on until it clicks into place.
4• To mount the rear wheels connected by the brake
cable, place them with the brake facing externally (fig_a).
WARNING: ensure the hooks have clicked into place, as
in figure b.
5• Finally, hook the central element of the brake cable onto
the chassis, ensuring it clicks into place, as in the figure.
6• BASKET: to mount the basket, slip the loops over
the front hooks A and rear hooks B and C. The figure
shows the attached basket.
7•
CUP HOLDER :It can be applied on the 4 knobs on the
chassis. Two are on the left or right side of the handle and
two on the sides of the pushchair’s chassis, at the height
of the bumper, on the right or left . To apply the cup
holder, attach it and press until it clicks into place (Fig. a).
ADJUSTING THE HANDLEBARS: The height of the two
handlebars can be adjusted to 3 positions. For the
higher position, press the button while pulling the
handlebars upwards. To lower it, do the opposite (Fig.b).
8• BRAKE: to set the brakes on the stroller, lower the
levers on the rear wheels with your foot (Fig.a). To
release the brakes, lift the lever.
Always set the brakes when the stroller is not moving.
SWIVEL WHEELS: to swivel the front wheels lower the
levers as shown in arrow 1 (Fig.b).
WHEELS IN STATIONARY POSITION: To make them
stationary, push the lever in the opposite direction, as
indicated by arrow 2.
9• HOOD: to mount the hood, fasten the attachments
which are situated on the sides of the hood onto
those on the chassis, pushing outwards until the hood
clicks into place (Fig.a); fasten it onto the inside of the
armrest (Fig.b),
10• and onto the backrest of the stroller (Fig.c). The hood
has a window enabling you to observe your child, a
large and practical pocket (Fig.d) and a cord which
games can be hung on (Fig.e).

 Loading...