EN 11
INSTALLATION
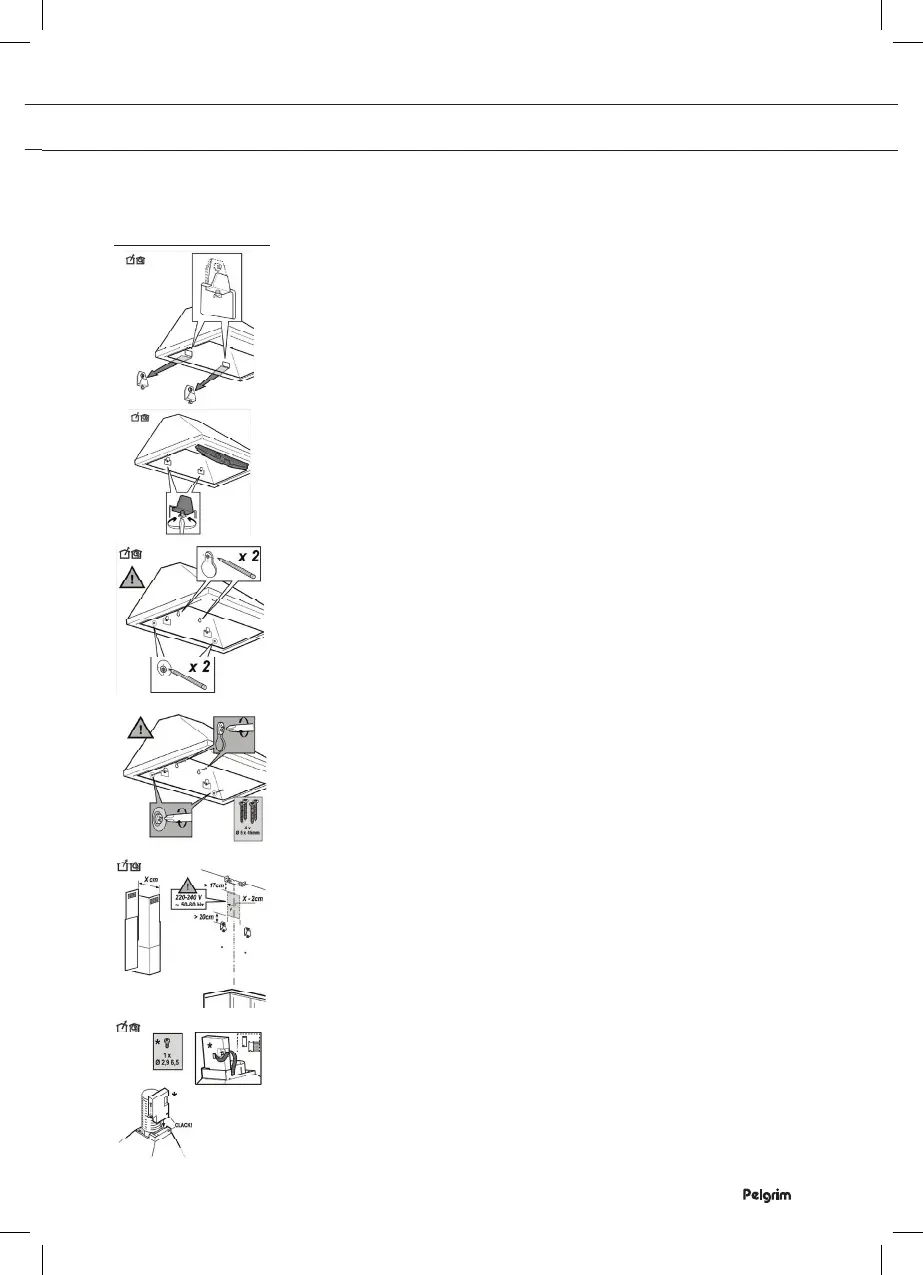
Mounting
• Screw the suspension brackets to the wall by using the plugs and
screws. The hood can be aligned by using a spirit level and the
adjusting screws (see diagrams).
• Then screw the hood to the wall using the plugs and screws.
• Fix the mounting bracket of the upper duct to the wall against the
ceiling.
• Connect the discharge pipe. Then click the electrical unit into the
notch.
• Put the plug in the wall socket. Ensure that there is no tension on
the wall socket!
• Slide the upper duct into the lower duct.
• Let the ducts drop into the hood.
• Push the upper duct around the wall bracket and screw the wall
bracket on to the mounting bracket with the screws supplied.