EasyManua.ls Logo

Pella 81470102 User Manual

Pella 81470102
12 pages
To Next Page IconTo Next Page
Page #1 background imageLoading...
Page #1 background image
INSTALLATION INSTRUCTION -
INSTRUCCIONES DE INSTALACIÓN
FOR SQUARE DESIGN BAY AND BOW WINDOW
WITH SEAT BOARD
Part Number: 81470102
© 2009 Pella Corporation
Read these instructions thoroughly before performing any steps.
Note: ese instructions may be used for Square Design Pella Bay and Bow windows that
have a head and seat board. Support cables are installed in factory assembled bay and bow
combinations.
Caution: e factory-installed support cables must be attached to members capable of
supporting 1,300 lbs. If the members are not capable of supporting 1,300 lbs., knee braces
must be used in addition to the cables. Bay and bow units are not intended to support any
roof structure. Consult an architect, engineer or construction professional if the ability of the
members to support the bay or bow is not known.
Installation Instructions for Typical Wood Frame Construction.
ese instructions were developed and tested for use with typical wood frame wall
construction in a wall system designed to manage water. ese instructions are not to be
used with any other construction method. Installation instructions for use with other
construction methods, multiple units or other bow and bay windows, may be obtained
from Pella Corporation, a local Pella retailer, or by visiting http://www.pella.com. Building
designs, construction methods, building materials, and site conditions unique to your project
may require an installation method dierent from these instructions and additional care.
Determining the appropriate installation method is the responsibility of you, your architect,
or construction professional.
Always read the Pella
®
Limited Warranty before purchasing or installing Pella products. By
installing this product, you are acknowledging that this Limited Warranty is part of the terms of the
sale. Failure to comply with all Pella installation and maintenance instructions may void your Pella
product warranty. See Limited Warranty for complete details at http://warranty.pella.com.
Cable clamps
Flashing tape #1
Flashing tape #2
Jamb covers
Knee braces
Head frame
expander
(2-1/2" Wide)
Lea las instrucciones en español en el reverso.
Question and Answer IconNeed help?

Do you have a question about the Pella 81470102 and is the answer not in the manual?

Pella 81470102 Specifications

General IconGeneral
ColorWhite
BrandPella
Model Number81470102
Glass TypeInsulating
Energy EfficiencyENERGY STAR Qualified

Summary

Rough Opening Preparation

Preparing and Setting the Window

Insert Window into Rough Opening

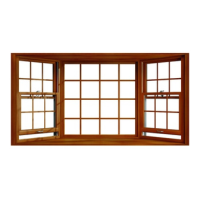
Insert the window unit into the rough opening from the exterior, centering it.

Continue Shimming and Secure Jambs

Use shims to plumb and square the window, then secure jambs with screws.

Cable Clamp Installation

Install Cross Braces for Cable Mount

Install 2" x 6" cross braces above cable holes in the head board for support.

Install Cable Clamps with "T" Nuts

Secure cable clamps to the mounting surface using screws.

Run Cable Through Clamp and Secure

Thread the cable through the clamp and drive screws to secure it.

Install Cross Braces for Non-Accessible Attachment

Install 2x6 cross braces for non-accessible cable mounting.

Measure Cable Length for Non-Accessible

Measure and cut cable to the correct length for non-accessible attachment.

Thread Cable Through "T" Nut and Secure

Thread the cable end through the "T" nut and tighten clamp screws.

Install Cable Clamps for Header Mount

Install cable clamps to solid structural members for header mounting.

Run Cable Through Header Mount Clamp

Thread cable through header mount clamp and secure with screws.

Supporting the Window

Tighten Top Hex Nut on Cable Ends

Tighten the top hex nut on each cable end to hold the cable in position.

Tighten Bottom Nut and Remove Support

Tighten the bottom nut on cable ends and remove temporary support.

Install Knee Braces for Additional Support

Install knee braces if the unit or seat board requires additional support.
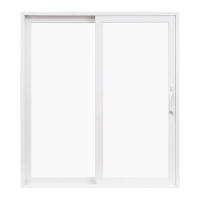
Related product manuals