COLORCASCADE
®
Color Pool and Spa Light Installation and User’s Guide COLORCASCADE
®
Color Pool and Spa Light Installation and User’s Guide
1. Switch off electrical switch or circuit breaker at the source.
2. RemoveJunctionBoxorTransformercover.Disconnectthelightwiresand
attach a fish tape to the existing light power cord. This will assist in pulling
the replacement light power cord through the conduit back to the junction
box.
3. Remove the ColorCascade light assembly from the pool or spa water:
4. Slowly pull the light and attached power cord (with attached fish tape) out of
the niche. Pull the light’s power cord and fish tape out of the niche and place
the light on the deck.
5. Attach the new light power cord to the fish tape and carefully feed the fish
tape and cable to the junction box.
6. FeedcordthroughNicheandthenthroughconduittoJunctionBoxor12Volt
AC Transformer. The ColorCascade light has no serviceable parts, so leave
approximately 12 to 18 inches of cord to allow the light to be easily removed
if replacement is required.
7. CutthecordattheJunctionBoxor12voltACtransformer,leavingatleast
six (6) inches of cord to make connections.
8. Strip back three (3) inches of the outer cord jacket to expose the two
insulated wires (be careful not to damage the insulation on the two (2) inner
wires).
9. Connectboth(2)wirestothecorrespondingcircuitwiresintheJunctionBox
or12VoltACTransformerandsecuretheJunctionBoxcoverinplace.
10. Install the ColorCascade light assembly into the niche and tighten the four
screws provided.
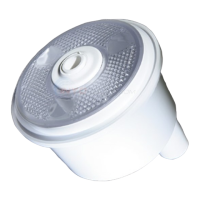
11. Install the return line fitting included with the light assembly by firmly
pressing it into the center hole. Make sure it is pressed all the way down to
provide a smooth transition. Adjust the ball for proper water direction.
12. Fill the pool until the underwater light is completely submerged in water
before operating the light for more than ten (10) seconds. To check for proper
operation, switch on the main switch or circuit breaker, as well as the switch
which operates the ColorCascade light itself. Proceed to next page for
light installation instructions. Note: The ColorCascade light should not be
powered for more than 30 sec if is not submersed in water.
The following removal and installation instructions describe how to remove and install the
ColorCascade Light assembly. Also use these instructions after completing the following
light replacement procedure.
Failure to bring the pool or spa’s electrical system up to code requirements
before installing the underwater light will create an electrical hazard which
could result in death or serious injury to pool users, installers, or others due to
electrical shock, and may also cause damage to property.
REPLACING THE COLORCASCADE
®
LIGHT ASSEMBLY
(AFTER ELECTRICAL REQUIREMENTS ARE MET)
11
 Loading...