7
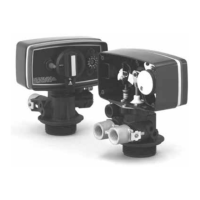
VALVE FLANGE
TYPICAL CLAMP
HALF
Figure 6.
TANK FLANGE
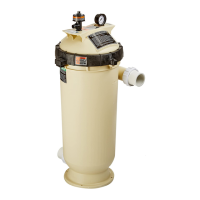
8. The plastic clamp can now be installed. Place the clamp half over the
valve ange and the tank ange as shown in Figure 6. Insert the valve
screws and nuts into the clamp half making sure that the nuts are
located in the special hexagonal retainer slots on the clamps. See
Figure 7.
Figure 7.
9.
Begin to tighten the clamp screws with a Phillips screwdriver. Tap around
the outside of the clamp with a rubber mallet (or similar tool) to ensure
uniform loading and proper seating of the clamp halves. Continue
tapping and tightening until the clamp ends touch each other. Do not
tighten beyond this point to avoid damaging the screws or clamp.
High Pressure:
Improper tank valve assembly could cause the valve
to separate and ca
use serious in jury and/or major
property damage.
6. Be sure top of lter is free of any sand or debris and valve o-ring is in
place on valve body. Install valve so that the port locations are in the
desired nal position. See Figure 1 (see page 4).
7. Be sure that the valve is rmly pushed into the top of the tank and that
the ange of the tank and the ange of the valve are contacting each
other. See Figure 6.
Pump and Sand Filte
r System Installation and User’s Guide
 Loading...