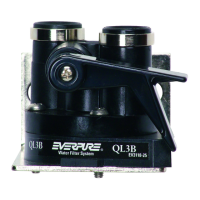
10 • EVERPURE
®
PRO-Reverse Osmosis Water Filtration System Installation and Operating Instructions
Connecting the Supply Adapter and Inlet of Filter
See Figure 22.
1. Locate the pre-installed white plastic tubing on the left-
hand side of the RO system. Place a mark 5/8 inch from the
end of the tubing.
2. Wet tubing with water and insert into supply adapter 5/8
inch until mark is flush with fitting.
NOTE: Disconnecting the tubing from the
Quick-Connect Fittings.
Routine maintenance and cartridge replacement will not
require that you disconnect the tubing from the filter system;
however, tubing may be quickly and easily removed from the
fitting if necessary. First, turn off the water supply to the filter.
Open faucet, then press in the gray collar around the fitting
while pulling the tubing with your other hand.
5/8-inch
(16mm)
Figure 22
Installing the Membrane
See Figure 23.
1. Using the housing wrench, unscrew the middle
(membrane) housing.
NOTE: Do not unwrap the tape around the membrane;
it is part of the membrane. Do not squeeze the
membrane.
2. Turn locking device clockwise to remove. Grasp the
membrane by the central tube (the end with the two
o-rings). Before insertion, lightly lubricate the brine seal
with the silicone lubricant (included with membrane).
3. Gently slide the membrane into the housing. Pressing on
the central tube of the membrane from the top only, push
the membrane fully into the housing until the central
tube is flush with the top of the housing. Be sure to push
the membrane straight down into the housing. If the
membrane is not centered in the housing, the locking
device will not fit properly. After the membrane is seated,
lightly lubricate the membrane o-rings with a small
amount of the silicone lubricant.
4. Insert, and turn the locking device counterclockwise. Screw
the housing back onto the RO system until it is hand-tight.
DO NOT OVER TIGHTEN.
The housing o-ring provides the watertight seal
between the cap and the housing. It is important
that the o-ring be properly seated in the groove
below the threads of the housing or a water leak
could occur.
Brine-
ring
o-rings
Brine
Seal
Locking
Device
Membrane
O-rings
Housing
O-ring
Figure 23
Faucet Operation
For controlled water flow, push the handle down. For constant
water flow, lift the faucet handle to lock it in the open position
(Figure 24).
Constant
water flow
Controlled
water flow
Figure 24
Battery Installation
1. Remove manifold cover.
2. Plug battery into leads.
3. Place battery in holder at the front of unit and replace cover.
 Loading...