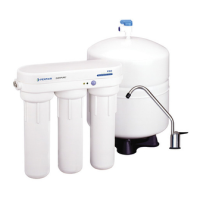
14 • EVERPURE
®
PRO-Reverse Osmosis Water Filtration System Installation and Operating Instructions
14. Wait 25 minutes, then open the drinking water faucet and
let the water flow to drain.
NOTE: Do not attempt to remove the filter housings until the
water flow stops.
15. Remove the filter housings and dispose of the water. Rinse
the housings thoroughly with clean, potable water.
16. Place the empty post-polishing filter housing on the left
side of the unit. HAND TIGHTEN ONLY.
NOTE: DO NOT put the post-polishing filter into the housing
at this time. It will be put into the housing after the
membrane has been flushed.
17. Insert the prefilter cartridge into the right housing and
attach to the right side of the unit. HAND TIGHTEN ONLY.
NOTE: Use the silicone lubricant supplied with the membrane
for steps 18,19 and 20.
18. Lightly lubricate the inside of the membrane (middle)
threaded cap (Figure 29).
Inside of threaded cap
Figure 28
19. Lightly lubricate both sides of the brine seal (Figure 29).
Membrane
O-rings
Locking Device
Housing
O-ring
Brine-ring
O-rings
Brine
Seal
Figure 29
20. Gently slide the membrane into the housing. Pressing on
the central tube of the membrane from the top only, push
the membrane fully into the housing until the central
tube is flush with the top of the housing. Be sure to push
the membrane straight down into the housing. If the
membrane is not centered in the housing, the locking
device will not fit properly.
21. After the membrane is seated, lightly lubricate the two
small o-rings at the end of the membrane. Also, lightly
lubricate both brine ring o-rings (Figure 29).
The rubber o-rings provide the water-tight seal
between the cap and the housing. It is important
that the o-ring be properly seated in the groove
below the threads of the housing or a water leak
could occur.
22. Insert, then turn the locking device counter-clockwise.
Screw the housing back onto the RO system until it is
hand-tight. DONOTOVER TIGHTEN.
23. To complete the flushing of the membrane and post-
polishing filter and assembly of the unit, completely open
the cold water supply until it comes to a stop. Allow water
to drip from the faucet for 3 more hours. Then close the
faucet and open the valve on the storage tank. The tank
valve is open when the handle lines up with the tubing
connection.
TROUBLESHOOTING
If you are experiencing a problem not listed in this manual,
shut off the cold water supply and close the tank valve. Call
Technical Support at 1-800-279-9404.
Leaks between the filter housing and manifold
1. Turn off cold water supply to system. Close tank valve.
Open drinking water faucet to relieve water pressure.
2. Using the housing wrench, remove the housing with the leak.
3. Remove and clean housing o-ring and lubricate with
clean silicone grease. Clean o-ring groove below threads
of housing to remove any dirt or particles that may be
preventing the o-ring from sealing completely. With two
fingers, insert o-ring in groove and press into place.
4. Tighten housing back onto manifold. HAND TIGHTEN ONLY.
5. Turn on cold water supply. Open tank valve. Close drinking
water faucet after water begins to flow. If leaks persist, call
Technical Support.
Leak between tank valve and storage tank
1. Turn off water supply to system. Open faucet to drain
storage tank. Let faucet run for 3–5 minutes until it drips.
2. Remove green tubing from tank valve by pressing the collar
around the fitting while pulling the tubing with your
other hand.
3. Unscrew the tank valve from the storage tank.
4. Place two wraps of plumber tape on the threads of the
storage tank.
5. Thread the tank valve onto the top of the tank opening by
turning it clockwise until snug.
6. Cut off 1 inch of tubing. Tubing should be cut squarely.
Internal and external burrs should be removed. Place a
mark on tubing 3/4 inch from end of tubing.
7. Insert tubing until the mark is flush with the
quick-connect fitting.
8. Turn on water supply and close drinking water faucet.
9. Allow system to pressurize for several hours and check
for leaks.
10. Check for leaks after tank is fully pressurized (6–12 hours).
If leak persists, call Technical Support.
 Loading...