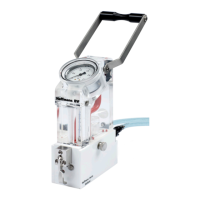
HAFFMANS RPU 352, RPU 353, RPC 80 RPC 50
2
RPU 352, RPU 353, RPC 80, RPC 50 Page 69 of 112
Degree of fit to template
The degree of fit to the selected template is printed in the results. The comparison starts when
both traces pass through the P.U. Cut-off temperature for the first time and stops when the
shortest trace ends, see table 7.1.
Table 7.1
Description Arbitrary %
Average temperature deviation Average pressure deviation
very good 80 - 100
±0 to ±1°C ±0 to ±0.2 bar
good 60 - 80
±1 to ±2°C ±0.2 to ±0.4 bar
fair 40 - 60
±2 to ±3°C ±0.4 to ±0.6 bar
poor 20 - 40
±3 to ±4°C ±0.6 to ±0.8 bar
very poor 00 - 20
±4 to ±5°C ±0.8 bar or more
23.4 TEMPLATE EXCHANGE
IMPORT TEMPLATES
and
EXPORT TEMPLATES
in the template set-up menu allow you
to exchange templates between two RPC-80 playback units so once recorded templates can be
used for several pasteuriser lines or at several different sites. The External Link (serial)
connectors of the two RPC-80 units are linked by a short cable and a null modem.
1. Connect the two units with a suitable cable,
2. Select
EXPORT TEMPLATES
on the unit that already has the recorded template(s).
The display shows
TEMPLATE EXPORT...
with a
CANCEL
button,
3. Select IMPORT TEMPLATES on the unit that you wish to receive a copy of the
template(s). This unit now becomes the importer and has control over the rest of the
exchange,
4. The importer unit receives a copy of the exporter's template directory,
5. Choose the template you wish to bring over from the other unit,
6. Choose the template number for the new template,
7. The date of recording is added to the imported template record; not the date of
exchange.
ATTENTION
!
While the template is being imported SAVING Template.... will show on
the display. Never switch off the RPC-80 until the TEMPLATE SAVED
OK message is shown.
8. Go to Finished SET-UP. EXIT to return to normal operation.
9. Remove the connecting cable and press
CANCEL
on the exporter unit.
 Loading...