TO REMOVE OLD AIR CELL
1. Turn off electric power to the pump at the control box or main switch.
2. Drain water from the tank by opening faucet closest to the tank. Allow all
water to escape and leave faucet open after water stops running.
WARNING: Make sure all the pressure has been released from the tank
and system.
3. Remove valve core from the air valve at the top of the tank. Ensure that no
compressed air remains in the tank.
4. Using a 1/2” deep well socket, remove metal nut and washer from the air
valve.
NOTE: The valve stem at this time should pull into the tank.
If it does not, all of the pressure may not have been released.
5. For tanks with black drain - Disconnect the tank from the water supply line.
a. Push service connection fitting in towards tank to relieve pressure on
red clip (Figure 3B). Pull red clip from end of drain pipe (Figure 3A).
b. Remove service connection fitting from end of drain pipe (Figure 3C).
6. Carefully lay the tank on its side (protect sides of tank). Do not drop.
7. Remove drain assembly and base from tank.
a. Push drain fitting into the tank to relieve pressure on the large red
clips.
b. Using a flathead screwdriver, pry (2) red clips that retain drain
assembly in tank (Figure 3D).
c. Pull drain assembly straight out of the bottom of the tank.
8. Remove old O-ring from drain assembly (Figure 3E). Replace with O-ring
from kit and completely cover O-ring with lubricant.
9. Remove old air cell from tank through the bottom opening. Two people are
recommended when removing air cell. One person should secure the tank
while the other firmly pulls and works the air cell from side to side.
INSTALLATION OF NEW AIR CELL
1. With drain assembly removed from tank, stand tank upright on base with
drain connection on the bottom. Tank is unstable on base without drain
connected. Therefore it is recommended that one person hold the tank
while another continues with the next two steps.
2. Remove nylon line from kit. Separate steel nut and washer from nylon line
leaving brass stem connector attached. Feed brass valve stem connector
through the steel nut and washer. Feed through the nut first. Flat sides of
nut and washer should be facing the valve stem during assembly.
3. Drop valve stem connector through valve stem hole at top of tank. The steel
nut and washer should be tied together at the other end of the line. Feed
nylon line through the hole until steel nut and steel washer are against the
tank and suspending line from top of tank. Carefully lay tank on its side.
Valve stem connector should be easily accessible at the bottom of the tank.
4. Attach valve stem connector to valve stem on top of new air cell. This is
accomplished by screwing connector into the inside thread on valve stem.
NOTE: To avoid damage to valve core, do not screw connector too far into
stem.
5. To install replacement aircell, two people are recommended. With the aid
of the nylon line, one person should guide the valve stem through the valve
stem hole while the other person pushes the air cell through the drain
opening.
NOTE: Nylon line should only be used to guide the stem and not to pull the
air cell into the tank.
6. Attach metal washer and nut to valve stem. Hand tighten nut at this time so
that air cell is able to spin freely in the tank. Remove valve stem connector.
7. Place bottom drain pipe through the hole in the base.
8. Insert barb on the bottom of the air cell through the hole in the drain
screen.
9. Lubricate the O-ring on the drain assembly with silicone grease. Check that
the O-ring is in place.
FILTRATION & PROCESS AIR CELL REPLACEMENT INSTRUCTIONS
Valve Stem Cap
Dust Cap
Metal Nut
Metal Washer
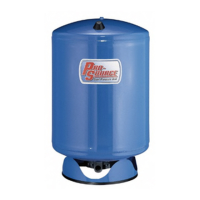
Tank
Air Cell*
Securing Pin Hole
Base
Barb
(goes through hole on
drain screen)
Bottom Drain Assembly
Classic
Classic QC
Figure 1
Rubber Washer
Gray/White/Brass Retainer
Valve Stem
Figure 2
OR
 Loading...