GB
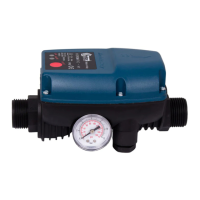
3. OPERATING INSTRUCTIONS
The switch starts up the pump for 15 seconds once connected to the line. Any
further pump starting occurs when the pre-set operating pressure value is
reached, accordingly to the drop in pressure in the tubing when opening a tap.
In the traditional water systems equipped with pressure switch and pressure
tank, the pump stops when a certain pressure value is reached. Differently
Hidromatic has been projected to stop the pump depending on the reduction
of the flow to minimum levels.
Once this circustance has been reached, it delays the real stop of the pump of
a timing running from 7 to 15 seconds: the logic of this function is to reduce
the starting operations of the pumps in case of minimum flow conditions.
4. INSTALLATION
1. Install anywhere between the pump and the first service outlet so that
the arrows moulded on the case and on the outlet connection are
pointing to the same direction as the fluid flowing through the pipe.
Check perfect water tightness of all water connections. If you are using a
pump with a pressure higher than 10 bar, install a pressure reducer on
the Hidromatic’s inlet.
2. For the electrical connection of the version supplied without electric
leads, follow the wiring diagram on the printed circuit board cover, or on
the drawing following. Furthermore, in case of use of a pump with power
higher than ½ Hp and the ambient temperature is higher than 25° C it is
necessary to wire with cables with a thermic resistance not inferior to
99°C. Use only suitable wire nippers to wire the Fastons. If the leads are
included, simply connect the pump’s power plug to the Hidromatic socket
and its own power plug to a current outlet.
3. Operating pressure is pre-set at 1.5 bar which is the optimum value for
the majority of applications. Minimum operating pressure can be
adjusted as needed by turning the screw situated on the inside flange
marked with + and -.
 Loading...