Manejo
1. Móntelo en el trípode.
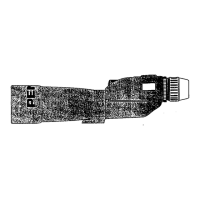
El telescopio debe utilizarse montado en un trípode, etc. (dibujo 1-1)
El agujero del tornillo de trípode de cámara situado en la parte inferior de la
unidad debe utilizarse para montar el trípode.
Abriendo el sujetador situado en la parte inferior de la caja se puede utilizar el
telescopio enganchado al trípode sin necesidad de sacar la unidad de la caja.
(dibujo 1-2)
2. Colocación del ocular (extra)
Inserte el ocular firmemente en la sección de acoplamiento del ocular, gire el
anillo de sujeción del ocular en la dirección (→ LOCK) de la unidad y sujete la
lente firmemente. (dibujo 2)
Para retirarla, afloje el anillo de sujeción del ocular en dirección inversa de la
dirección de sujeción y retire la lente.
3. Ocular
Si se está utilizando el ocular XW o el ocular de Zoom, la posición del ocular se
puede ajustar cuanto sea preciso, siempre dentro de unos limites de movilidad.
Cuando se utiliza el ocular XF, se selecciona una posición con el anillo del
ocular, de tipo helicoidal y provisto de cuatro topes. Ajústelo para obtener la
mejor visión general posible. Si desea más información sobre el empleo del
ocular, consulte el Manual de instrucciones correspondiente. (dibujo 3)
4. Mira
La mira está situado encima de la capucha. Gire la capucha tanto como sea
preciso para obtener la posición más adecuada. (dibujo 4)
5. Enfoque
Gire el botón de enfoque y ajústelo de forma que el objeto pueda verse
claramente en el campo de visión. Girando el botón de enfoque hacia la derecha
(desde el lado del ocular) se pueden enfocar distancias grandes. Girando hacia
la izquierda se enfocan distancias pequeñas. (dibujo 5)
6. Utilización de la capucha
Sáquela y utilícela cuando sea necesario. (dibujo 6)
7. Tornillo de sujeción
Afloje el tornillo de sujeción para girar la unidad libremente 90 grados hacia la
izquierda o hacia la derecha hasta obtener la posición más adecuada para la
observación. Al girar la unidad hacia la izquierda y hacia la derecha se escuchará
un clic al alcanzar el tope. Fije el tornillo de sujeción apretándolo en la posición
más adecuada. (dibujo 7)
Gebruik
1. Bevestiging aan het statief
De spotting scope dient bevestigd aan een statief, etc. te worden gebruikt. (zie
1-1)
De camerastatiefaansluiting, aan de onderkant van het instrument, dient te
worden gebruikt om het statief te bevestigen.
Wanneer de sluiting aan de onderkant van de houder geopend wordt, is het
mogelijk de spotting scope te gebruiken met het statief bevestigd en het
instrument in de houder. (zie 1-2)
2. Bevestigen van het oculair (extra)
Breng het oculair stevig in de oculairbevestigingsssectie aan en draai de
bevestigingsring van het oculair in de (→ LOCK) richting op het instrument en
bevestig de lens stevig. (zie 2)
Om het oculair te verwijderen dient de bevestigingsring van het oculair in de
tegenovergestelde richting van de vergrendelingsrichting te worden gedraaid
en kan de lens worden verwijderd.
3. Oogkap
De positie van de oogkap kan naar wens binnen het bewegingsbereik worden
veranderd wanneer het XW-oculair of het Zoomoculair wordt gebruikt. Bij gebruik
van een XF-oculair moet u een instelling kiezen met de vier-stop, schroeftype
oculairring. Stel zodanig af dat het beeld optimaal is. Raadpleeg de handleiding
van het oculair voor verdere informatie over het gebruik van de oogkap. (zie 3)
4. Vizier
Het vizier bevindt zich boven de kap. Draai de kap totdat de uitlijning naar wens
is. (zie 4)
5. Scherpstellen
Draai de focusknop en stel hem zo af dat het voorwerp duidelijk binnen het
beeldveld kan worden gezien. Door de focusknop naar rechts (vanaf de
oculairzijde) te draaien, kan men op lange afstand instellen. Door de focusknop
naar links (vanaf de oculairzijde) te draaien, kan men op korte afstand instellen.
(zie 5)
6. Gebruik van de kap
Trek deze, indien nodig, uit. (zie 6)
7. Klemschroef
Draai de klemschroef los om de eenheid 90 graden naar links of rechts te kunnen
draaien voor een optimale observatiehouding. Er zijn twee klikstops wanneer
de eenheid naar links en rechts wordt gedraaid. Draai de klemschroef in de
meest geschikte positie vast. (zie 7)
Español Nederlands
Bedienung
1. Befestigung auf einem Stativ
Das Teleskop sollte in Verbindung mit einem Stativ oder einer ähnlichen
Vorrichtung verwendet werden (siehe 1-1).
Befestigen Sie das Stativ am Kamerastativ-Einschraubloch an der Unterseite
des Teleskops.
Wenn Sie den Verschluss an der Unterseite des Futterals öffnen, kann das
Teleskop in der Hülle auf das Stativ geschraubt werden (siehe 1-2).
2. Anbringen der Okularlinse (separat im Handel erhältlich)
Führen Sie die Okularlinse in die Vorhängevorrichtung ein und drehen Sie den
Sicherungsring der Okularlinse in die Richtung LOCK, um das Okular sicher zu
befestigen (siehe 2).
Lösen Sie zum Abnehmen der Okularlinse den Sicherungsring des Okulars in
entgegengesetzter Richtung.
3. Augenkappe
Die Position der Augenkappe kann innerhalb des beweglichen Bereichs frei
eingestellt werden, wenn das XW-Okular oder das Zoom-Okular verwendet wird.
Wählen Sie bei Verwendung des XF-Okulars mit dem Okularring mit vier
Einstellpositionen eine Position aus. Führen Sie eine Einstellung zum Erzielen
des bestmöglichen Gesamtsichtfeldes durch. Lesen Sie hinsichtlich weiterer
Einzelheiten über die Verwendung der Augenkappe die Bedienungsanleitung
des Okulars (siehe 3).
4. Sucher
Der Sucher befindet sich über der Haube. Drehen Sie die Haube frei, bis die
Ausrichtung angemessen ist (siehe 4).
5. Scharfstellung
Regulieren Sie den Fokussierknopf so, dass das anvisierte Objekt im Sichtfeld
deutlich und scharf zu sehen ist. Weiter entfernte Objekte sehen Sie scharf,
wenn Sie den Knopf (von der augenseitigen Linse aus gesehen) nach rechts
drehen; in der Nähe befindliche Objekte stellen Sie mit einer Linksdrehung des
Knopfes scharf (siehe 5).
6. Gegenlichtblende
Ziehen Sie die Blende bei Bedarf heraus (siehe 6).
7. Klemmschraube
Lösen Sie die Klemmschraube, um das Gerät frei um 90 Grad nach links oder
rechts zu drehen und die am besten geeignete Stellung für die Beobachtung zu
erzielen. Beim Drehen des Gerätes nach links oder rechts gibt es zwei
Raststellungen. Fixieren Sie die Klemmschraube durch Anziehen in der am
besten geeigneten Position (siehe 7).
Utilisation
1. Installez l’instrument sur son pied
Le lunette de visée doit être utilisé une fois qu’il est installé sur son pied, etc…(voir
1-1)
Le trou à vis du pied de caméra, situé à la base de l’instrument, doit être utilisé
pour fixer le pied.
L’ouverture de l’attache située à la base de l’étui permet d’utiliser le lunette de
visée installé sur son pied, en laissantl’instrument à l’intérieur de son étui. (voir
1-2)
2. Fixation de la lentille oculaire (extra)
Introduisez la lentille oculaire fermement dans le réceptacle de la lentille oculaire,
faites pivoter l’anneau de fixation de la lentille oculaire dans le sens (→
FERMETURE) sur l’instrument et bloquez la lentille. (voir 2)
Pour la retirer, desserrez l’anneau de fixation de la lentille oculaire dans le sens
inverse détachez la lentille.
3. Bonnette d’oculaire
Il est possible d’ajuster librement la position de la bonnette d’oculaire dans les
lunettes de réglage lorsque vous utilisez l’oculaire XW ou l’oculaire Zoom. Si
vous utilisez l’oculaire XF, sélectionnez une position avec la bague d’oculaire
de type hélicoïdale à 4 positions d’arrêt. Effectuez le réglage de façon à obtenir
globalement la meilleure vue. Pour obtenir des renseignements supplémentaires
concernant le mode d’utilisation de la bonnette d’oculaire, reportez-vous aux
explications relatives à l’utilisation de la lentille oculaire. (voir 3)
4. Viseur
La viseur se trouve au-dessus du cache. Tournez le cache librement jusqu’à ce
que l’alignement soit satisfaisant.
5. Mise au point
Faites pivoter le bouton de mise au point et effectuez le réglage de façon à ce
que l’objet apparaisse nettement dans le champ optique. Vous pouvez obtenir
une mise au point sur de longues distances en tournant le bouton de mise au
point vers la droite (à partir du côté lentille oculaire), alors qu’en tournant vers
la gauche, vous obtenez une mise au point sur de courtes distances.
6. Utilisation du cache
Retirez-le et utilisez-le quand c’est nécessaire. (voir 6)
7. Vis de blocage
Desserrez la vis de blocage pour faire tourner l’instrument librement à droite et
à gauche et pour trouver ainsi la position la mieux adaptée à l’observation. Il
existe deux positions d’arrêt pendant la rotation de l’instrument à droite et à
gauche. Fixez la vis de blocage en la serrant dans la meilleure position possible.
(voir 7)
Funzionamento
1. Fissaggio dello strumento al treppiede.
Lo spotting scope deve essere fissato ad un treppiede, ecc. (ved. 1-1)
Per montare il treppiede, utilizzare il foro della vite di fissaggio apposito, situato
nella parte inferiore dell’unità.
Aprire il dispositivo di fissaggio, nella parte inferiore della custodia, per utilizzare
lo spotting scope fissato al treppiede, quando l’unità rimane all’interno della
custodia stessa. (ved 1-2)
2. Montaggio dell’oculare (extra)
Inserire fermamente l’oculare nella sezione di montaggio. Ruotare l’anello di
fissaggio dell’oculare nella direzione di blocco (→ LOCK), indicata sull’unità, e
bloccare saldamente l’oculare. (ved 2)
Per rimuovere l’oculare, allentare l’anello di fissaggio ruotandolo nella direzione
inversa rispetto a quella di blocco, e staccare le lente.
3. Coprilente
É possibile variare la posizione del coprilente secondo il suo intervallo di
regolazione quando si utilizza l’oculare XW o l’oculare dello Zoom. Se si utilizza
l’oculare XF, selezionare una posizione con anello dell’oculare a quattro elicoidi.
Regolare in modo da ottenere la migliore veduta generale possibile. Per maggiori
dettagli sul coprilente, fare riferimento all’uso dell’oculare nel manuale utente.
(ved 3)
4. Mirino
Il mirino è posizionato sul cappuccio. Ruotare il cappuccio fino a raggiungere
l’allineamento. (ved 4)
5. Messa a fuoco
Ruotare il pomello di messa a fuoco, regolandolo in modo da osservare
chiaramente l’oggetto all’interno del campo visivo. La rotazione del pomello di
messa a fuoco verso destra (visto dal lato dell’oculare) consente di mettere a
fuoco lunghe distanze. La rotazione del pomello di messa a fuoco verso sinistra,
permette invece di mettere a fuoco brevi distanze. (ved 5)
6. Utilizzo del cappuccio
Estrarre il cappuccio ed utilizzarlo quando necessario. (ved 6)
7. Vite di fissaggio
Allentare la vite di fissaggio per ruotare l’unità liberamente di 90 gradi a sinistra
o a destra in modo da ottenere la migliore posizione di osservazione. Si avvertono
due click di arresto non appena l’unità viene ruotata a sinistra e a destra. Serrare
la vite di fissaggio stringendola nella posizione più adatta. (ved 7)
Français
Italiano
使い方
1. 三脚への取り付け
スポッティングスコープ本体を、三脚などに取り付けてご使用ください。
(1-1)
三脚には、本体下部にあるカメラ三脚用ネジ穴を使用してください。
なお、ケース下部のファスナーを開けると、スポッティングスコープはケース
に入れたまま三脚に取り付けられ使用できます。(1-2)
2. 接眼レンズ(別売り)の取付
本体の接眼レンズ取付け部に、接眼レンズを奥までしっかりと差込み、接眼レ
ンズ固定リングを本体にあるロック(→ LOCK)の方向に回して接眼レンズを
しっかり固定してください。(2)
接眼レンズを外すときは、接眼レンズ固定リングをロックの逆の方向に回して
緩め、接眼レンズを抜いてください。
3. アイカップ
当社製 XW アイピース、XF アイピース、ズームアイピースをご使用の場合、
アイカップの位置はXWアイピース、ズームアイピースでは可動範囲内に自由
に調節できます。XFアイピースでは 4段式クリックを採用し 4ヶ所の位置で
選択できます。それぞれ、視野全体が見易い位置に調節してご使用下さい。ア
イカップの詳しい使用方法は、接眼レンズ(アイピース)の使用説明書をご参
照下さい。(3)
4. 照準
フード上部に照準があります。フードは自由に回転しますので、照準を見易い
位置に回転させてご使用下さい。(4)
5. ピント合わせ
フォーカスノブを回転させ、目標物が視野内ではっきり見える様に調節して下
さい。
フォーカスノブを接眼レンズ側より見て右に回しますと、遠距離にピントが合
います。
左に回しますと、近距離にピントが合います。(5)
6. フードの使用
必要に応じて引き出してご使用ください。(6)
7. クランプネジ
クランプネジをゆるめると本体が左右90°づつ回転し、観察に最も快適な姿
勢がとれます。本体回転位置に、クリックが左右2ヶ所あります。最も良い位
置でクランプネジを締め付けて固定してください。(7)
How to Use
1. Attach to the tripod.
The spotting scope unit should be used attached to a tripod, etc. (see 1-1).
The camera tripod screw hole at the bottom of the unit should be used to attach
the tripod.
Opening the fastener at the bottom of the case makes it possible to use the
spotting scope attached to the tripod while the unit remains inside its case. (see
1-2)
2. Attaching the eyepiece lens (extra)
Insert the eyepiece lens firmly into the eyepiece lens attachment section, turn
the eyepiece lens fixing ring in the (→ LOCK) direction on the unit, and fix the
lens securely. (see 2)
To remove, loosen the eyepiece lens fixing ring in the reverse direction from the
locking direction and detach the lens.
3. Eye cap
The position of the eye cap can be freely adjusted within the movable range
when using XW Eyepiece or Zoom Eyepiece. When using XF Eyepiece, select
a position with the four-stop helicoids-type eyepiece ring. Adjust to obtain the
best possible overall view. For further details on how to use the eye cap, see the
Owner's Manual for the eyepiece. (see 3)
4. Sight
The sight is located above the hood. Rotate the hood freely until alignment is
suitable. (see 4)
5. Focusing
Tu rn the focus knob and adjust so that the object can be clearly seen within the
filed of view. Turing the focus knob to the right (from the eyepiece lens side)
enables focusing at long distances. Turing to the left results in focusing at short
distances. (see 5)
6. Using the hood
Pull out and use when necessary. (see 6)
7. Clamp screw
Loosen the clamp screw to turn the unit freely 90 degrees to the left or right and
obtain the most suitable posture for observation. There are two click stops as
the unit is rotated to the left and right. Fix the clamp screw by tightening it in the
most suitable position. (see 7)
English日本語
1-1
4
2 3 5
Deutsch
使用方法
1. 安裝三角架。
望遠鏡使用時應安裝在三角架或類似裝置上。(參閱圖 1-1)
用儀器下方的相機三角架螺絲孔連接三角架。
打開箱盒底部的緊固件,就可以一面架在三角架上,一面在箱盒內使用望遠鏡。
(參閱圖 1-2)
2. 安裝目鏡鏡頭(另件)
將目鏡鏡頭牢牢地插入目鏡鏡頭安裝部位,沿儀器上箭頭(→ LOCK)方向旋轉
目鏡鏡頭緊固環環,上緊目鏡鏡頭。(參閱圖 2)
移動裝置時,反向旋轉,鬆開目鏡緊固環,取下目鏡鏡頭。
3. 眼杯
使用本公司製造的XW目鏡、 XF 目鏡以及放大目鏡時, XW 目鏡和放大目鏡的
眼杯位置可在允許範圍內任意調節。XF目鏡採用4檔式卡緊點,可從4處位置
中進行選擇。請調節眼杯,使各目鏡獲得盡可能好的觀察視野。眼杯使用的詳細
內容請參見目鏡的使用說明書。
4. 準直儀
準直儀在防護罩的上方。防護罩可自由旋轉,使用時請將準直儀旋轉至最佳觀測
位置。
5. 調焦
旋轉調焦旋鈕,直至在視野內獲得被觀測物的清晰成像。向右(從目鏡鏡頭一
側)旋轉成像距離增大。向左旋轉成像距離縮小。(參閱圖5)
6. 使用防護罩
必要時可將防護罩拉出來使用。(參閱圖 6)
7. 夾緊螺絲
鬆開夾緊螺絲,裝置即可左右轉動各90度,以調節最佳觀測位置。旋轉全程中
有左右兩處卡緊點,可聽到“噠”聲。找到最佳位置後用夾緊螺絲固定。
中國語
1-2 6
7
English
Specifications
Models
Features
Type
Effective diameter of objective lens
Attachment diameter
Eyepiece ring
Focusing range
Length x Height x Width
(Body)
Weight (Body)
Filter ring diameter
Waterproof
Tripod mount
Accessories
Eyepiece lens
Magnification
Real field of view
Apparent field of view
Field of view at 1000 m
Field of view at 1000 yards
Exit pupil aperture
Eye relief
Relative brightness
Length x Outside diameter
(Eyepiece lens)
Weight (Eyepiece lens)
PF-65 ED
22
22
2
PF-65 ED
A
22
22
2
Porro-prism Straight type Porro-prism 45° Angle type
65mm
31.7mm (1.25 inch)
Collet type
About 5m to infinity (about 19.0 ft to infinity)
270mm x 115mm x 85mm 270mm x 120mm x 85mm
10.6 in. x 4.5 in. x 3.3 in. 10.6 in. x 4.7 in. x 3.3 in.
1050g (37 oz.) 1070g (37.7 oz.)
67mm (M67 P=0.75)
1m depth of water (JIS class 6), Nitrogen filled
1/4 inch
Objective lens cap, Eyepiece ring cap, Case
XF12 XF8.5
XF ZOOM
XW20 XW14 XW10 XW7
ZOOM
EYEPIECE EYEPIECE
6.5mm - 8mm -
19.5mm 24mm
32.5 x 46 x 20x - 60x 19.5 x 28 x 39 x 55.5 x 16x - 48x
1.85° 1.3° 2.1° - 1° 3.5° 2.5° 1.8° 1.25° 2.4° - 1.25°
60° 60° 42° - 60° 70° 70° 70° 70° 38° - 60°
32m 22m 37 – 17m 61m 44m 31m 21m 40 – 21m
96ft 66ft 117 – 51ft 183ft 132ft 93ft 63ft 120 – 63ft
2.0mm 1.4mm 3.2 - 1.1mm 3.3mm 2.4mm 1.7mm 1.2mm 4 - 1.4mm
18mm 18mm 11 – 15mm 20mm 20mm 20mm 20mm 18 - 22mm
4.0 1.9 10.2 - 1.2 10.9 5.7 2.9 1.4 16 - 1.7
78 x 43mm 83 x 43mm 88 x 50mm 86 x 61mm 97 x 61mm 110 x 61mm 120 x 61mm 144 x 69mm
3.1 x 1.7 in. 3.3 x 1.7 in. 3.5 x 2.0 in. 3.4 x 2.4 in. 3.8 x 2.4 in. 4.3 x 2.4 in. 4.7 x 2.4 in. 5.7 x 2.7 in.
155 g 150g 240g 355g 365g 390g 390g 550g
5.5 oz. 5.3 oz. 8.5 oz. 12.5 oz. 12.9 oz. 13.8 oz. 13.8 oz. 19.4 oz.
Français
Caractéristique
Modèle
Caractéristiques
Type
Diamètre effectif de l’objectif
Diamètre de fixation
Bague d’oculaire
Plage de mise au point
Longueur x Hauteur x Largeur
(corps)
Poids (corps)
Diamètre de la bague de filtre
Etanchéité
Pied à trois branches
Accessoires
Lentille oculaire
Grossissement
Champ visuel réel
Champ apparent de vision
Champ visuel à 1000m
Ouverture de la pupille de sortie
Dégagement oculaire
Luminosité relative
Longueur x Diamètre externe
(lentille oculaire)
Poids (lentille oculaire)
PF-65 ED
22
22
2
PF-65 ED
A
22
22
2
Prisme de Porro, type droit Prisme de Porro, angle type 45°
65mm
31.7mm
type serrage
De 5m environ à l’infini
270mm x 115mm x 85mm 270mm x 120mm x 85mm
1050g 1070g
67mm (M67 P=0.75)
Jusqu’à 1m de profondeur, Fûts d’objectif remplis à l’azote
1/4 pouce
Bouchons d’objectifs, bouchons anti-pluie (Bouchon d’oculaire) Étui, courroie
XF12 XF8.5
XF ZOOM
XW20 XW14 XW10 XW7
ZOOM
EYEPIECE EYEPIECE
6.5mm - 8mm -
19.5mm 24mm
32,5 x 46 x 20x - 60x 19,5 x 28 x 39 x 55,5 x 16x - 48x
1,85° 1,3° 2,1° - 1° 3,5° 2,5° 1,8° 1,25° 2,4° - 1,25°
60° 60° 42° - 60° 70° 70° 70° 70° 38° - 60°
32 m 22 m 37 – 17m 61m 44m 31m 21m 40 – 21m
2,0 mm 1,4mm 3,2 - 1,1mm 3,3mm 2,4mm 1,7mm 1,2mm 4 - 1,4mm
18 mm 18mm 11 – 15mm 20mm 20mm 20mm 20mm 18 - 22mm
4.0 1,9 10,2 - 1,2 10,9 5,7 2,9 1,4 16 - 1,7
78 x 43mm 83 x 43mm 88 x 50mm 86 x 61mm 97 x 61mm 110 x 61mm 120 x 61mm 144 x 69mm
155g 150g 240g 355g 365g 390g 390g 550g
Italiano
Dati tecnici
Modelli
Caratteristiche
Tipo
Diametro dell’obiettivo
Diametro dell’accessorio
Anello oculare
Campo di messa a fuoco
Lunghezza x Altezza x Larghezza
(Corpo)
Peso (Corpo)
Diametro anello filtro
Impermeabile
Treppiede
Accessori
Oculare
Ingrandimento
Angolo di campo
Campo di visione apparente
Campo visivo a 1000m
Pupilla d’uscita
Distanza tra gli oculari
Luminosità relativa
Lunghezza x Diametro esterno
(Oculare)
Peso (Oculare)
PF-65 ED
22
22
2
PF-65 ED
A
22
22
2
Porro-prism Straight type Porro-prism 45° Angle type
65mm
31.7mm
Tipo a virola
Da circa 5m a infinito
270mm x 115mm x 85mm 270mm x 120mm x 85mm
1050g 1070g
67mm (M67 P=0.75)
1m d’acqua, corpo riempito interamente d’azoto
1/4"
Tappi obiettivi, tappi stagni (per oculari), custodia, tracolla
XF12 XF8.5
XF ZOOM
XW20 XW14 XW10 XW7
ZOOM
EYEPIECE EYEPIECE
6.5mm - 8mm -
19.5mm 24mm
32,5 x 46 x 20x - 60x 19,5 x 28 x 39 x 55,5 x 16x - 48x
1,85° 1,3° 2,1° - 1° 3,5° 2,5° 1,8° 1,25° 2,4° - 1,25°
60° 60° 42° - 60° 70° 70° 70° 70° 38° - 60°
32m 22m 37 – 17m 61m 44m 31m 21m 40 – 21m
2,0mm 1,4mm 3,2 - 1,1mm 3,3mm 2,4mm 1,7mm 1,2mm 4 - 1,4mm
18mm 18mm 11 – 15mm 20mm 20mm 20mm 20mm 18 - 22mm
4.0 1,9 10,2 - 1,2 10,9 5,7 2,9 1,4 16 - 1,7
78 x 43mm 83 x 43mm 88 x 50mm 86 x 61mm 97 x 61mm 110 x 61mm 120 x 61mm 144 x 69mm
155g 150g 240g 355g 365g 390g 390g 550g
Español
Ficha técnica
Modelos
Características
Típo
Diámetro efectivo del objetivo
Diámetro de acoplamiento
Anillo de ocular
Escala de enfoque
Longitud x Altura x Anchura
(cuerpo)
Peso (Cuerpo)
Diámetro del anillo filtro
Impermeabilidad
Trípode
Accesorios
Ocular
Aumento
Campo de visión real
Campo de visión aparente
Campo de visión a 1000 m
Pupila de Salida
Espacio ocular
Luminosidad relativa
Longitud x Diámetro externo
(Ocular)
Peso (Ocular)
PF-65 ED
22
22
2
PF-65 ED
A
22
22
2
Porro-prisma, tipo recto Porro-prisma, Ángulo de 45°
65mm
31.7mm
Tipo anillo guía
Aproximadamente 5m a infinito
270mm x 115mm x 85mm 270mm x 120mm x 85mm
1050g 1070g
67mm (M67 P=0.75)
1 m de profundidad de agua, relleno de nitrogeno
1/4 plug
Tapas para los objetivos, tapas de protección contra la lluvia (tapas para los oculares) Estuche, correa para el cuello
XF12 XF8.5
XF ZOOM
XW20 XW14 XW10 XW7
ZOOM
EYEPIECE EYEPIECE
6.5mm - 8mm -
19.5mm 24mm
32,5 x 46 x 20x - 60x 19,5 x 28 x 39 x 55,5 x 16x - 48x
1,85° 1,3° 2,1° - 1° 3,5° 2,5° 1,8° 1,25° 2,4° - 1,25°
60° 60° 42° - 60° 70° 70° 70° 70° 38° - 60°
32m 22m 37 – 17m 61m 44m 31m 21m 40 – 21m
2,0mm 1,4mm 3,2 - 1,1mm 3,3mm 2,4mm 1,7mm 1,2mm 4 - 1,4mm
18mm 18mm 11 – 15mm 20mm 20mm 20mm 20mm 18 - 22mm
4.0 1,9 10,2 - 1,2 10,9 5,7 2,9 1,4 16 - 1,7
78 x 43mm 83 x 43mm 88 x 50mm 86 x 61mm 97 x 61mm 110 x 61mm 120 x 61mm 144 x 69mm
155g 150g 240g 355g 365g 390g 390g 550g
中國語
規格
型號
規格
類型
物鏡直徑
附件直徑
目鏡環
封焦範圍
長×高×寬(機體)
重量(機體)
濾光片安裝直徑
防水
三角架
配件
目鏡透鏡
放大倍率
觀景角度場
視在視場
觀景範圍在1000米
瞳鏡直徑
目程
相對光度
長×外徑(目鏡)
重量(目鏡)
PF-65 ED
22
22
2
PF-65 ED
A
22
22
2
波魯稜鏡 直視型 波魯稜鏡 45° 傾斜型
65毫米
31.7毫米
來套型
約5米 -無限遠
270毫米×115毫米×85毫米 270毫米×120毫米×85毫米
1050克 1070克
67毫米(M67 P=0.75)
一米水深,內注氮氣
1/4吋
物鏡罩,目鏡罩,望遠鏡套
XF12 XF8.5
XF ZOOM
XW20 XW14 XW10 XW7
ZOOM
EYEPIECE EYEPIECE
6.5-9.5毫米 8-24毫米
32.5 x 46 x 20x - 60x 19.5 x 28 x 39 x 55.5 x 16x - 48x
1.85° 1.3° 2.1° - 1° 3.5° 2.5° 1.8° 1.25° 2.4° - 1.25°
60° 60° 42° - 60° 70° 70° 70° 70° 38° - 60°
32 米 22 米 37 - 17米 61 米 44 米 31 米 21 米 40 - 21 米
2.0毫米 1.4毫米 3.2 - 1.1毫米 3.3毫米 2.4毫米 1.7毫米 1.2毫米 4 - 1.4 米
18毫米 18毫米 11 - 15毫米 20毫米 20毫米 20毫米 20毫米 18 - 22毫米
4.0 1.9 10.2 - 1.2 10.9 5.7 2.9 1.4 16 - 1.7
78 x 43毫米 83 x 43毫米 88 x 50毫米 86 x 61毫米 97 x 61毫米 110 x 61毫米 120 x 61毫米 144 x 69毫米
155克 150克 240克 355克 365克 390克 390克 550克
Nederlands
Ficha técnica
Modellen
Kenmerken
Type
Effectieve opening van frontlens
Diameter aansluiting
Oculairring
Scherpstelbereik
Lengte x hoogte x breedte
(Body)
Gewicht (Body)
Diameter filterring
Waterbestendigheid
Statief
Accessoires
Oculairlens
Vergroting
Beeldhoek
Waarneembaar blikveld
Beeldveld op 1000 m
Uittredepupil
Oogbeschermer
Relatieve helderheid
Lengte x buitendiameter
(Oculairlens)
Gewicht (Oculairlens)
PF-65 ED
22
22
2
PF-65 ED
A
22
22
2
Porro-prisma Dakkant-type Porro-prisma 45 graden-hoek type
65mm
31.7mm
Spantangtype
Ongeveer 5 m tot oneindig
270mm x 115mm x 85mm 270mm x 120mm x 85mm
1050g 1070g
67mm (M67 P=0.75)
1m waterdiepte, stikstofvulling
1/4 inch
Objectiefdop, beschermdop tegen regen (oculairdop) tas, draagriem
XF12 XF8.5
XF ZOOM
XW20 XW14 XW10 XW7
ZOOM
EYEPIECE EYEPIECE
6.5mm - 8mm -
19.5mm 24mm
32,5 x 46 x 20x - 60x 19,5 x 28 x 39 x 55,5 x 16x - 48x
1,85° 1,3° 2,1° - 1° 3,5° 2,5° 1,8° 1,25° 2,4° - 1,25°
60° 60° 42° - 60° 70° 70° 70° 70° 38° - 60°
32 m 22m 37 – 17m 61m 44m 31m 21m 40 – 21m
2,0 mm 1,4mm 3,2 - 1,1mm 3,3mm 2,4mm 1,7mm 1,2mm 4 - 1,4mm
18 mm 18mm 11 – 15mm 20mm 20mm 20mm 20mm 18 - 22mm
4.0 1,9 10,2 - 1,2 10,9 5,7 2,9 1,4 16 - 1,7
78 x 43mm 83 x 43mm 88 x 50mm 86 x 61mm 97 x 61mm 110 x 61mm 120 x 61mm 144 x 69mm
155g 150g 240g 355g 365g 390g 390g 550g
Deutsch
Technische Daten
Modelle
Merkmale
Typ
Tatsächlicher Objektivdurchmesser
Vorsatzdurchmesser
Okularring
Scharfeinstellbereich
Länge x Höhe x Breite
(Körper)
Gewicht (Körper)
Filterring-Durchmesser
Wasserdicht
Stativ
Zubehör
Okuarlinse
Vergrößerung
Tatsächliches Sehfeld
Sichtfeld
Sehfeld bei 1000 m
Austrittspupille
Augenpunkt
Relative Helligkeit
Länge x Außendurchmesser
(Okularlinse)
Gewicht (Okularlinse)
PF-65 ED
22
22
2
PF-65 ED
A
22
22
2
Grades Porro-Prisma 45° Winkelsucher Porro-prisma
65mm
31.7mm
Fassung
ca. 5m bis unendlich
270mm x 115mm x 85mm 270mm x 120mm x 85mm
1050g 1070g
67mm (M67 P=0.75)
1 m Wassertiefe, stickstoffgefüllt
1/4”
Objektivlinsendeckel, Regenschutzdeckel (Okularlinsendeckel), Halsriemen
XF12 XF8.5
XF ZOOM
XW20 XW14 XW10 XW7
ZOOM
EYEPIECE EYEPIECE
6.5mm - 8mm -
19.5mm 24mm
32,5 x 46 x 20x - 60x 19,5 x 28 x 39 x 55,5 x 16x - 48x
1,85° 1,3° 2,1° - 1° 3,5° 2,5° 1,8° 1,25° 2,4° - 1,25°
60° 60° 42° - 60° 70° 70° 70° 70° 38° - 60°
32m 22m 37 – 17m 61m 44m 31m 21m 40 – 21m
2,0mm 1,4mm 3,2 - 1,1mm 3,3mm 2,4mm 1,7mm 1,2mm 4 - 1,4mm
18mm 18mm 11 – 15mm 20mm 20mm 20mm 20mm 18 - 22mm
4.0 1,9 10,2 - 1,2 10,9 5,7 2,9 1,4 16 - 1,7
78 x 43mm 83 x 43mm 88 x 50mm 86 x 61mm 97 x 61mm 110 x 61mm 120 x 61mm 144 x 69mm
155g 150g 240g 355g 365g 390g 390g 550g
日本語
仕 様
機 種
仕 様
形 式
対物レンズ有効径
接眼レンズ取り付け径
接眼レンズ取付方式
焦点調整範囲
長さ×高さ×幅(本体)
質量(本体)
フィルター取付径
防水性(本体)
三脚座
付属品
接眼レンズ
倍 率
実視界
見掛け視界
1000mでの視界
ひとみ径
アイレリーフ
明るさ
長さ×外径(接眼レンズ)
質量(接眼レンズ)
PF-65ED
2
PF-65ED
A2
ポロプリズム 直視型 ポロプリズム 45°傾斜型
65mm
31.7mm
コレット式
約 5m〜無限遠
270mmx115mmx85mm 270mmx120mmx85mm
1050g 1070g
67mm(M67P=0.75)
JIS保護等級6級相当、水洗い防水形(1m防水)、窒素ガス封入
1/4inch
対物レンズキャップ、接眼部キャップ、ケース
XF12 XF8.5
XFZOOM
XW20 XW14 XW10 XW7
ZOOM
EYEPIECE EYEPIECE
6.5mm- 8mm-
19.5mm 24mm
32.5x 46x 20x〜60x 19.5x 28x 39x 55.5x 16x〜48x
1.85° 1.3° 2.1°〜1° 3.5° 2.5° 1.8° 1.25° 2.4°〜1.25°
60° 60° 42°〜60° 70° 70°70°70°38°〜60°
32m 22m 37〜17m 61m 44m 31m 21m 40〜21m
2.0mm 1.4mm 3.2〜1.1mm 3.3mm 2.4mm 1.7mm 1.2mm 4〜1.4mm
18mm 18mm 11〜15mm 20mm 20mm 20mm 20mm 18〜22mm
4.0 1.9 10.2〜1.2 10.9 5.7 2.9 1.4 16〜1.7
78x43mm 83x43mm 88x50mm 86x61mm 97x61mm 110x61mm 120x61mm 144x69mm
155g 150g 240g 355g 365g 390g 390g 550g
 Loading...