OPERATION
INTRODUCTION
Congratulations. You are now the owner of one of the nest timing l ights on the market today. If you
will take a few moments to read through the following information we are sure that you will enjoy
many years of service from your timing light and through its use, increase the eciency of your car’s
engine. The special “Xenon” bulb used in these lights will provide the ultra-bright ash needed to see
engine timing marks under most bright lighting conditions, even during normal daylight. In several
models the bulb can be replaced by the user when needed reducing the need to return the light to
the factory for service.
WHAT IS TIMING?
In order for an automobile engine to function, three things are necessary: air, fuel, and a spark to
ignite the air/fuel mixture and create an explosion. The precise instant of that explosion must be
such that the maximum power is delivered to the engine piston. This is “Timing.” Each engine
manufacturer determines at the factory the exact timing necessary for various engines so that each
ounce of power is obtained from every gallon of fuel. Due to normal engine and ignition system wear,
the timing can change and will reduce both power and mileage. With the Xenon timing light, the car
owner can reset the timing to the new car standards and regain lost power and increase mileage.
Timing is given in degrees Before Top Dead Center (BTDC) or After Top Dead Center (ATDC) in the
manufacturer’s specications. In order to completely burn the air/fuel mixture in the car’s engine cyl-
inders, most timing is such that the spark occurs at a point several degrees before top dead center
(for example, 4 BTDC) to assure that full power of the explosion is obtained. Two additional terms
that manufacturers use when describing timing are; “Advanced” and “Retarded.” When the timing is
advanced, the spark will occur before the piston reaches the top of the engine cylinder (BTDC). On
some late model cars equipped with various emission control devices, the timing is retarded so that
the spark occurs after the piston has started down in the cylinder (ATDC). Engine timing is changed
by adjustment of the ignition distributor.
In order to allow setting and adjustment of the engine timing, special “Timing
Marks” are provided on each engine during assembly. In most cases, these marks appear on the
engine vibration damper or fan pulley at the lower front of the engine. On some early engines, this
mark was shown at the rear of the engine on the ywheel.
WHEN TO CHECK TIMING
The instance of spark plug ring is determined by the opening of the distributor ignition breaker
points and will change any time the point gap or dwell angle is changed. In addition, normal wear on
the breaker point rubbing block will change the dwell and aect the timing. While cars equipped with
the new “breaker-less Electronic Ignition Systems” will not normally change timing since there are no
breaker points, the timing light can still be used to note changes in timing caused by troubles in the
ignition system as well as for resetting timing when components are changed.
Read the ENTIRE IMPORTANT SAFETY INFORMATION section at the beginning of this document
including all text under subheadings therein before set up or use of this product. Note: These general
instructions will not apply to all engine designs and/ or vehicles. Consult your engine manufacturer’s
service instructions which supersede these instructions.
WARNING!
Be careful working around a running engine. Moving belts and fans can cause severe injury
if contacted. Metal engine parts are very hot. Do not contact any part of the engine. Take extreme caution
to prevent the spark plug clamp and wire from touching moving or hot parts of the engine.
Preparation:
1. Remove the battery cover in back and put Dry Battery SUM-1 or “D” size or Ni-Cr
Battery x 2 pcs. Check batteries which are connected correctly to the strobe circuit.
2. As depressing the T/L switch, the indicator lamp lights ON, which means battery power
is sucient. If it fails to illuminate or is very weak, battery power is insucient.
Replace the battery in set. NOTE: Do not use a used battery with new one together!
Operation for Timing:
1. Locate the engine’s timing mark by referring to the vehicle’s engine manual or contacting the
manufacturer. Refer to the vehicle’s manual or contact the manufacturer for the timing specications
of the engine being tested.
2. Start the engine and run for 5-15 minutes until normal operating temperature is reached.
3. Stop engine.
4. Be sure you have fresh D-cell battery’s in the light.
5. If the vehicle specications and instructions require it, locate the vacuum line that attaches to
the ignition distributor vacuum advance and disconnect the line and plug the end of it. A golf tee or
small pencil may be used to plug the line. Note: The Spark Plug Clamp is fragile and may break if
dropped or struck sharply.
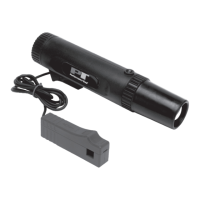
6. Connect the Spark Plug Clamp to the Spark Plug Wire as shown. The spark plug clamp must be
connected with the arrow on the clamp pointing towards the spark plug. Since this tool is self-pow-
ered the only connection is to hook up the spark plug clamp to the #1 Spark Plug.
7. Start the engine and operate at idle speed.
8. Squeeze the trigger on the timing light and direct the ash onto the engine timing marks to obtain
a reading. Compare the reading from the timing mark to the reading in the manufacturer’s specica-
tions. If the timing does not match with the timing listed in the manufacturer’s specications, adjust
the timing.
Timing Adjustment:
1. With the Engine stopped, loosen the bolt that locks down the distributor, but do not fully remove
it. It should be loose enough so that you can turn the distributor right and left. Do not over-loosen
the bolt or allow the distributor to move on its own.
2. Start the engine and run until it reaches the standard operating temperature.
3. Direct the beam from the Timing Light at the timing marks and slowly rotate the distributor in
very small increments. Turn the distributor either right or left until the timing line on the balance
lines up with the pointer mounted to the block. Refer to the vehicle’s manual for the proper
advanced setting.
4. Stop the engine.
5. Tighten the distributor lock down bolt using care not to change the position of the distributor.
6. Start the engine and recheck the timing. If the timing is incorrect, the distributor may have moved
while bolting it down. Reset the timing.
7. If you have no other tests to perform with the Timing Light, turn o the engine and reconnect the
vacuum line. If you have further tests, rst check to see if the vacuum line needs to be connected for
those tests.
IMPORTANT SAFETY INFORMATION
1. Keep work area clean. Cluttered areas invite injuries.
2. Observe work area conditions. Keep work area well lighted. Do not use electrically powered
tools in the presence of flammable gases or liquids. Do not bring combustible materials near
the tools.
3. As with any tool, use common sense when operating. Do not wear loose clothing or jewelry
that could become caught by moving parts, causing injury. Operate tool a safe distance from
yourself and others in the work area.
4. Keep children away. Children must never be allowed in the work area. Do not let them handle
machines, tools, hoses or extension cords.
5. Always wear approved eye protection when using tools.
6. Do not operate any tool if under the influence of alcohol or drugs. Read warning labels on
prescriptions to determine if your judgment or reflexes are impaired while taking drugs. If there
is any doubt, do not operate any tool.
 Loading...