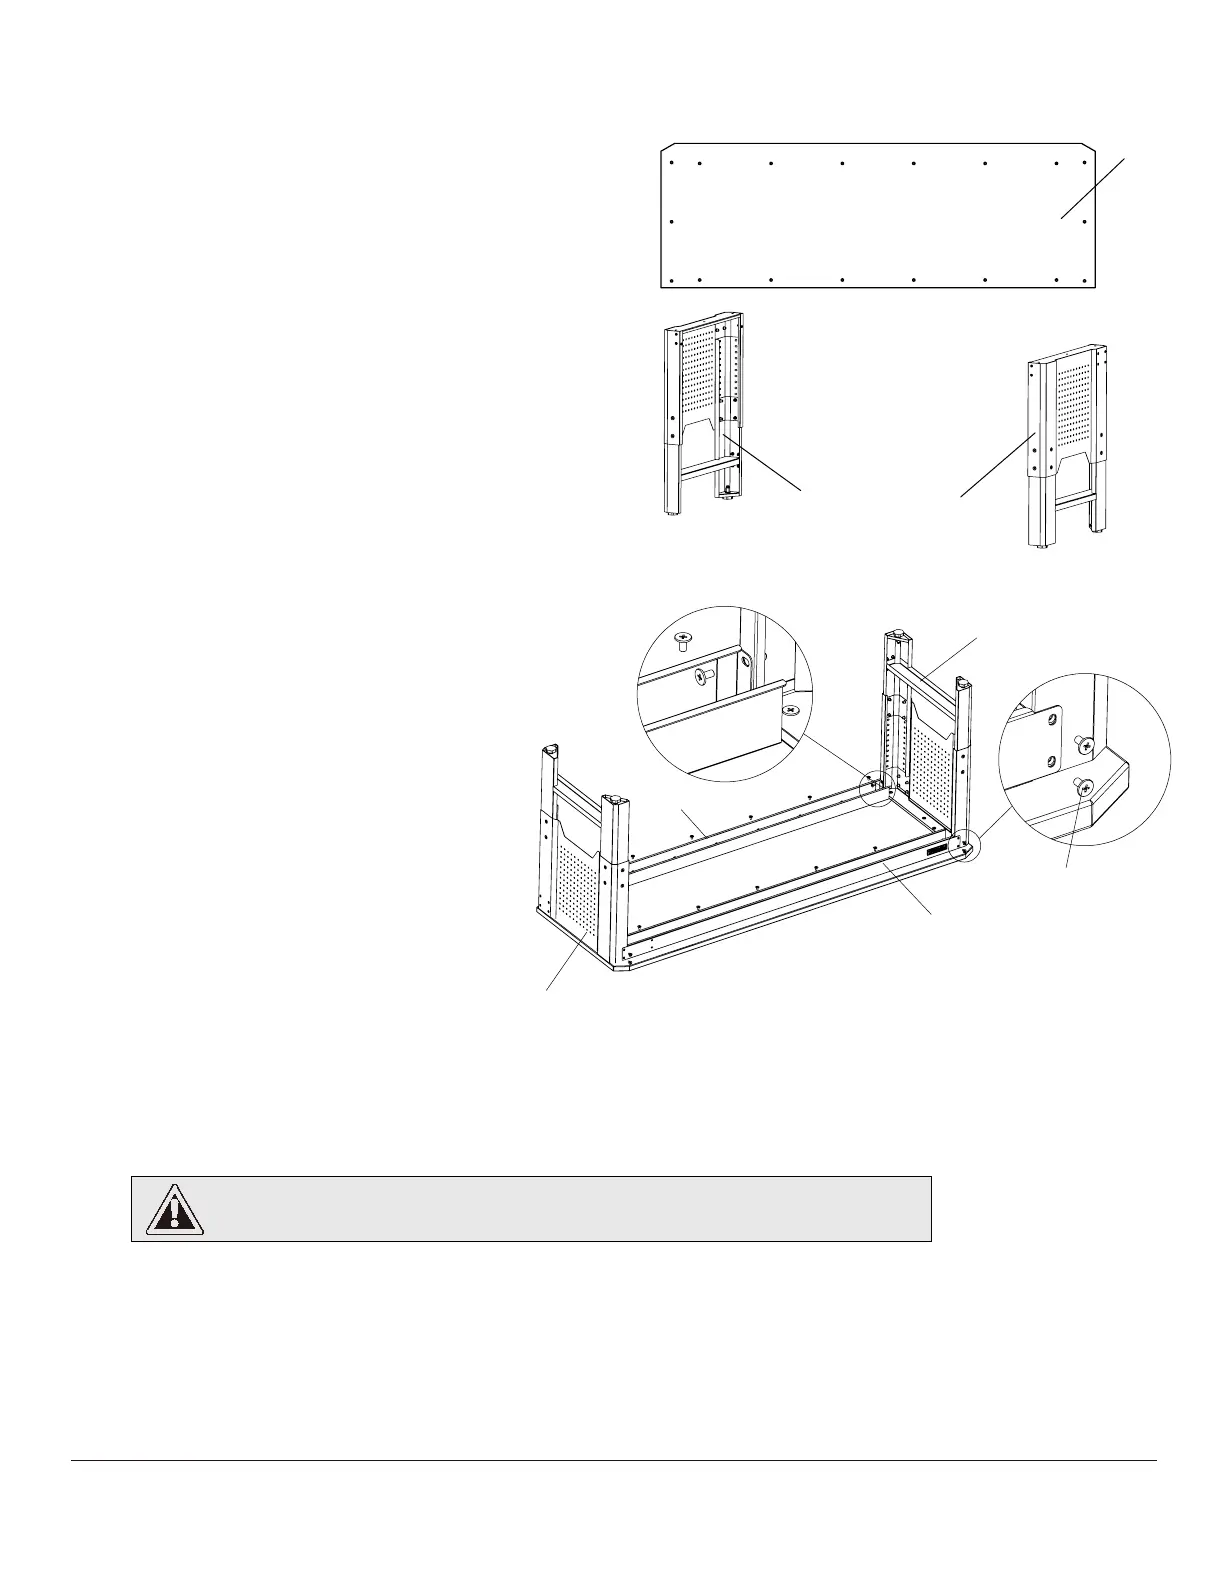
Attaching the Crossbars
5
The Front Crossbar (B) has PREFORMAX badge.
□
Attach Front Crossbar (B) to front of Table
and Rear Crossbar (C) to back of Table
□
Align the pre-drilled holes in Table with
holes in Crossbar length.
□
Partially tighten Screws (AA) through each
Crossbar (B,C) into Table .
□
Align Crossbar (B,C) end holes with holes in
Left and Right Legs (D, E).
□
On each end of Crossbar, partially tighten
screws (AA) through Crossbar holes into
Leg holes as shown in figure below.
Note: The Crossbar end flanges must be
attached so that they are on the outside
of the Leg Panels.
□
Go back and tighten all Screws (AA)
□
Attaching the Wood Table
4
Determine the front and back of table. Leg Panels
must be attached to the table with Back Rail attachment
holes to the back of table.
□
Attach the Left (D) and Right Leg Panels (E) to the
underside of the Workbench Table (A):
□
Align the pre-drilled holes in Table with holes in top
of Legs.
□
Partially tighten 3 Screws (AA) through each Leg into the
Table as shown in the figure below. Do not fully tighten
the Screws to allow for proper installation of the Crossbar
attachments.
□
7
A
Underside of Workbench Table
Table Front
Table Back
D
E
C
D
B
AA
E
CAUTION:
Ensure all Screws are properly tightened before flipping the Workbench over.
 Loading...