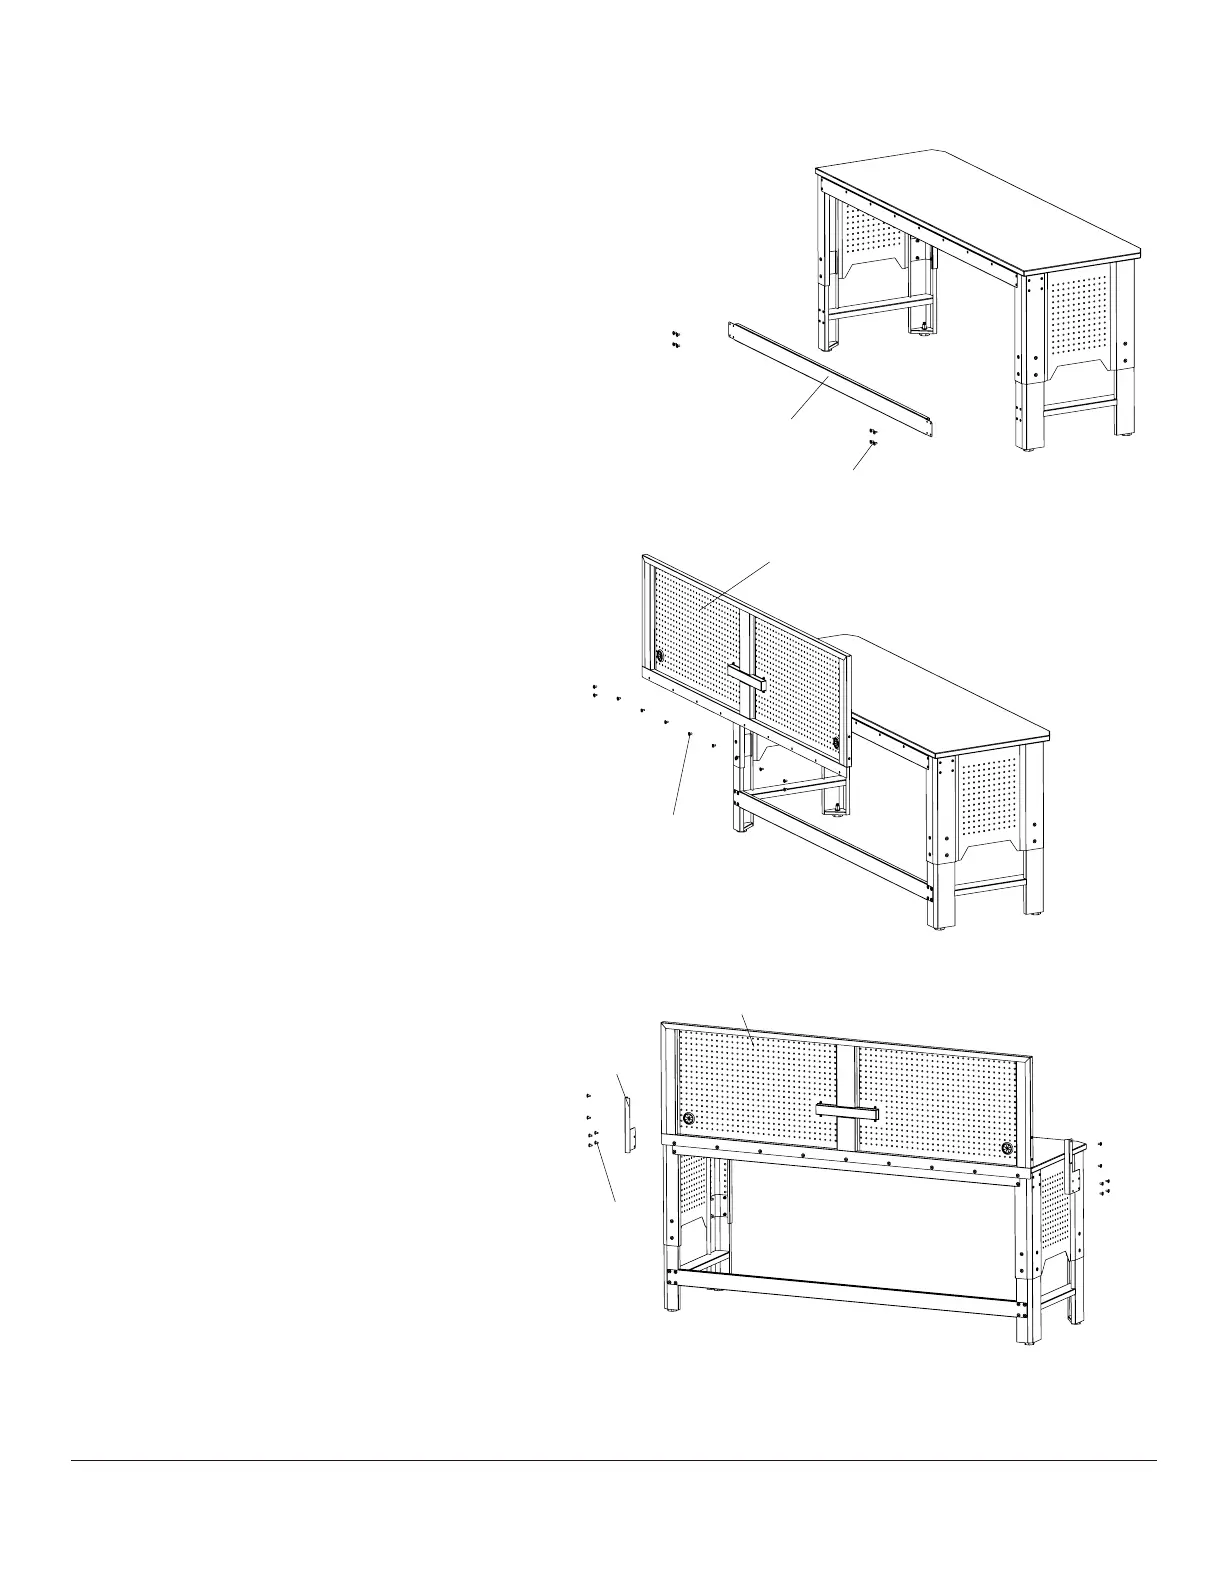
Attaching the L bracket
8
Position the L-bracket (H) over the holes on
the Pegboard (G) and the workbench.
□
Tighten 6 Screws (AA) through the L-bracket (H)
into Pegboard (G) and the workbench.
□
Repeat this process for the other side of the
Pegboard (G) to attach it to the workbench.
□
□
8
G
H
AA
Attaching the Pegboard
7
Attaching the Back Rail
6
With the help of another person,
□
□
□
carefully lift the Pegboard (G) into the
upright position as shown.
Align Pegboard (G) end holes with holes in
Rear Crossbar (C).
□
Install and tighten 11 Screws (AA) through
Pegboard (G) holes into Rear Crossbar (C) holes
as shown in the figure.
□
AA
Attach Back Rail (F) to back of Left and Right Leg Panel (D,E).
Align Back Rail end holes with holes in back of Left and
Right Legs.
Install and tighten 4 Screws (AA) through Back Rail end holes
into Leg holes as shown in figure below.
Note: The Back Rail end flanges must be attached so that
they are on the outside of the Leg Panels.
F
AA
Once the L bracket is attached, go back and
fully tighten all screws.
G