Page5of14
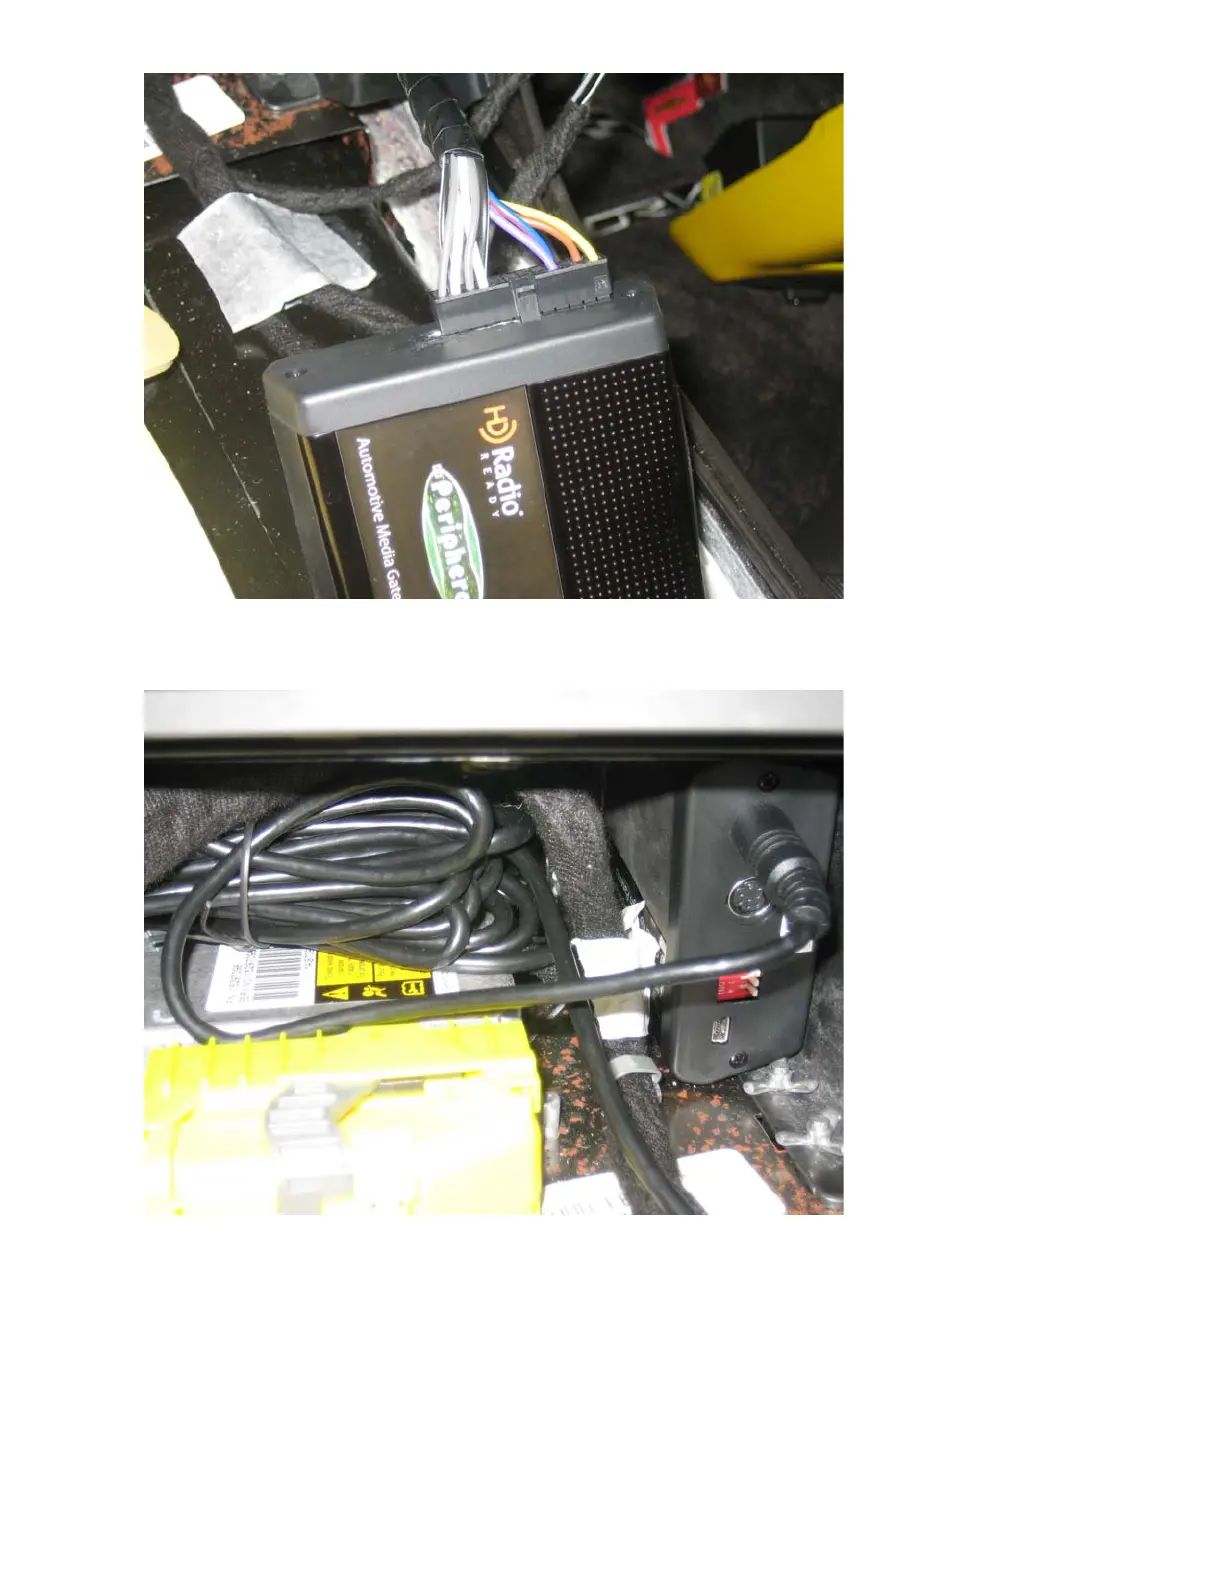
PXAMG connected to the PGHGM5 cable
This was then connected to the iPod interface cable and mounted into the space under the CC Module.
The iPod interface cable connects to the 1
st
DIN connector on the PXAMG. (Note: The four DIP switches
on the PXAMG are in the “OFF” position for correct operation)
As you can see from the above picture, I placed the extra iPod interface cable next to the PXAMG.
At this point, I wanted to test the installation out to verify its operation and functionality.
The PXAMG manual states that the first time the unit is connected to the radio it needs to initialize before
it is operational. This is done by turning the ignition on, then the radio, waiting a minute or so and then
turning the ignition off.
Once the above was done, I connected my wife’s iPod to the interface cable. Turned on the radio and
verified that the AM, FM, XM and CD worked as normal. Once normal radio functionality was confirmed, it
was time to test the PXAMG.
 Loading...