PERLICK RESIDENTIAL UNDERCOUNTER CUBELET ICE MAKER PRODUCT MANUAL
perlick customer service (800)558-5592 | 19
INSTALLATION INSTRUCTIONS
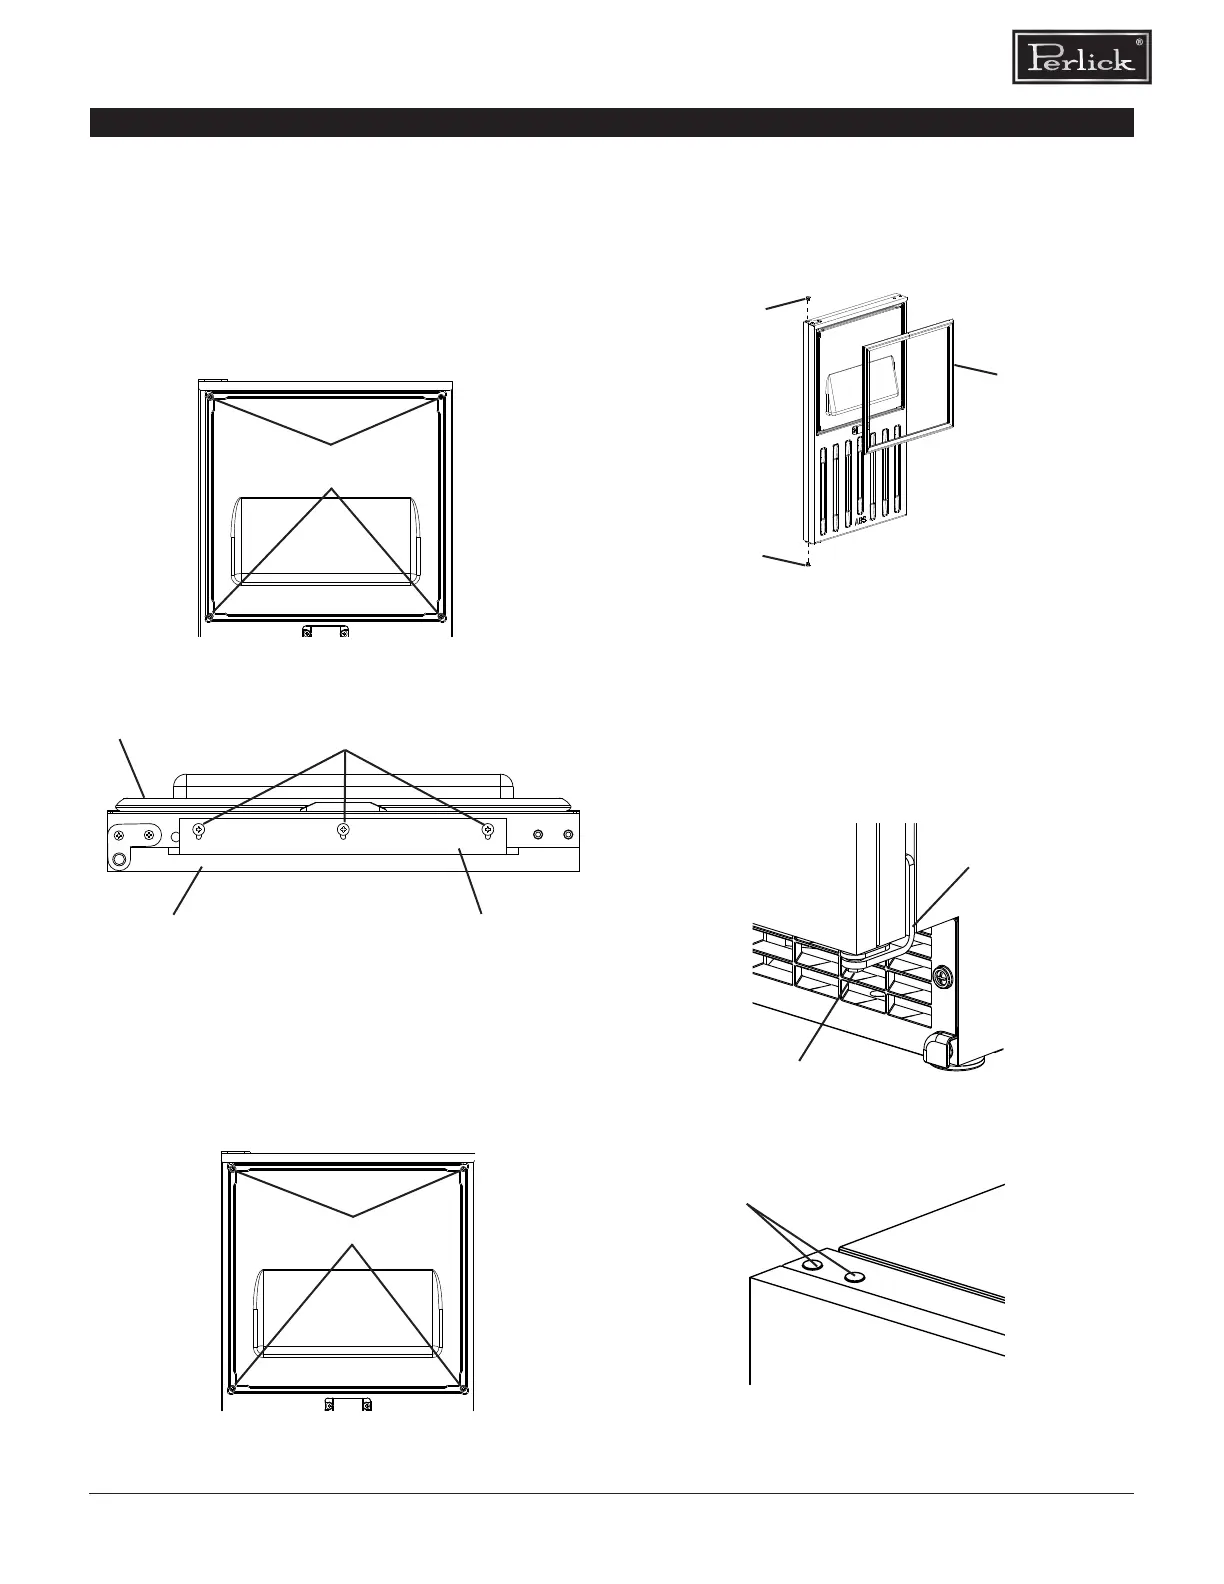
5) Fasten the overlay panel to the door using the four
M4×25 pan head screws provided. Snug the screws,
but do not ghten (See Fig. 17).
6) Fasten the sheet metal bracket to the boom of the
door with the three T2 screws provided. Tighten the
screws to the door (See Fig. 18).
8) Replace the door gasket in its proper orientaon.
Reinsert the bushings into hinge (C1) and hinge (C2)
(the hinges aached to the door) (See Fig. 20).
Snug the screws,
but do not ghten.
Fig. 17
Sheet Metal Bracket
Screws
Overlay Panel
Door
Fig. 18
7) Tighten the four M4×25 pan head screws installed in
step 5 (See Fig. 19).
Fig. 19
Tighten the screws.
Bushing
Bushing
Gasket
Fig. 20
9) Aach the door to hinge (A), then connue to maintain
a hold on the door. Screw the hinge stop pin into hinge
(B) unl it is ght (See Fig. 21).
10) Insert the 2 canoe clips included in the accessory bag
into the holes on top of the door (See Fig. 22).
Hinge Stop Pin
Hinge (B)
Fig. 21
Canoe Clips
Fig. 22
 Loading...