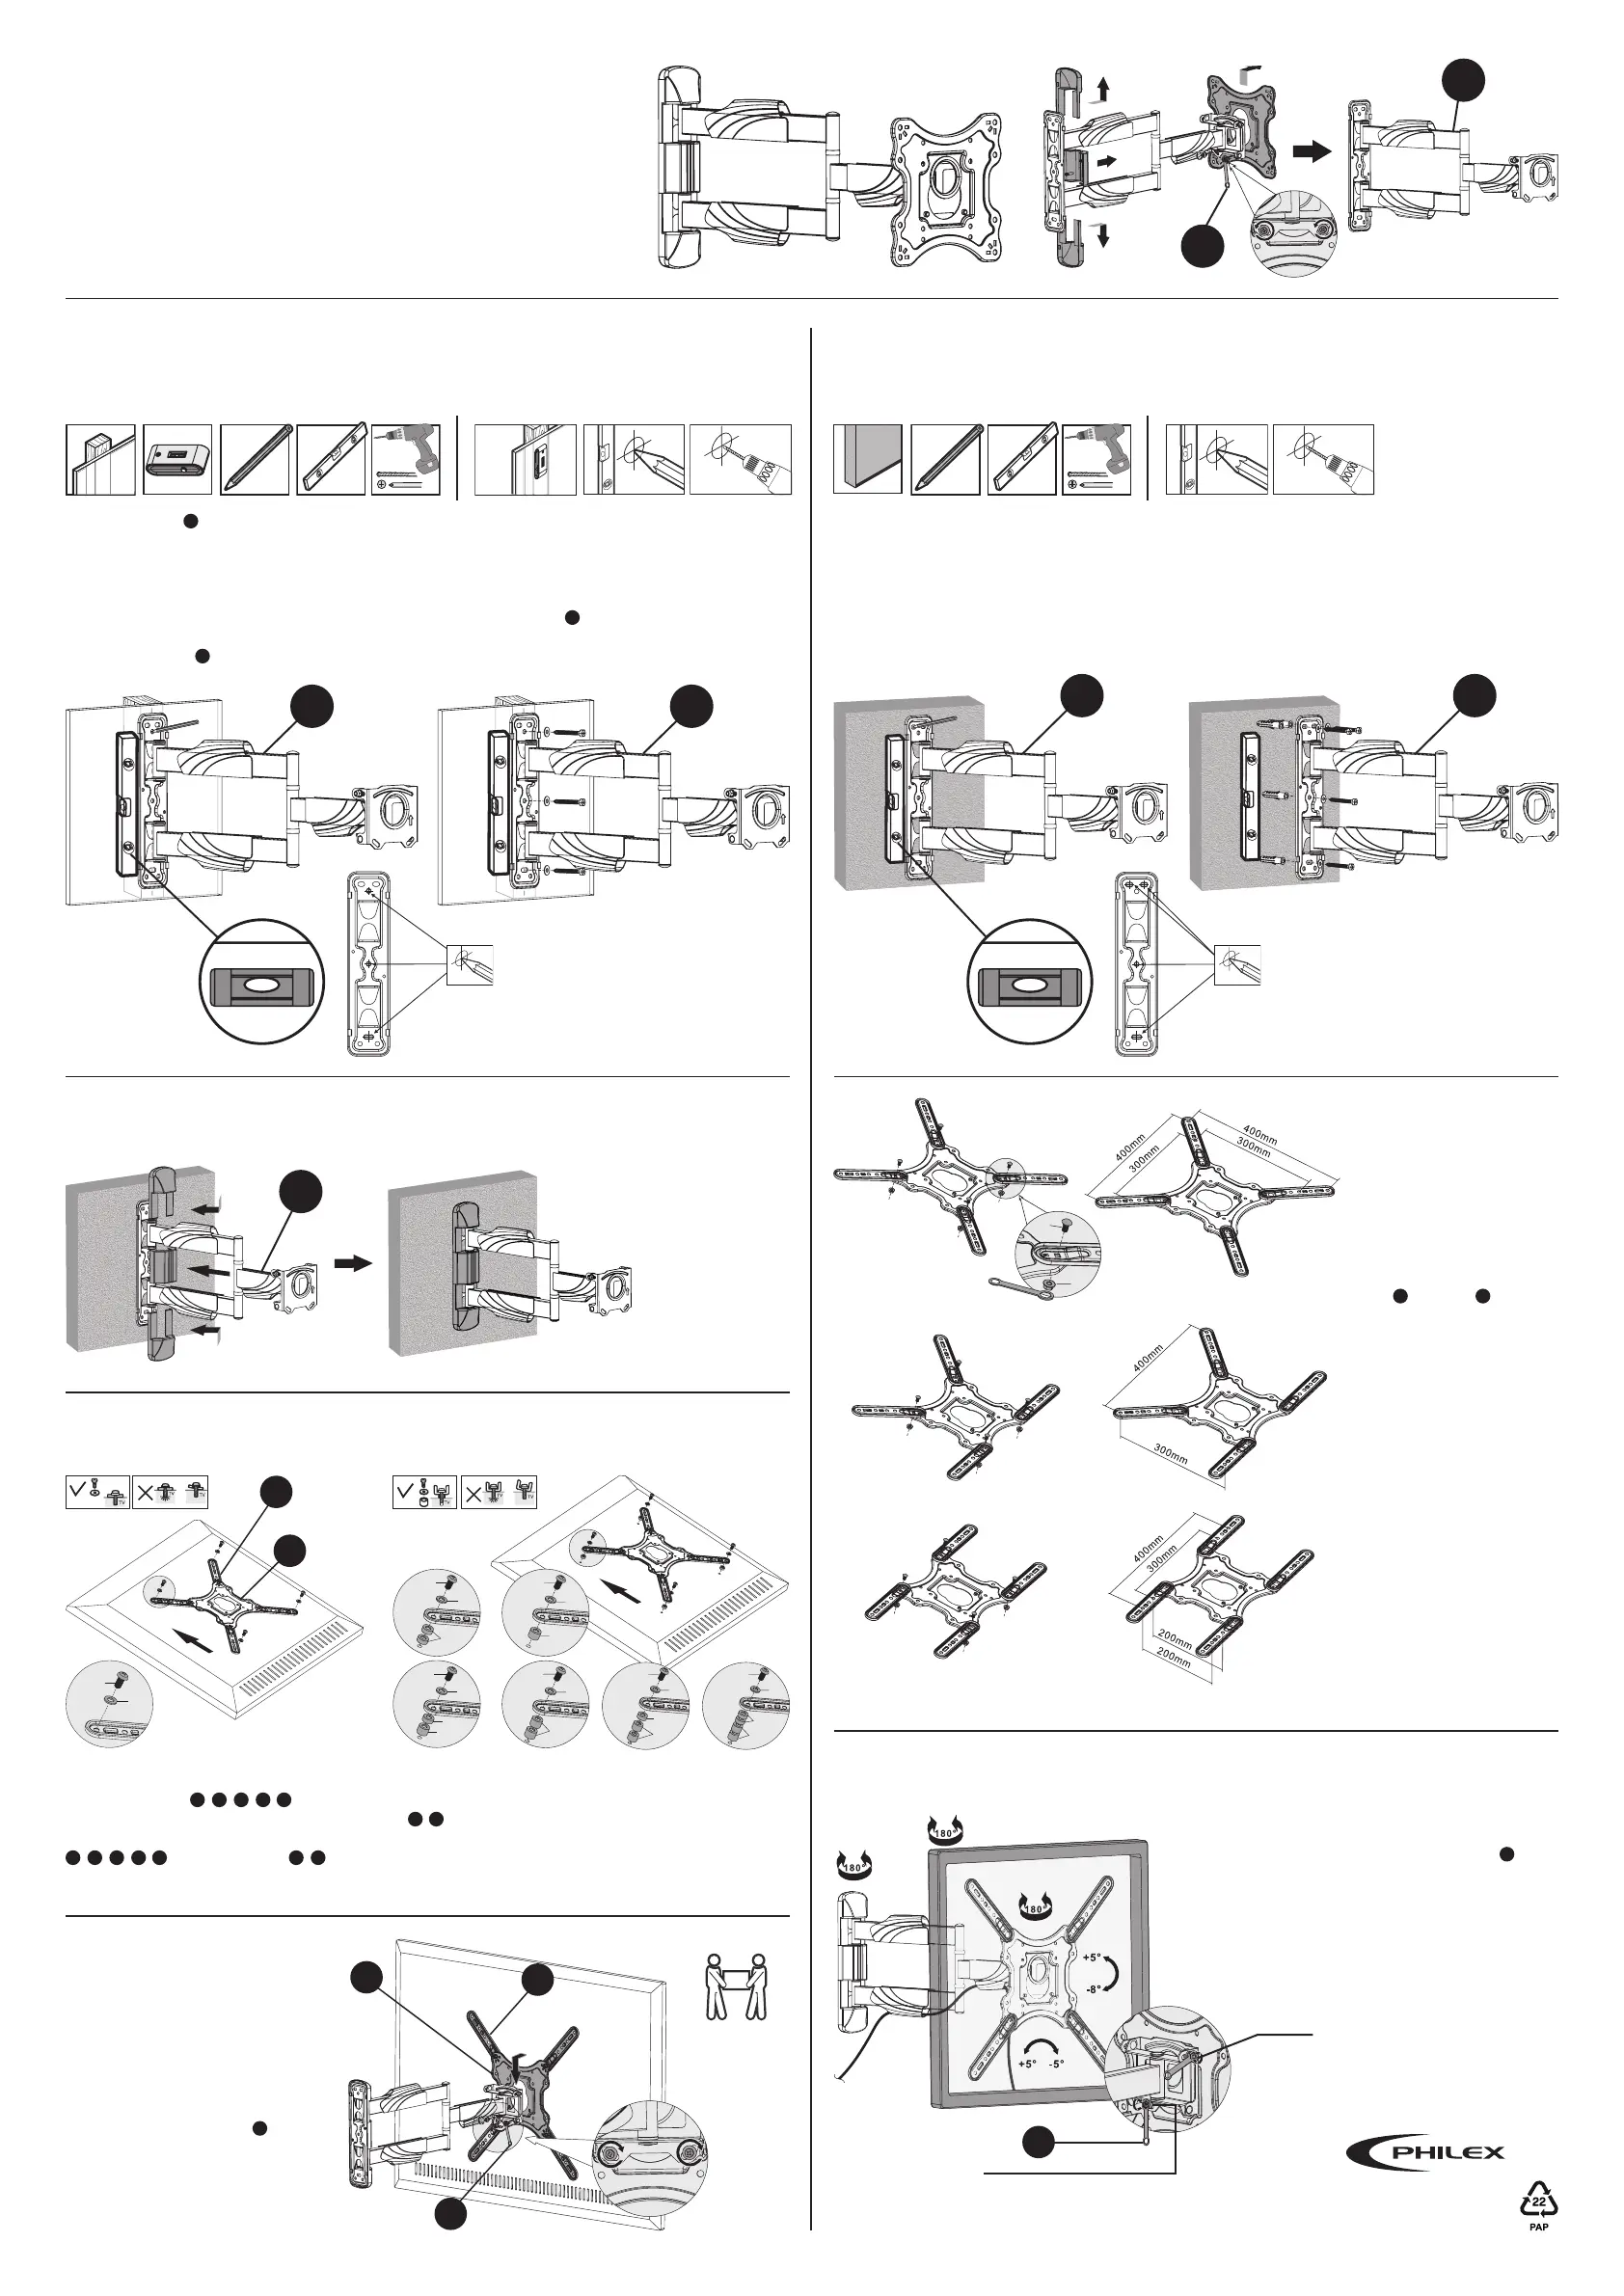
The wall bracket
A
is attached to the wall using three appropriate screws/bolts as shown in Fig.3.
Make sure the screws/bolts are suitable for wood and large enough to support the weight of the TV and
bracket (if in doubt ask for advice at your local DIY/hardware store and remember to make sure that the
heads of the screws/bolts are the correct size to hold the bracket securely in position).
Mark and drill three holes into the wood as close as possible to the centre of the upright (you can use a
stud detector to find stud positions). To mark the holes, hold the bracket
A
to the wall, using a spirit level
to make sure the bracket is level, and mark the centre of each hole, see Fig.2. Drill the three holes and
attach the bracket
A
to the wall using the appropriate screws/bolts.
The process is the same as for attaching to wood see Fig.3. You will however need to use four suitable
screws/bolts/wall plugs for the type of wall you are mounting onto (if in doubt ask for advice at your
local DIY/hardware store and remember to make sure that the heads of the screws/bolts are the
correct size to hold the bracket securely in position). When fixing to walls screws/bolts should be fixed
into bricks/stone not into mortar courses.
Before attaching the bracket arm to the wall, remove the plastic covers at the
back of the bracket. Using the spanner supplied, loosen the bolts to remove the
mounting plate on the front see Fig.1.
2a. Preparing Wall Fixings - Stud Walls
Tools required
3. Attaching the Plastic Covers
1. Removing the Mounting Plate
& Plastic Covers
4. Attaching
the Plate
Arms
6. Mounting
the TV to the
Bracket Arm
2b. Preparing Wall Fixings - Concrete/Brick Walls
Tools required
Fig.1
Fig.2 Fig.3
Use a spirit
level to ensure
bracket is level.
Tip:
Make sure the holes you mark are
in the centre of the stud.
A
A
Fig.6
Fig.11
A
C
A
A
Fig.4 Fig.5
Use a spirit
level to ensure
bracket is level.
Once the bracket
arm has been
securely attached
to the wall, place
the plastic covers
over the back
of the bracket
see Fig.6.
Select the correct size bolts to fit the VESA
holes for your TV
F
/
G
/
H
/
I
/
J
.
Attach the wall mount plate to the back of the
TV by lining up the VESA holes and using bolts
F
/
G
/
H
/
I
/
J
and the washers
K
/
L
to fix the TV securely to the mounting plate.
With two people, lift and hold the TV
in place while tightening the bolts
using the spanner supplied
C
to
secure the TV.
You can increase the spacing between the mounting
plate and the back of the TV by using the spacers
M
/
N
see Fig.11.
A
Fig.7
Fig.8
Fig.9
D
E
Attach the arms to the
mounting plate using the
bolts
D
and nuts
E
supplied
see Fig.7.
The arms can be aligned
in various positions to
accommodate a range
of VESA configurations
see Fig.7-9.
Fig.10
5. Mounting the Plate to the TV
K/L
K/L
K/L
K/L
K/L
K/L
K/L
M
N
N
N
N
N
M
M
M
F/G/H
I/J
F/G/H
I/J
F/G/H
I/J
F/G/H
I/J
F/G/H
I/J
F/G/H
I/J
F/G/H
I/J
A
B
Fig.12
Fig.13
Lift with
2 people
A
B
C
7. Adjusting the Tilt, Swivel & Level
Once attached, you can loosen the bolts located on the
back of the bracket using the spanner supplied
C
to
alter the tilt and level adjustment see Fig.13. When the
desired viewing angle has been set, tighten
the bolts.
You can swivel the TV left or right to further alter the
viewing angle.
Loosen
to adjust
the level
Loosen bolts on both
sides to adjust tilt
C
© Philex Electronic Ltd. 2017. vb1.2
Technical Support:
www.philex.com/support
 Loading...