5
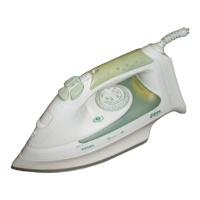
General description (fig. 1)
A Temperature control (rotate)
B Steam control (slide)
O = no steam
1 = minimum steam output
6 = maximum steam output
C Spray button T (press)
D Spray nozzle
E Shot of Steam button 9 (press)
F Turbo Steam button 0 (press) (types HI 525/28/29/35/45)
G Filling funnel for filling with water without spillage
H Temperature pilot light (amber)
I “Self clean” button (press)
J Water window
K Cord storage
L Type plate
M Measuring beaker
N “Soft touch” hand grip (types HI 525/28/29/35/45)
O “Auto Stop” pilot light (red) (type HI 545)
Filling with water (for steam-ironing and spraying)
• Please fill this iron with normal tap water before using for the first time.
• For refilling, you can also use tapwater. However, if the water is very
hard (hardness higher than 17 °DH / 21
1
⁄
4
°Clarke), it is advisable to
use distilled water.
- Remove the mains plug from the wall socket before filling the iron.
Set the steam control (B) to position O (= no steam).
- Stand the iron on its end and open the filling funnel (fig. 2).
- Pour water (max. 250 ml) into the filling aperture (fig. 3).
Use the measuring beaker with spout for this purpose.
- Close the filling funnel (fig. 4).
Ironing temperature
• Always check first to see whether a label with ironing instructions is
attached to the article to be ironed. (See table.)
Follow these ironing instructions in all cases.
 Loading...