www.philips.com/welcome
Register your product and get support at
2
a cb
4
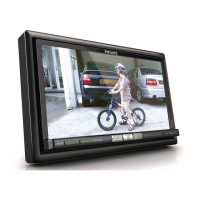
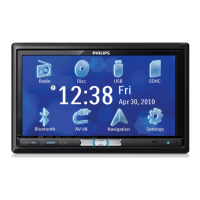
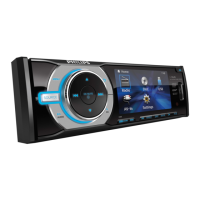
CED1700
English
Install the car audio
These instructions are for a typical installation.
However, if your car has different requirements,
make the corresponding adjustment. If you have
any questions regarding installation kits, consult
your Philips car audio dealer.
Caution
This unit is designed for negative ground •
(earth) 12 V DC operation only.
Always ins tall this unit in th e car dashboard.
•
Other lo cations c an be dangerous as the
rear of the unit heat s up during use.
To avoid short-ci rcuit: b efore you conn ect,
•
ensure th at the igni tion is off.
Ensure that you connec t the yellow an d red
•
power supply leads afte r all other leads are
connected.
Ensure that all loose leads are insulated with
•
electrical tape.
Ensure that the leads d o not get caug ht
•
under screws orin pa rt s that will move (e.g.
seat rail).
Ensure that all ground (earth) lead s are run
•
to a common gr ound (ear th) point.
Use only the s upplied mounting har dware
•
for a safe and secur e installation.
Improper fuses can cause damage or fire.
•
When you need to change th e fuse, cons ult
a professional.
Connect wires
1
Caution
Ensure that all loose leads are insulated with •
electrical tape.
1 Check the car’s wiring carefully, then
connect t hem to the supplied I SO wires .
a
Connector Connect to
1Yellow wireThe +12V car batter y which
is live at all times.
2Blue wire The electric antenna control
lead or power supply lead of
the antenna booster
If there is no elect ric ante nna
or antenna b ooster, or it is
manually operated telescopic
antenna , it is not necessar y
to connec t this lead .
3Black wire A metal surface of the car
Firs t connect the black
ground (ear th) lead, then
connect t he yellow and r ed
power supply leads.
4Red wire The +12V power terminal
which is live in t he
accessory (ACC) pos ition of
the ignitio n switch
If there is no accessor y
position, connect to the
+12V car battery termina l
that is always live. Be sur e
to connec t the black ground
(earth) lead to a metal
surface of the car fir st.
5 Green and
green/black
wires
Left speaker (Rear)
6 White and
white/black
wires
Left speaker (Front)
7 Gray and
gray/black
wires
Right spea ker (Front)
8 Purple and
purple/black
wires
Right spea ker (Rear)
2 Connec t the other e nd of the supplied
stand ard conne ctor to th e car audio
system.
b
Connector/
Obeject
Connect to/with
1 Pink wire Exte nsion wir e
2 2.5m ex tension
wire(Not
included)
Parki ng brake (-)
3 Brake switch
4Ground
5 ISO wires Connec ted in step 1
above.
6 Grey wir e Rear line out Left /
Right
7 Black wir e Front line out Left /
Right
8 Blue cable Subwoofer
9 Red cable Aux Right
10 White c able Aux Left
11 Yellow cable Video in
12 Yellow cable Camera in
13 Yellow cable V ideo out 1
14 Yellow cable V ideo out 2
15 Purple wire Reverse camera (B+)
16 Gearbox switch
17 Reverse gear
signal
Back lamp lead +
Mount in the dashboard
Note
Check wire connection before you mount •
the unit in to a car.
If preset r adio st ations are lost when the
•
ignition key is turned O FF and then back
ON, reconnect the red lead s crosswise to
the yellow ones .
1 If the car does not have an on- board dr ive
or navigation computer, disconnect the
negative te rminal of t he car bat tery.
2 Ensure that car dashboard opening is within
these measurements:
a
3 Slide the unit into the dashboa rd until a
click sound is h eard.
b
EN Quick Start Guide
183 mm
53mm
5mm
1
a
R-CH
L-CH
R-CH
L-CH
1
2
3
4
5
6
7
8
9
0
!
"
P
R
N
D
2
L
$%
&
§
/
b
4 Attach the trim plate.
c
5 Reconnec t the nega tive terminal of the car
battery.
Turn on
Caution
Risk of road accidents ! Never watch video or •
adjust se ttings while you dr ive.
1 Press to turn on the u nit.
The available OSD (On-Screen Display) »
languages are displayed.
2 Touch a language to select.
The OSD language is changed to the »
selected language immediately.
• To adjust screen brig htness , press DIMMER
on the rem ote control, then pr ess
or .
To turn off the uni t, press and hold•
for 3
seconds.
Set date and time
1
Tou c h to display main menu.
Radio
Bluetooth AV_IN1 Navigation Settings
CHDScsiD USB
2 Tou c h [Settings].
Setting menu displays. »
3 Tou c h to access 2nd page.
4 Tou c h [Date].
5
Touch year digit to highlight this digit.
6 Tou c h
/ to set year.
7 Repeat s tep 4 and 5 to set month and day.
Set Time
1 Tou c h [Clock Time].
2 Touch hour/minute digit to highlight the digit.
3 Tou c h /
to set hour/minute.
Set time format
1 Tou c h[ Time format]repeate dly to toggle
between [12Hr] and [24Hr] options.
Tip
When date /time is s et, touch • to go back
to the upper l evel menu, o r touch
to go to
the main menu.
Listen to Radio
1
Tou c h to display home menu.
2 Tou c h [Radio].
Radio screen displays. »
3 Touch on FM or AM repeatedly on the left
of the scree n to selec t band:
FM band options: • FM1, FM2, FM3
AM band options: • AM1, AM2
4 Briefl y touch
or to tu ne to a radio
station by step.
Tou ch •
or for ove r 1 seconds to
tune to a rad io stat ion autom atically.
Play disc
3
You can play video, audio or images stored on the
following discs:
DVD video, DVD-R, DVD-RW•
VCD•
Audio CD, CD -R , CD-RW•
Note
Ensure that the disc contains playable •
content .
1 Inser t the disc i nto the disc s lot with la bel
side facing u p.
Front panel closes automatically. »
Play starts automatically. »
To remove the disc, press the »
button.
When the disc is ejected, the unit
»
switches to the previous source,
if connected. Otherwise, the
unit switches to [Radio] mode
automatically.
Note
Depends on where you bought the unit, •
you can play DVD dis cs with one of the
following re gion codes:
Countries where you
bought the unit
Supported DVD
region code
China
Asia Pacifi c, Taiwan,
Korea
Latin Am erica
Russia, I ndia
Play USB device
Note
Ensure that the device contains playable
•
content .
1 Open the lid of USB socket .
2 Inser t the USB to t he USB socke t.
Play starts automatically. »
Play with Bluetooth device
Pair the Bluetooth-enabled devices
To connect your Bluetooth device to the unit, you
need to pair the device to the unit. Pairing needs
only to be done once.
You can pair up to eight devices.
1 Turn on the Blue tooth func tion on your
device.
3
2 Search for ot her Bluetooth device with
your device.
3 Select “ CED1700” in the pairing list.
4 Enter default password “0000”.
If pairing succeeds. the dial screen »
displays.
Make a call
1 Tou c h
on top of the scr een.
The dial screen displays. »
2 Touch number icons directl y to input
phone number.
3 After the phone num ber entered, touch
.
The unit starts dialing. »
Or you can make call through quick dial:
1 Tou c h [QUIC K DIAL] on the dial screen.
The screen prompts to enter quick dial »
number.
2 Touch a preset numb er on the scr een.
The unit dials the selected preset phone »
number.
Tip
If no quick number is pre set, the screen •
prompts [Empty].
Receive call
By default, all incoming calls are received
automatically.
1 If there is incoming call, [Incoming call...]
flashes on t he scree n. Speak i nto the
Bluetooth microphone.
2 When conversation ends, tap
(red) to
terminate the call .
Tip
You can select to r eceive cal ls manuall y by •
set [Auto answer] to [Off] status.
© 2010 Koninklijke Philips Electronics N.V.
All rights reserved.
Document order number: CED1700_00_QSG_V1.0