CED1800BT
Quick Start Guide
快速入門指南
快速入门指南
Install / 安裝 / 安装
Enjoy/ 使用 / 使用
Install / 安裝 / 安装
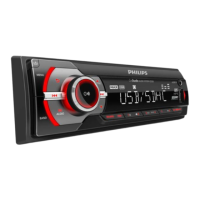
a
bcde fg hijk
l
m
n
o
p
q
r
s
t
182 mm
112 mm
5 mm
Enjoy/ 使用 / 使用
English
Install the car entertainment
system
Always follow the instructions in this chapter in
sequence.
These instructions are for a typical installation.
However, if your car has different requirements, make
the adjustment accordingly. If you have any question
regarding installation kits, consult your local retailer.
Note
•
This system is designed for negative ground (earth) 12V DC
operation only.
• Always install this system in the car dashboard. Other
locations can be dangerous as the rear of the system heats
up during use.
• To avoid shor t-circuit: before you connect, make sure that
the ignition is off.
• Make sure that you connect the yellow and red power supply
leads after all other leads are connected.
• Make sure that all loose leads are insulated with electrical
tape.
• Make sure that the leads do not get caught under screws or
in parts that will move (e.g. seat rail).
• Make sure that all ground (earth) leads are run to a common
ground (earth) point.
• Use only the supplied mounting hardware for a safe and
secure installation.
• Improperfusescancausedamageorre.Whenyouneedto
change the fuse, consult a professional.
• Whenyouconnectotherdevicestothissystem,makesure
that the rating of the car circuit is higher than the total fuse
value of all the connected devices.
• Never connect speaker wires to the metal body or chassis
of the car.
• Never connect speaker wires with stripes to one another.
Connect wires
Note
•
Make sure that all loose leads are insulated with electrical
tape.
• Consult a professional to connect wires as instructed below.
• Before connection, check the car's wiring carefully.
1 Connect the ISO male connectors. (1-1)
ISO male
connectors
Connect to
a Green strip, black-
edged green strip
Rear left speaker
b Whitestrip,black-
edged white strip
Front left speaker
c Gray strip, black-
edged gray strip
Front right speaker
d Purple strip, black-
edged purple strip
Rear right speaker
e Red strip Ignition key +12V DC
when ON/ACC
f Blue strip Motor/electric antenna
relay control lead
g White-edgedblue
strip
Amplierrelaycontrol
lead
h Black strip Ground
i Yellow strip The +12V car battery
which is energized at all
times
2 Connect other wires if necessar y. (1-2)
Caution
•
To avoid an accident, the driver must not watch video while
driving. By design, this system disallows watching video dur ing
drive. Park your car in a safe place and engage the parking
brake before watching video.
Note
•
Whentheparkingbrakeofyourvehicleisnotengaged,the
video blocking system is activated. It blocks the display of
front video source only.
• If the system is not properly connected with the parking
brake control module of your vehicle, video signals will be
blocked by the system.
Connectors and
sockets on rear panel
External sockets or
connectors
1 For ISO male
connectors
As indicated above
2 REAR OUT R (Red
socket)
Rear right speaker
3 AV-IN R (Red socket) Right audio channel
output socket of an
external player
4 AV-IN L(White
socket)
Left audio channel
output socket of an
external player
5 REAR OUT L(White
socket)
Rear left speaker
Always there to help you
Register your product and get support at
Question?
Contact
Philips
Question?
Contact
Philips