EasyManua.ls Logo

Philips HD4959 - User Manual

Philips HD4959
2 pages
Print Icon
To Next Page IconTo Next Page
Loading...
www.philips.com/welcome
User manual
HD4959
www.philips.com/welcome
Safety leaflet
HD4959
www.philips.com/welcome
Warranty
HD4959
Меню
таймер
подогрев
Вкл/Выкл
Защита от
детей
10cm
10cm
c
a
b
d
e
f
g h i j k ml
s r q p
on
Меню
Вкл/Выкл
Вкл/Выкл
Меню
Вкл/Выкл
EN User manual
RU 
Overview

Using the induction cooker


Using the timer

Cleaning

Preparing for use

Recommended types and sizes of cookware

All registered and unregistered trademarks are
property of their respective owners.
© 2012 Koninklijke Philips Electronics N.V.
All rights reserved.
HD4959_UM_RU_V1.0_A3x0.75
HD4959
Register your product and get support at
www.philips.com/welcome
882495940300
English
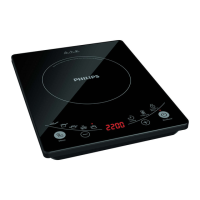
1 Your induction cooker
Congratulations on your purchase and welcome to Philips! To fully

www.philips.com/welcome.
2 What’s in the box
 
User manual Warranty card
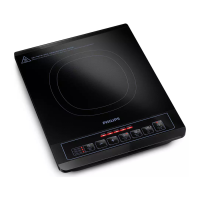
Overview
a
Cooking plate
d
Control panel
b
Cooking zone
e
Air outlets
c
Air inlet
f
Power cord
Controls overview
g
Fry mode
n
Keep warm button
h
Congee mode
o
Child lock button
i
Steam mode
p
On/Off button
j
Soup mode
q
Increase button
k
Hot pot mode
r
Decrease button
l
Screen
s
Menu button
m
Timer button
3 Before first use
Remove all packaging materials from the induction cooker.
Preparing for use
1 
2 Make sure there is at least 10cm free space around the appliance to
prevent overheating.
3 Always place the cookware on the cooking zone during cooking.
4 Make sure you use cookware of the correct types and sizes (see the
table below).
Recommended types and sizes of cookware
Material Cookware with a bottom made of iron or magnetic
stainless steel
Shape 
Size 
depending on the cooking mode
4 Using the induction cooker
There are six preset cooking modes: Fry (
 
(   ) and Keep warm ( ).
1 Follow the steps in “Preparing for use”.
2 Press the On/Off button (

3 Press the Menu button (
) repeatedly or the Keep warm
(
) button to choose the desired cooking mode. The corresponding
indicator lights up and the induction cooker starts working in the
selected mode.
4 
) to
switch off the appliance.
5 Unplug the induction cooker after the fan stops working.
Note

Increase (
) or Decrease ( ) button.
For cooking modes selected by the menu button (

power is displayed on the screen; for Keep warm ( 
temperature is displayed on the screen.

adjusts the cooking temperature for better cooking result.
Cooking time and power
Refer to below table for the cooking time and power of different
cooking modes.
Cooking mode Cooking time (minute) Cooking Power
Fry (
) 1 - 120 800W - 2200W
Hot pot (
) 1 - 120 800W - 2200W
Congee (
) 30 - 180 800W - 2200W
Steam (
) 30 - 120 800W - 2200W
Soup (
) 30 - 180 800W - 2200W
Keep warm (
) 1 - 120 800W - 2200W
HD4959_UM_RU_V1.0_A3x0.75.indd 17/30/2012 4:09:37 PM
Question and Answer IconNeed help?

Do you have a question about the Philips HD4959 and is the answer not in the manual?

Overview

This document describes the Philips HD4959 Induction Cooker, a versatile kitchen appliance designed for various cooking needs.

Function Description

The Philips HD4959 Induction Cooker is a portable cooking device that utilizes electromagnetic induction to heat cookware directly. It features a single cooking zone and a control panel for selecting different cooking modes and adjusting settings. The cooker is designed to provide efficient and precise heating for a range of dishes.

Key Components:

  • Cooking Plate (1): The primary surface where cookware is placed for heating.
  • Cooking Zone (2): The specific area on the cooking plate where induction heating occurs.
  • Air Inlet (3) & Air Outlets (5): Essential for ventilation and preventing overheating of the internal components.
  • Control Panel (4): Houses all the buttons and the screen for operating the cooker.
  • Power Cord (6): Connects the cooker to a power source.

Controls Overview:

The control panel offers a variety of preset cooking modes and manual adjustments:

  • Fry mode (7): For frying dishes.
  • Congee mode (8): For cooking congee.
  • Steam mode (9): For steaming food.
  • Soup mode (10): For preparing soups.
  • Hot pot mode (11): For hot pot cooking.
  • Keep warm button (14): To maintain food at a warm temperature.
  • Child lock button (15): To prevent accidental operation.
  • On/Off button (16): To power the appliance on or off.
  • Increase button (17) & Decrease button (18): To adjust power levels or timer settings.
  • Menu button (19): To cycle through the preset cooking modes.
  • Screen (12): Displays cooking power, temperature, or timer information.
  • Timer button (13): To set a cooking timer.

Important Technical Specifications

The cooker supports a range of cooking times and power levels depending on the selected mode:

  • Fry mode: 1-120 minutes, 800W-2200W
  • Hot pot mode: 1-120 minutes, 800W-2200W
  • Congee mode: 30-180 minutes, 800W-2200W
  • Steam mode: 30-120 minutes, 800W-2200W
  • Soup mode: 30-180 minutes, 800W-2200W
  • Keep warm mode: 1-120 minutes, 800W-2200W

Cookware Compatibility:

  • Material: Cookware with a bottom made of iron or magnetic stainless steel.
  • Shape: Cookware with a flat bottom.
  • Size: Bottom diameter of 10-23cm, depending on the cooking mode.

Usage Features

Before First Use:

  1. Remove all packaging materials.
  2. Place the appliance on a dry, stable, and level surface.
  3. Ensure at least 10cm free space around the appliance for proper ventilation.
  4. Always place compatible cookware on the cooking zone during operation.

Operating the Induction Cooker:

  1. Press the On/Off button (16) to power on the appliance. The On/Off indicator will light up.
  2. Press the Menu button (19) repeatedly or the Keep warm button (14) to select the desired cooking mode. The corresponding indicator will light up, and the cooker will begin operation.
  3. To adjust power levels during cooking, use the Increase (+) (17) or Decrease (-) (18) buttons.
    • For modes selected via the Menu button, cooking power is displayed.
    • For Keep warm mode, cooking temperature is displayed.
    • Steam, Soup, and Congee modes automatically adjust the cooking temperature for optimal results.
  4. To switch off, press the On/Off button (16).
  5. Unplug the cooker after the fan stops running.

Using the Timer:

  1. Press the Timer button (13). The timer indicator will light up, and the screen will display "00:00".
  2. Use the Increase (+) (17) or Decrease (-) (18) buttons to set the desired cooking time.
  3. Press the Timer button (13) again to confirm the setting. The screen will display the remaining cooking time.
  4. To cancel the timer, press the Timer button (13) and then the Decrease (-) (18) button until the time returns to "00:00".

Child Lock Function:

  1. To activate, press and hold the Child lock button (15) for 3 seconds. A "BEEP" sound will confirm activation, and the child lock indicator will light up.
  2. To deactivate, press and hold the Child lock button (15) for 3 seconds again.

Troubleshooting Common Issues:

  • Cooker does not work: Check if the power cord is connected, if the appliance is switched on, and if the cookware is compatible and placed correctly.
  • Cookware not detected: Ensure the cookware is magnetic and has a flat bottom within the recommended diameter.
  • Cooker stops working during cooking: This could be due to overheating (check ventilation), an empty pot, or an internal error. Allow the cooker to cool down, ensure there is food in the pot, or contact customer service if an error code is displayed.
  • Error codes:
    • E1 or E2: Main sensor or short circuit error. Unplug and contact customer service.
    • E3 or E4: Voltage error. Unplug and contact customer service.
    • E5 or E6: IGBT sensor or circuit state error. Unplug and contact customer service.
    • E7 or E8: High or low temperature error for the induction coil. Allow the cooker to cool down or warm up, ensure proper ventilation, and check if the fan is working.

Maintenance Features

Cleaning:

  1. Unplug the appliance and allow it to cool down completely before cleaning.
  2. Wipe the cooking plate and control panel with a soft, damp cloth and a mild household detergent.
  3. Do not immerse the appliance in water or any other liquid.

Environment:

  • Do not dispose of the appliance with normal household waste. Take it to an official collection point for recycling to help preserve the environment.

Guarantee and Service:

For any issues or questions, refer to the Philips website or contact the Philips Consumer Care Centre in your country. If a service is needed, contact the Philips Consumer Care Centre.

Philips HD4959 Specifications

General IconGeneral
BrandPhilips
ModelHD4959
CategoryCookers
LanguageEnglish

Related product manuals