2 - 22 - 2
f) The set will shut down automatically when the software upgrade
is completed.
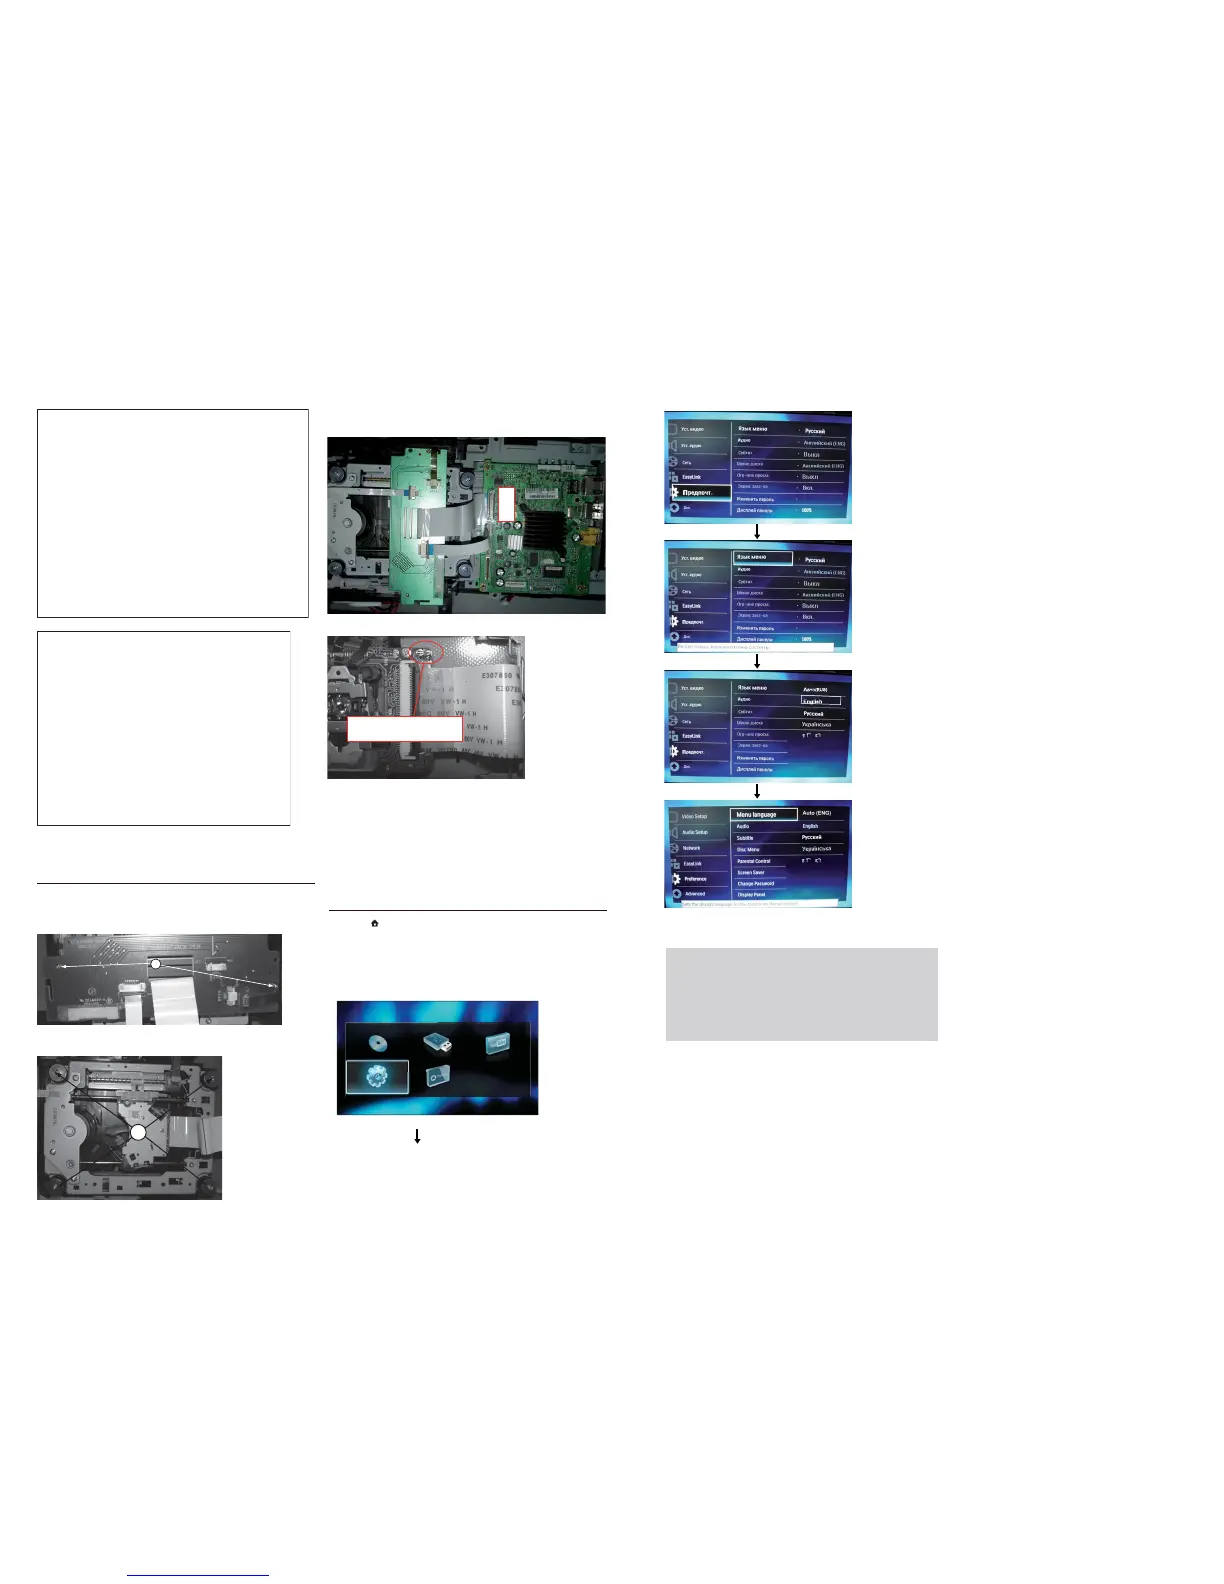
6) How to replace the defective Blu-ray Loader
a) Remove the defective Blu-ray Loader.
b) Loosen 2 screws “A” on the top of BD loader jack pcb to remove
the board as shown below.
A
c) Loosen 4 screws “B” to take out the “Sanyo TRV-414H05” as
shown below.
B
d) Blu-ray Loader to connect “HA802” on the top of BD Board as
shown below.
IB913
e) Remove soldered joint on the ESD protection points.
Note: The 2 ESD protection points on any one side must be
soldered if
o the Blu-ray Loader is OK and needs to be disconnected
from connector HA802 of the BD Board.
o the defective Blu-ray Loader is needed to be send back to
supplier for failure analysis and to support backcharging evidence.
CAUTION!
This information is confi dential and may not be
distributed.Only a qualifi ed service person should
reprogram the Region Code.
Software upgrade will take 5 minutes
Do not switch off!
Package version: 000025.0
Software BE Completed
Software FE Completed
Software MCU1: Not started
Software Dock: 2%
Software MCU3: Not started
Software upgrade will take 5 minutes
Do not switch off!
Package version: 000025.0
Software BE Completed
Software FE Completed
Software MCU1: 1%
Software Dock: Failed
Software MCU3:
The ESD protection points
on the top of board
7) OSD Language setup (only for 51 version)
a) Press “ ” <Home> button on R/C.
b) Select <Setup>, then press “OK” button on R/C.
c) Select <Preference>, then press <OK> button on R/C.
d) Select <Menu language>, then press <OK> button on R/C.
C) Select <English>, then press <OK> button on R/C.
 Loading...