Changing Waves:
To change the size of a wave: select the wave. Select
Size Up or Size Down repeatedly to desired size.
For Pressure and CO
2
change the scale to change the
size of the wave: select Scale in the individual setup
menu.
Using SmartKeys:
SmartKeys are graphical keys located in a row at the
bottom of each screen. The SmartKeys give you fast
access to often-used functions.
The arrow keys at the end of the row allow you to
access more SmartKeys, if available.
Some examples of SmartKeys:
Monitor Standby – enters standby
mode, suspends patient monitoring
Repeat Time – allows the
operator to change the NBP repeat
time
Vitals Trend – allows the operator
to view previous vital signs, record
or print vital signs.
Recordings – allows the operator
to select a Delayed or Realtime
recording
End Case – allows the operator to
discharge the patient, print an end-
case report (if configured) and enter
the monitor into standby once
confirmed
Other Patients – allows the
operator to view other patients in
the unit
Monitor
Standby
Repeat
Time
Vitals
Trend
Recor-
dings
End
Case
Other
Patients
Checking the Status of the Battery
If a battery is used, the battery status can be checked
on the lower right of the monitor Screen above the
Main Screen permanent key.
Battery power gauge:
This symbol shows the
remaining battery power. It is
divided into sections, each
representing 20% of the total
power. If two and a half
sections are shaded, as in this
example, this indicates that 50%
battery power remains.
Monitoring time available:
When the MP5 is running on battery, a time is
displayed below the battery power gauge. This is the
estimated monitoring time available with the current
battery power.
Printing Patient Reports:
Most patient reports can be printed by selecting Main
Setup -> Reports. Once the menu is displayed,
simply select the name of the report required. It will
then print the data from the time the report was
requested.
2:14 hrs
Making Recordings:
To quickstart any type of recording using a
preconfigured recordings template:
• Select the Recordings SmartKey and then select
the pop-up key of the recording type you want to
start
or
• Select the Main Setup key, select Recordings, then
select the recording type.
To manually stop a recording,
• Select the Stop All Recordng pop-up key.
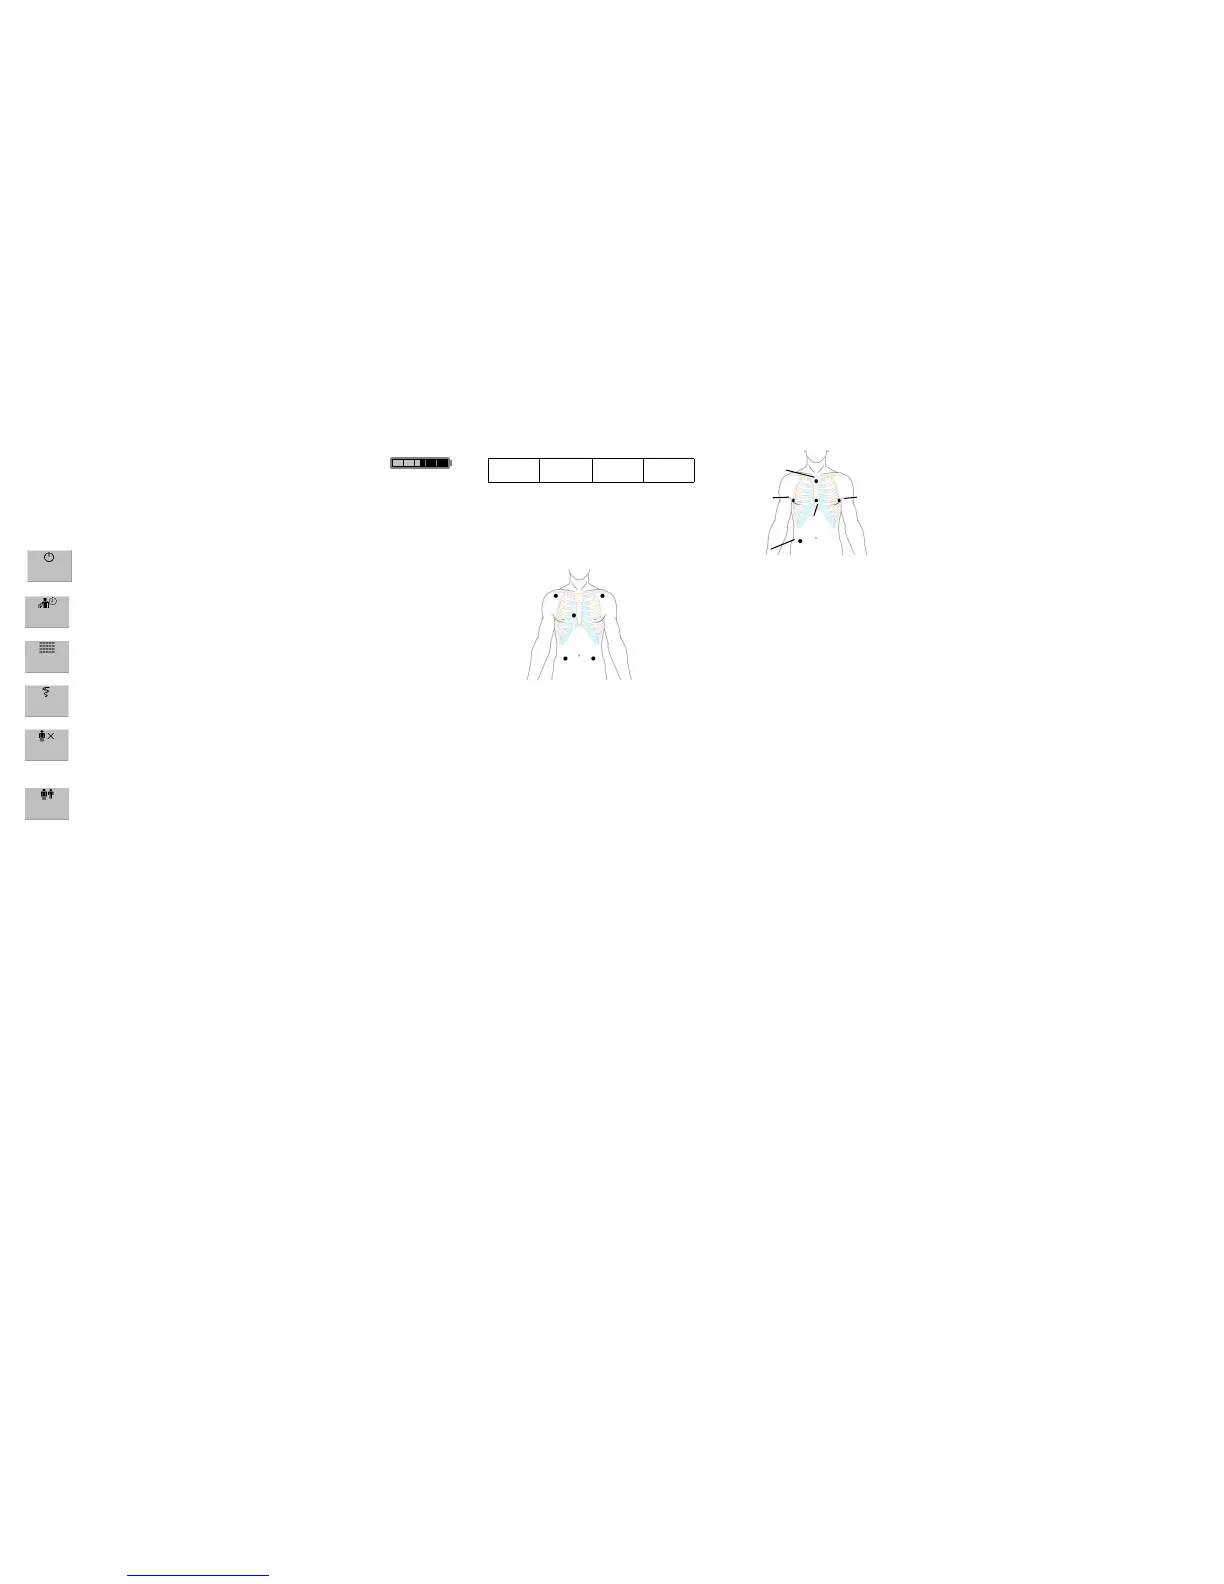
ECG - Standard 5-Lead Placement:
RA placement: directly below the clavicle and near
the right shoulder
LA placement: directly below the clavicle and near
the left shoulder
RL placement: on the right lower abdomen
LL placement: on the left lower abdomen
V placement: on the chest, the position depends on
your required lead selection
Delayed
Recordng
RT A
Recordng
RT B
Recordng
Stop all
Recordng
RA(R)
LA(L)
RL(N)
LL(F)
V(C)
ECG - EASI Lead Placement:
Place the electrodes as accurately as possible to obtain
the best quality EASI measurements. Respiratory
monitoring is also possible with the EASI placement;
respiration is measured between the I and A
electrodes.
To activate EASI lead placement:
Select the HR numeric to enter the ECG Setup
menu and select Lead Placement. Select EASI from
the pop-up list.
Obtaining further information:
Your monitor Instructions for Use (IfU) contain
important safety information. This Quick Guide is not
intended as a replacement for the IfU; you must be
familiar with the information in the IfU before you
begin monitoring patients.
IntelliVue Release E.0 onwards
12NC: 4512 610 18671
©Copyright 2006 Koninklijke Philips Electronics N.V.
All Rights Reserved
S(LA)
I(RA)
N
E(V)
A(LL)
 Loading...