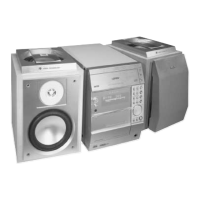
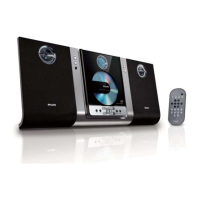
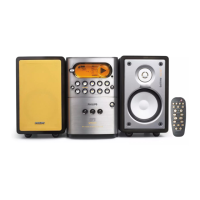
Controls (main system’s illustration on page 3)
Controls on the system and
remote control
1
STANDBY ON y
– to switch the system on or to Standby mode.
2 ECO POWER
– to switch the system on or to Eco Power
Standby mode.
3 iR
– infrared sensor for remote control.
4 # OPEN
– to open the tape deck door.
5 PHONES
– to connect headphones.
6 PROG (PROGRAM)
for CD ................. to programme disc tracks.
for TUNER ........ to programme preset radio
stations.
for CLOCK ....... to select 12- or 24-hour clock
mode.
7 BASS/TREBLE
– to select BASS or TREBLE sound feature.
BASS/TREBLE +/- (on the remote control)
– to increase or decrease the low or high tone
level for the respective BASS or TREBLE sound
feature selected.
8 wOOx
– (on the system only) to select the next wOOx
level or switch off wOOx sound effect.
– (on the remote control only) to switch on or off
the wOOx sound effect.
wOOx LEVEL
– (on the remote control only) to select a desired
wOOx level : WOOX 1, WOOX 2 or
WOOX 3.
9 VOL (VOLUME +/-)
– to increase or decrease the volume.
– (on the system only) to increase or decrease the
low or high tone level for the respective BASS or
TREBLE sound feature selected.
0 0 REC
– to start recording on a tape.
! SOURCE – to select the following:
CD 1•2•3 (CD 123)
– to select disc tray 1, 2 or 3.
TUNER
– to select waveband : FM, MW or LW.
TAPE
– to select tape mode.
AUX / CDR
– to select a connected external source :
CDR or AUX (auxiliary) mode.
@ Mode Selection
PLAY PAUSE ÉÅ
for CD ................. to start or interrupt playback.
for TAPE .............. to start playback.
for PLUG & PLAY…(on the system only) to
initiate and start plug & play
mode.
STOP/DEMO STOP Ç
for CD ................. to stop playback or to clear a
programme.
for TUNER ........ to stop programming.
................................. (on the system only) to delete the
preset radio station.
for TAPE .............. to stop playback or recording.
for DEMO ......... (on the system only) to activate/
deactivate the demonstration.
for CLOCK ....... to exit clock setting or cancel
timer.
for PLUG & PLAY…(on the system only) to exit
plug & play mode.
PREV / NEXT íë(PRESET 43)
for CD ................. to skip to the beginning of the
current, previous, or next track.
for TUNER ........ to select a preset radio station.
for TAPE .............. to select tape side (back or
front).
for CLOCK ....... to set the minute.
SEARCH / TUNE àá
for CD ................. to search backward/forward.
for TUNER ......... to tune to a lower or higher radio
frequency.
for TAPE .............. to rewind or fast forward.
for CLOCK ....... to set the hour.
# CD OPEN•CLOSE (CD 1/CD 2/CD 3) 0
– to open or close the individual disc tray : CD 1,
CD 2 or CD 3
$ Disc trays
% Display screen
– to view the current status of the system.
^ MUTE
– to interrupt or resume sound reproduction.
& CD DIRECT 1/2/3
– to select a disc tray for playback.
* IS (INCREDIBLE SURROUND)
– to activate or deactivate the surround sound
effect.
( DIM
– to select various dim mode : DIM 1, DIM 2,
DIM 3 or DIM OFF.
) AUTO REV. (AUTO REVERSE)
– to select the desired tape playback modes.
¡ TIMER
– to display timer or set the timer.
™ REPEAT
– to playback track(s)/disc(s)/programme
repeatedly.
£ SHUFFLE
– to playback all available discs and their tracks/
programme in random order.
≤ TIMER ON/OFF
– to activate or deactivate the timer function.
∞ NEWS
– to hear News automatically.
§ SLEEP
– to activate, deactivate or set the sleep timer
function.
≥ RDS
– to select RDS information.
• CLOCK
– to display clock or set the clock.
ª B
– to switch the system to Eco Power Standby
mode.
Notes for remote control:
– First, select the source you wish to
control by pressing one of the source select
keys on the remote control (CD 123 or
TUNER, for example).
– Then select the desired function (
É
,
í
,
ë
, for example).

 Loading...