15
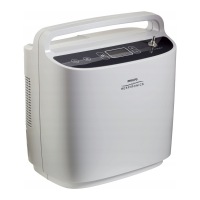
SimplyGo Mini User Manual
Note: Replacement and spare batteries are available separately� For
information, contact your equipment provider�
Note: An optional SimplyGo Mini Smart Battery Charger (sold separately)
is available for your system� For more information, contact your
equipment provider�
Device Warm-Up
When you turn on your SimplyGo Mini device, it will sense if you are breathing
from it� If you are not yet breathing through the cannula, SimplyGo Mini will
begin to pulse automatically about once every ve seconds� As soon as you
begin breathing through the cannula, the device will begin delivering pulses
based on your breathing� It may take up to 20 minutes for the SimplyGo Mini
output to stabilize within its O
2
purity specications� However, you may begin
breathing from the SimplyGo Mini at any time� During the initial stabilization
period, the Warm-Up symbol is displayed under the setting number�
Setting up the Cannula and Tubing
The alarm system should be veried before use by the equipment provider
and between users by service personnel in accordance with the SimplyGo
Mini service manual�
However, the user may verify the functionality of the alarm system as follows:
1� Induce a No Flow Alarm condition by turning the device ON and
completely blocking the patient cannula connector of the device�
2� Wait approximately 90 seconds or until the No Flow Alarm occurs�
3� Verify that the No Flow Alarm indicators and screen symbols are
present�
4� Unblock the patient cannula connector for a minimum of 60 seconds�
5� Verify that the No Flow Alarm ceases�
 Loading...