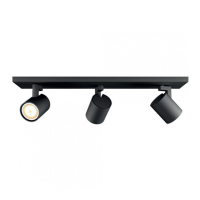
Installation & User’s Manual PL1 LED Luminaires
14 OPERATION AND PROGRAMMING
Menu Structure (continued)
3. Security
Unwanted changes to the Fixture's Configuration or Setting can be controlled by setting a security level, or Locking
the Fixture. Three levels of security are available in addition to completely Locking the Fixture.
PL1 luminaires are shipped with default passwords. Users may set their own password (four-digit number). When
setting a password, write it down and keep it in a secure location. Note, Philips Selecon does not have records of
passwords established by users or owners.
Note: Contact Philips Selecon technical support if a unit is locked and the password is lost for instructions on how to
reset luminaire.
Note: If the Fixture is locked when it is powered down the fixture will remain in the locked state when powered up.
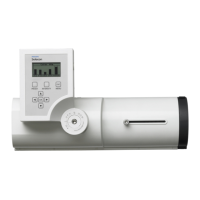
Passwords
Establishing or Changing Passwords
Step 1. At a Status Screen, press [MENU] and scroll to "Settings", press [OK].
Step 2. Go to the Security section.
Continued from previous page
Settings
Sub Menu Options Comments
SETTINGS - (Option)
Scrolls and sets the various fixture
settings using arrow buttons.
See "Settings" on page 16 for details.
Lock Fixture
Sub Menu Options Comments
LOCK - Are you sure? Yes (to Lock Fixture) / No
Use arrow buttons to make selection.
Press [OK] to accept. Note, a
password must be established (set) in
order to lock a fixture. Locking the
fixture will disable access to changing
menu settings.
LED Status
Sub Menu Options Comments
LED Status Information
Scrolls through the various levels
using arrow buttons as indicated on
menu screen. Depending on the
arrow button pressed, the screens
may appear in a different order that
shown in "Options".
LED 1
Displays LED’s current status (in
percentage%) of Intensity, Red,
Green, Blue, and White elements of
the LED). Also displays current color
temperature (i.e., WARM WHITE),
Fan Speed, operational LED junction
temperature, power settings.
Levels
Displays DMX levels for each LED
element (Red, Green, Blue, and
White) and total power.
Enter Password
Sub Menu Options Comments
Enter Pass PIN Enter four-digit password
For details, refer to "Security" on
page 14.
 Loading...