Mounting 7
PL1 LED Luminaires
Installation & User’s Manual
Note: For more information on DMX512 networking and systems, refer to "Additional Resources for DMX512" on
page 1. For PL1 LED Luminaire DMX Mapping, refer to "DMX CONTROL" on page 18.
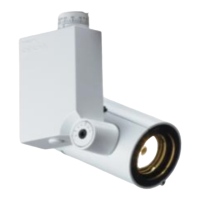
4. Mounting
There are several ways to mount PL1 LED Luminaires (depending on mounting option purchased). Below are the
various mounting options from Philips Selecon. Refer to "Product Descriptions" on page 3 for additional information.
Note: For track mounted luminaires, refer to the track manufacturer’s requirements and instructions for installation
procedures. For ceiling mounted models, you must follow local and national codes for fixture installation.
DMX512
DMX512 (out from first
to second luminaire)
DMX512 (out to the next luminaire or
DMX512 controlled device)
PL1 LED Luminaires
DMX512 Connections
Note: Remaining pins on each connector are not used.
DMX512 Signal XLR Pin RJ45 Pin
Common (Drain) 1 7
DMX512 - 2 2
DMX512 + 3 1
(from console or
PL1 LED Luminaire DMX Cables (DMX to RJ45)
See DMX512
DMX512 Cable Options
To Luminaire (RJ45) DMX512 (XLR) Female
To Luminaire (RJ45) DMX512 (XLR) Male
Sold Separately
Note: For cables required to operate and control
PL1 LED Luminaires via DMX512, see "PL1
LED Luminaire DMX512 Cables" on page 4.
Cable Options Below
control device)
 Loading...