Do you have a question about the Phoenix Contact CF CRIMPHANDY 0,5 and is the answer not in the manual?
Details compatible conductors and ferrules, including types and specifications, for optimal tool performance.
Instructions for correct and safe operation, charging, and disposal of the lithium-ion battery and charger.
Lists all components included in the product package, providing an overview of the delivered items.
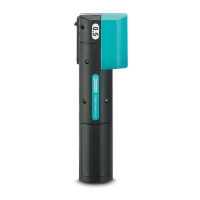
Identifies and describes the functions of each button, indicator, and feature on the crimping tool's interface.
Step-by-step guide on how to unlock the battery compartment and charge the tool's battery.
Instructions for powering the crimping tool on and off, including understanding indicator light signals.
Procedure for inserting the taped ferrule into the tool, including lid operation and waste container handling.
Detailed steps for cutting conductors to size and performing the crimping operation using the tool.
Procedure for loading new taped ferrules into the tool after the magazine is empty.
Procedure for safely removing the battery from the crimping tool, including when the battery is empty.
A table detailing common errors, their causes, and suggested solutions for the crimping tool.
Explanation of the different LED indicator light combinations and their meanings for troubleshooting.
Diagrammatic overview of common troubleshooting procedures and their corresponding page references.
Step-by-step instructions for safely removing a conductor that is stuck in the crimping tool.
Procedure for removing a ferrule that is stuck in the crimping die using the service tool.
Steps to clear a mechanical blockage in the ferrule transport mechanism of the crimping tool.
Instructions for opening the service cover and removing any loose parts that may be causing issues.
Procedure for resetting the crimping tool to its initial state to resolve certain operational issues.
Instructions for checking and replacing waste guide plates (GP1 and GP2) on the crimping tool.
Guidelines for returning a faulty product, including required documentation and sample materials.
List of part numbers and descriptions for the portable crimping tool, replacement parts, and accessories.
Detailed specifications of the crimping tool, including operating voltage, dimensions, weight, and conductor compatibility.
| Brand | Phoenix Contact |
|---|---|
| Model | CF CRIMPHANDY 0, 5 |
| Category | Crimp tool |
| Language | English |